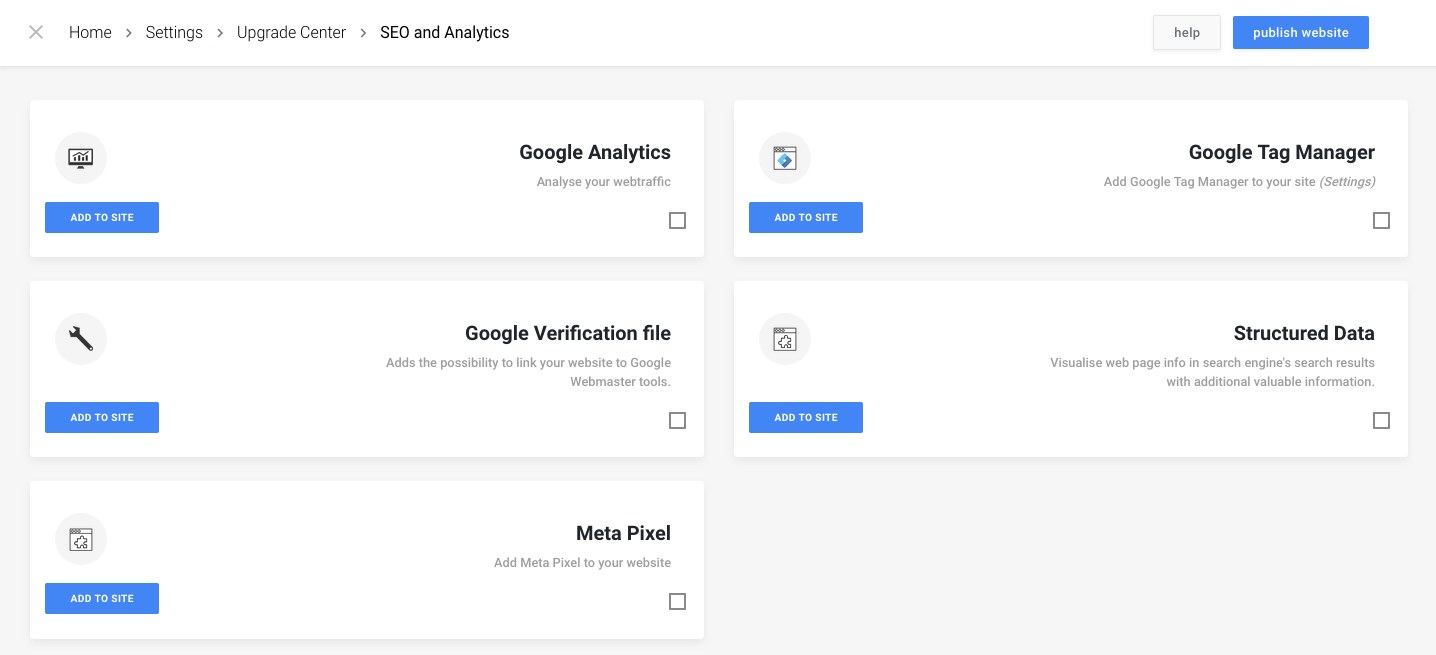
First we need to install the Meta Pixel module. By default, this will not be installed, so you will have to install it from the upgrade center.
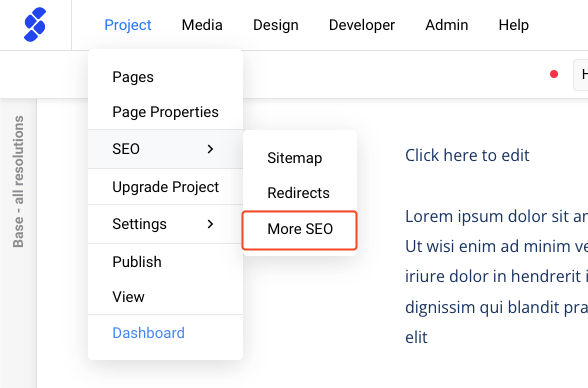
- Log in to the CMS and head to Project in the upper left navigation.
- Navigate to the SEO → More SEO.
- Select Meta Pixel and click Add to site.
- Confirm by clicking install.
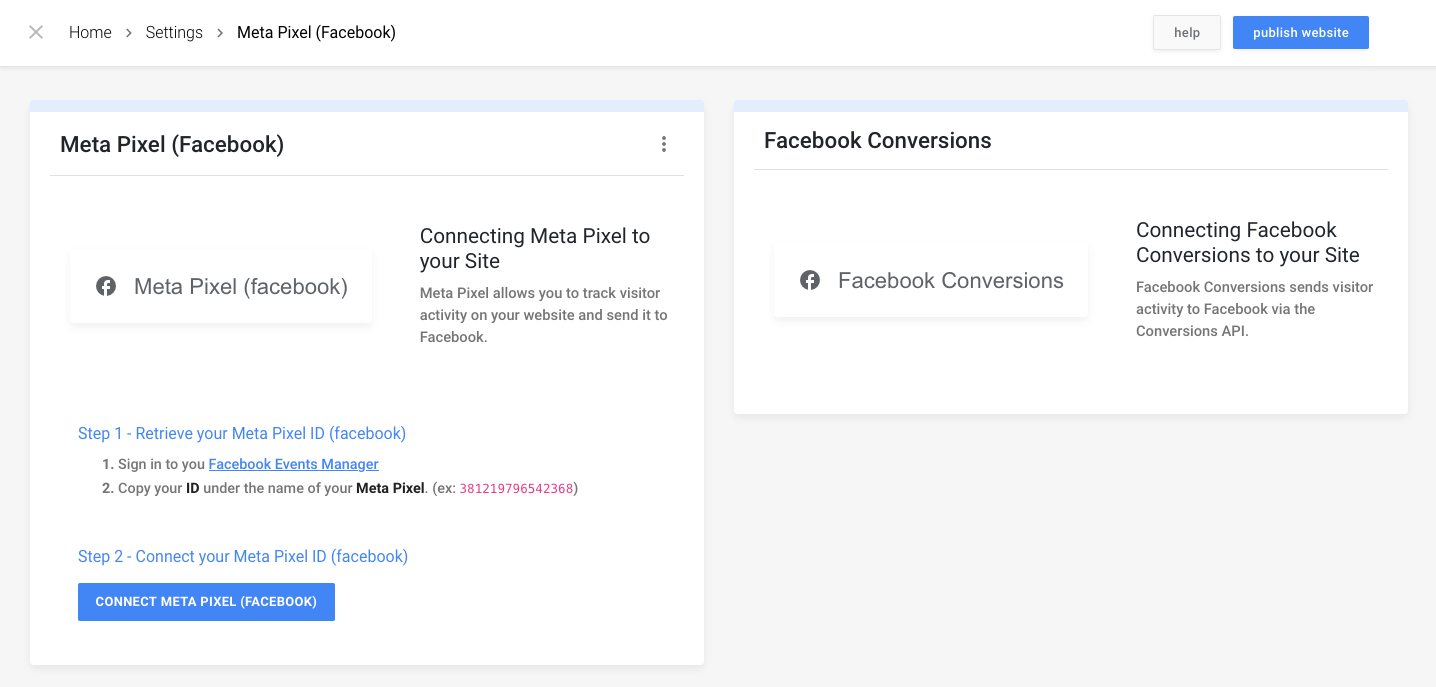
After you've added the module to the project, you can enter the Pixel ID to set up the connection.
- Go to Project in the upper left navigation
- Navigate to the SEO → Meta Pixel.
- Follow the steps to retrieve your Meta Pixel ID.
- Click the button to Connect Meta Pixel.
- Enter the Meta pixel ID in the modal/popup.
- Press Connect.
You're all set! Go back to Facebook to check if the data is coming through.
Remember to publish all pages after adding the Facebook pixel ID to your project.
Conversions API
After setting up your Facebook Pixel in the above-mentioned steps, we can improve our tracking by adding the Conversions API for server side tracking.
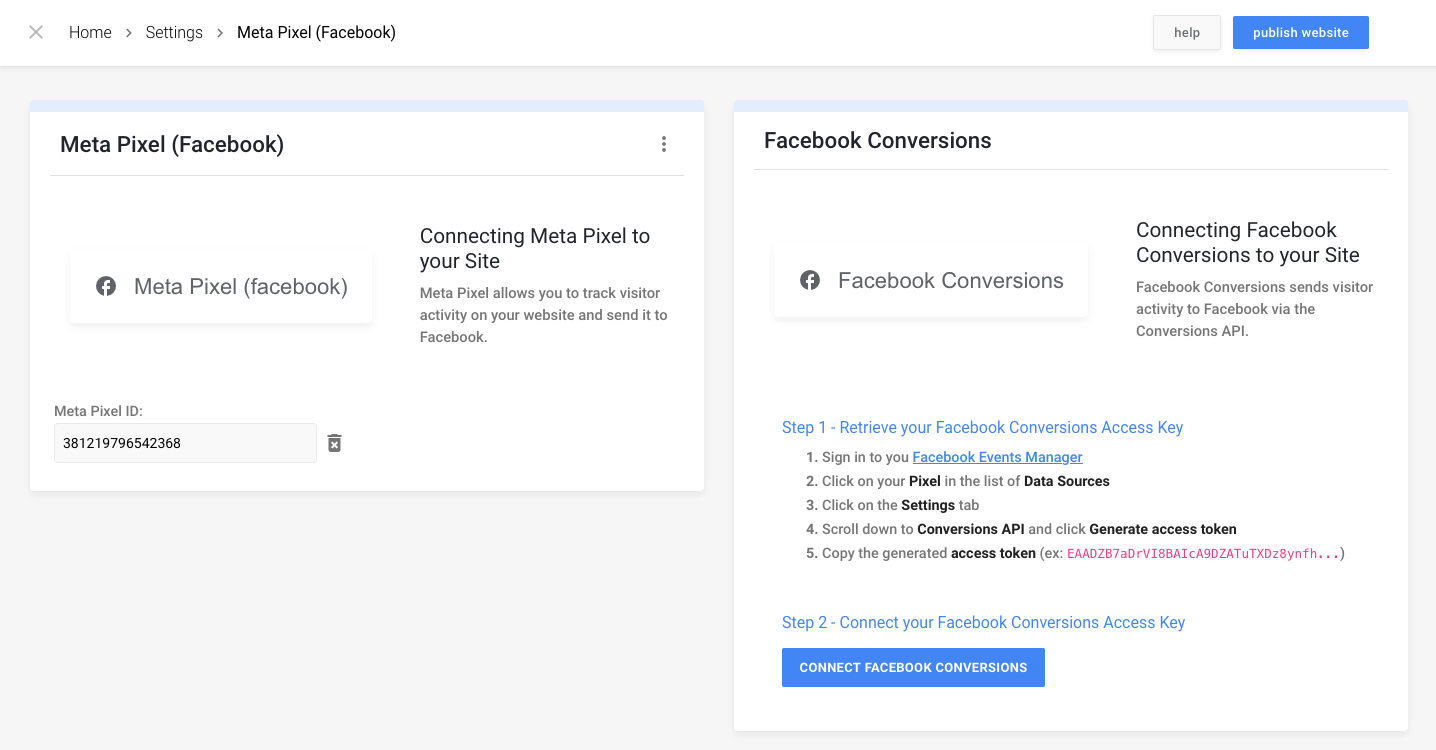
- Follow the steps in Step 1 to retrieve your Facebook Conversions Access Key.
- Click the button to Connect Facebook Conversions.
- Enter the Facebook Conversions Access Key in the modal/popup.
- (Optional) Enter your Test Event Code in the modal/popup, this can also be done later.
- Press connect.
If you already had a Facebook pixel module installed before june 2021, you will have to reinstall it from the upgrade center (Project > SEO > more SEO) to see the Facebook conversion API settings.
Remember to publish all pages after changing your Facebook Pixel and/or Facebook Conversions settings.