In this article
Install the E-commerce Module
- Go to General Project Settings > Modules.
- Install the E-commerce Module.
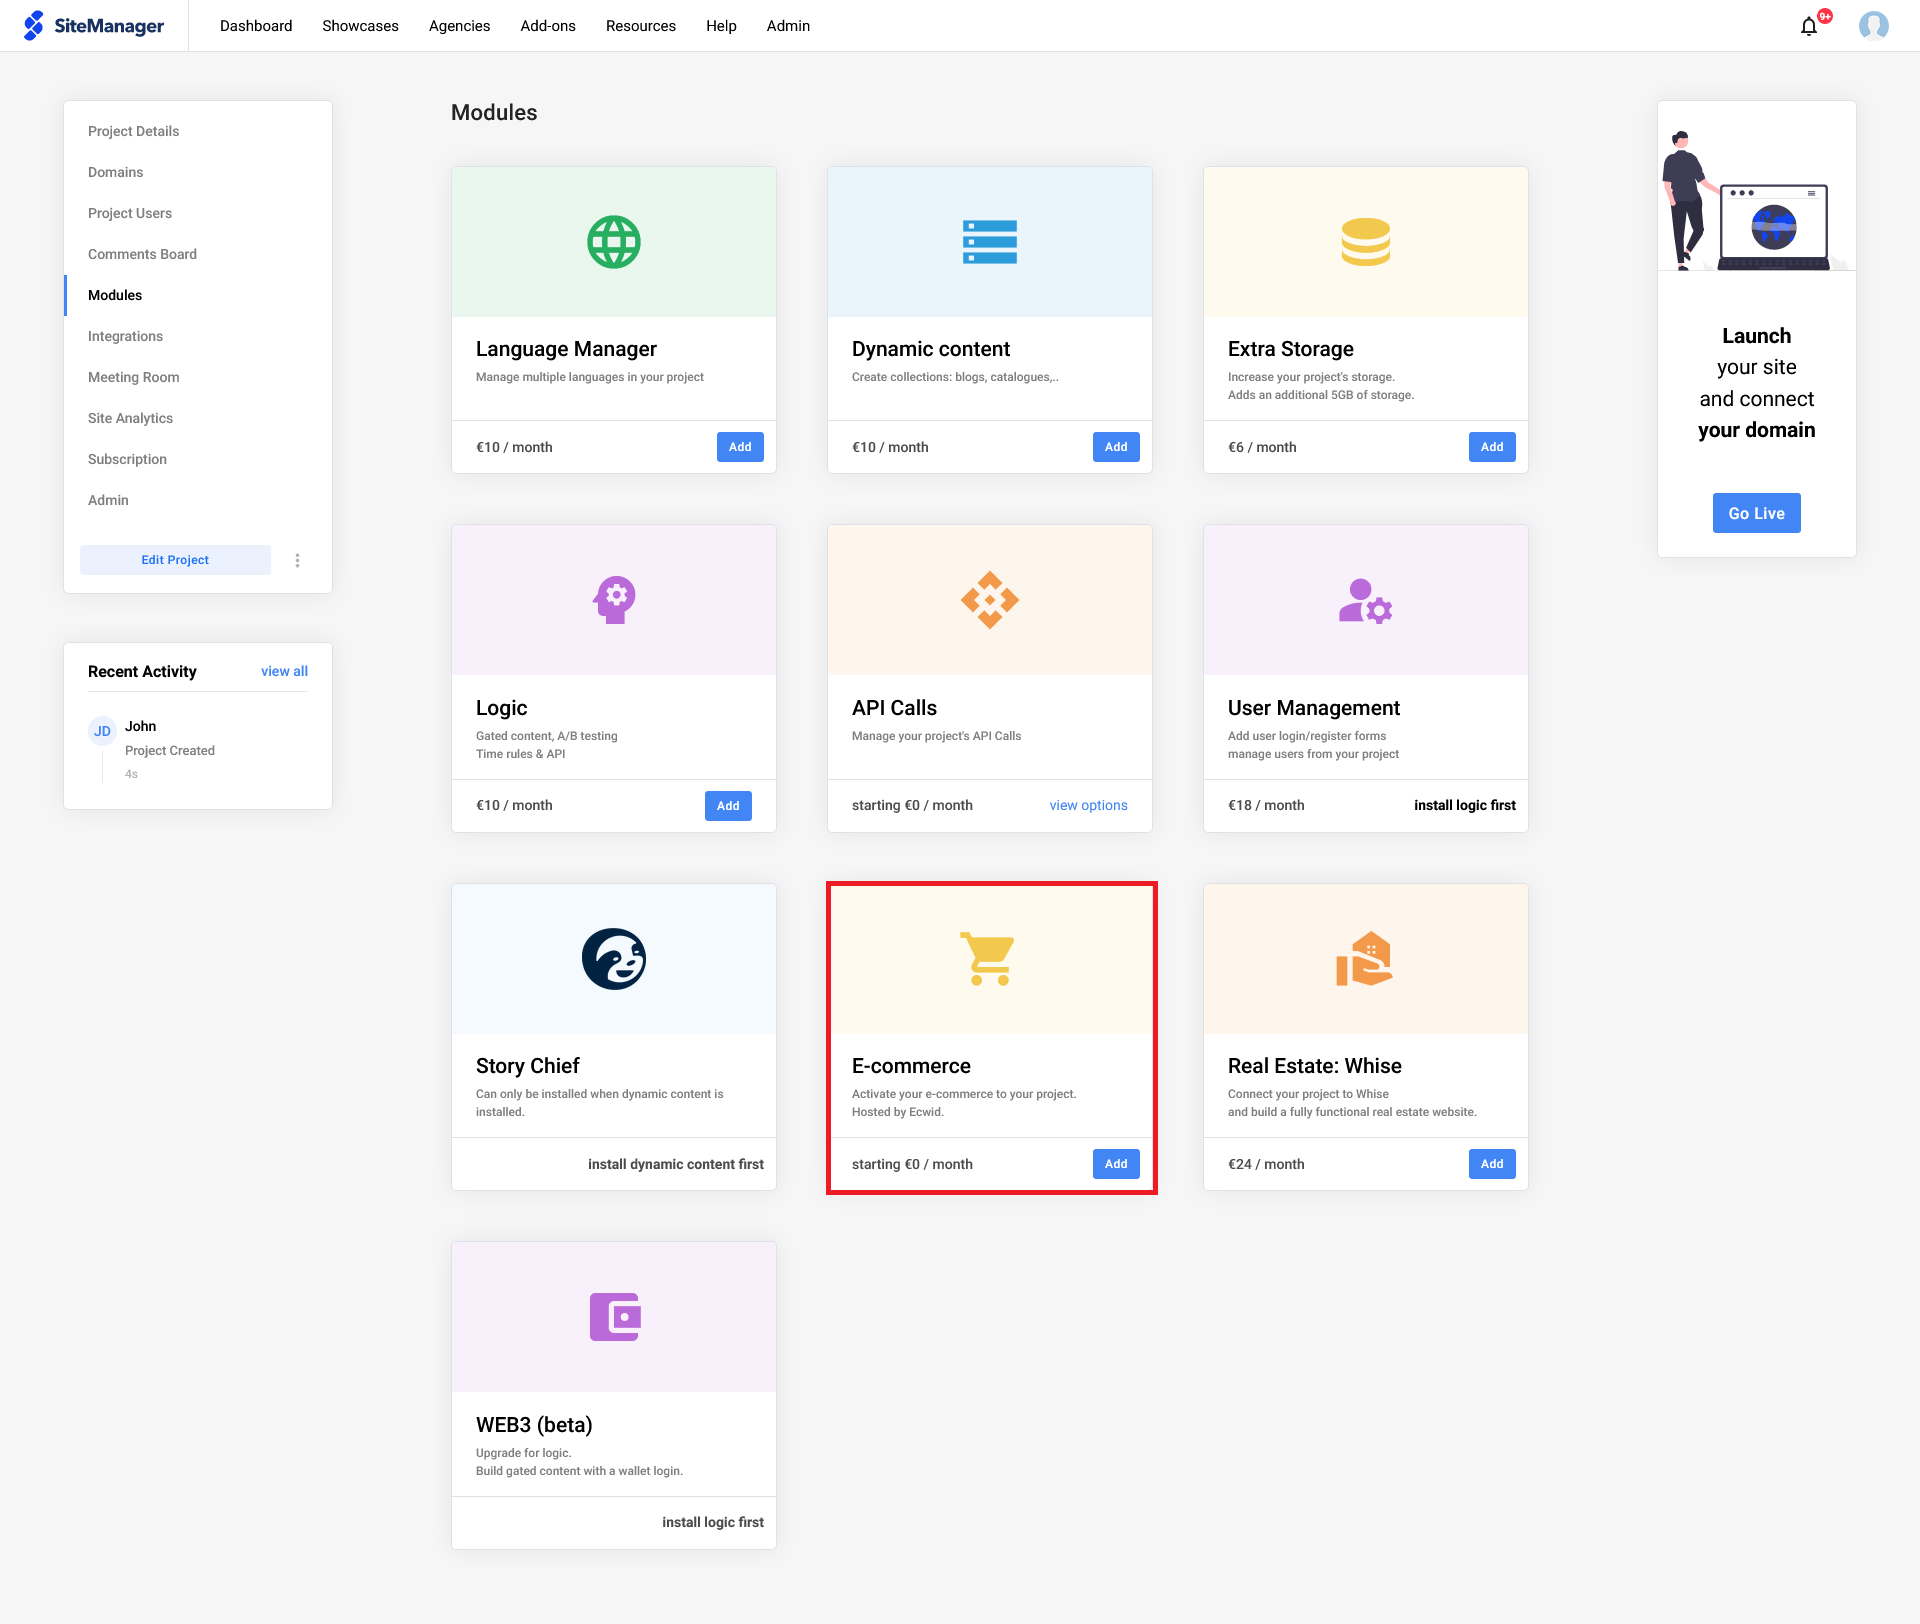
Depending on the needs of your project, choose the subscription you want to add. There are 5 options that you can choose from. If you already have an existing Ecwid store, you can use the store ID to connect it to your project on the right-hand side.
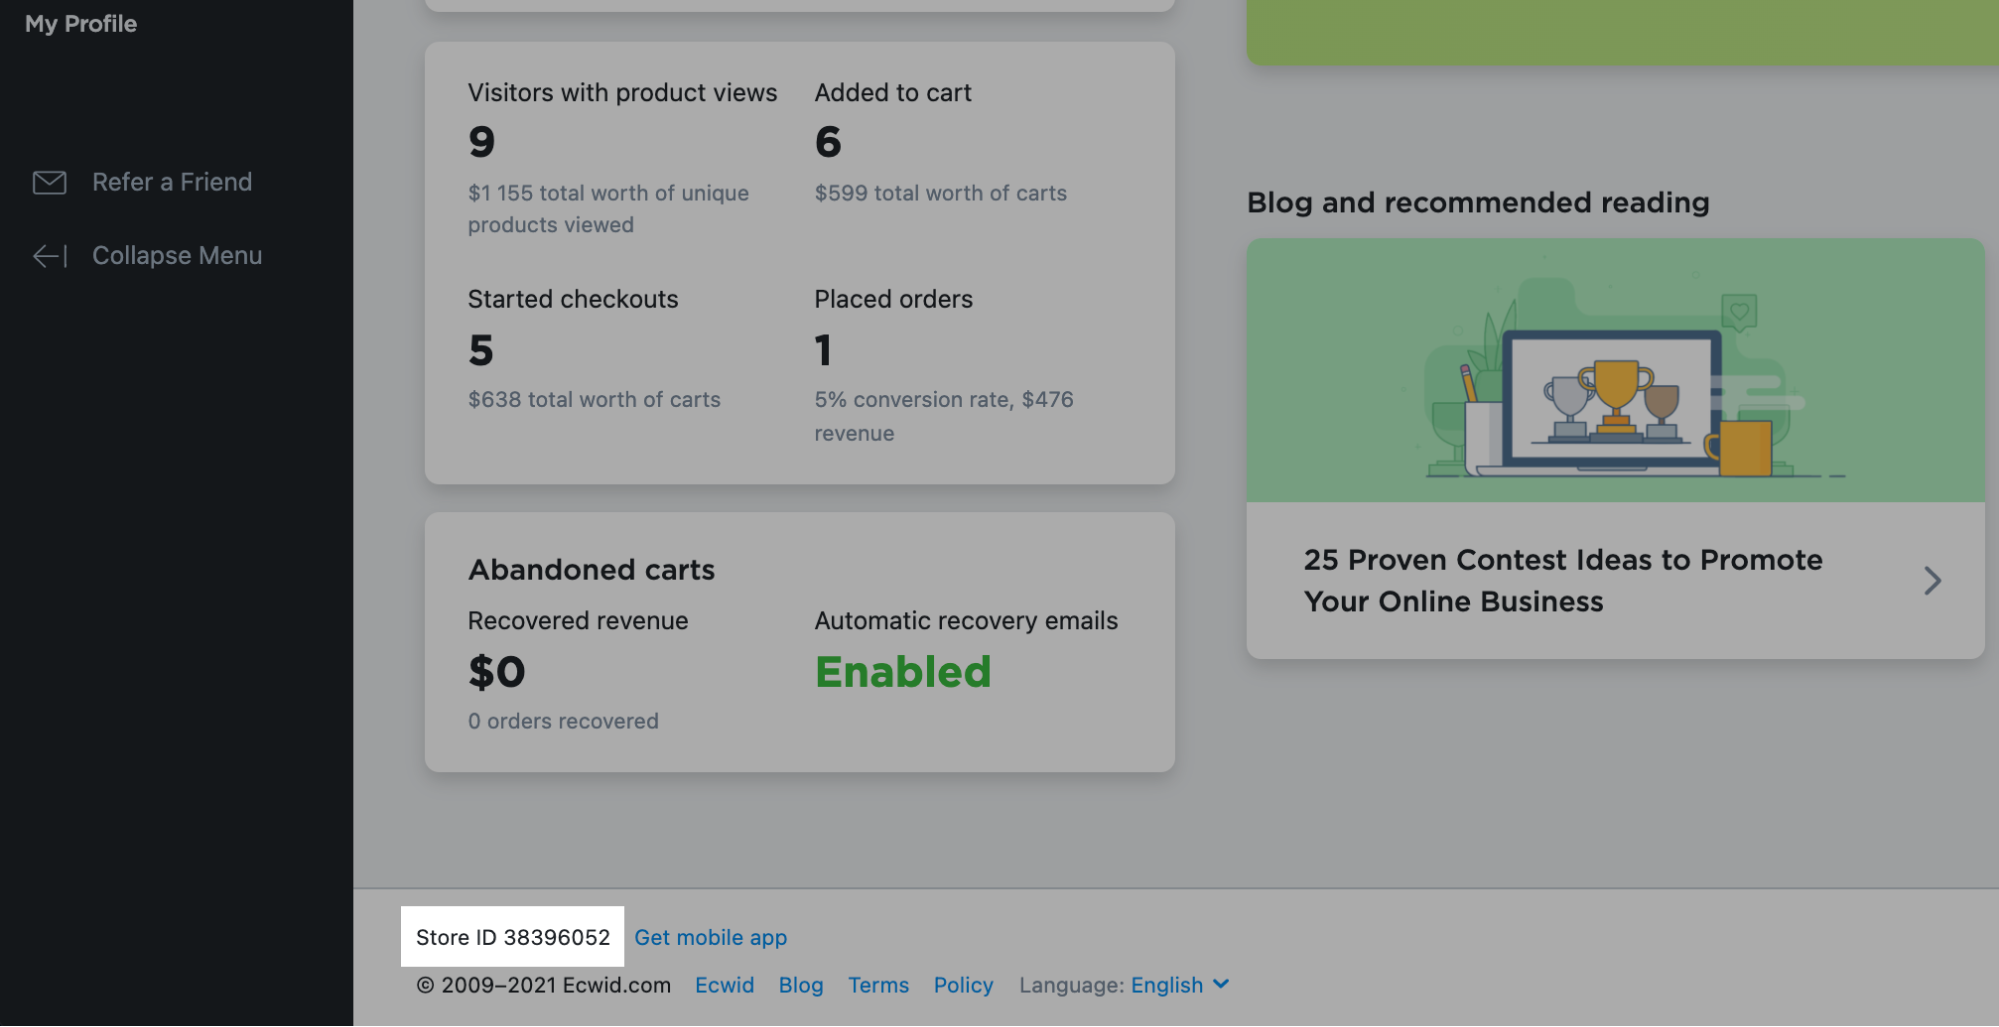
Not sure where to find your ID? There are two places the ID will be shown.
1. At the bottom of the admin panel
2. In the address bar of your browser (f.e. https://my.ecwid.com/store/38396052#dashboard)
Add Ecommerce components
When the E-Commerce module has been installed, a new component named Store Products will be available.
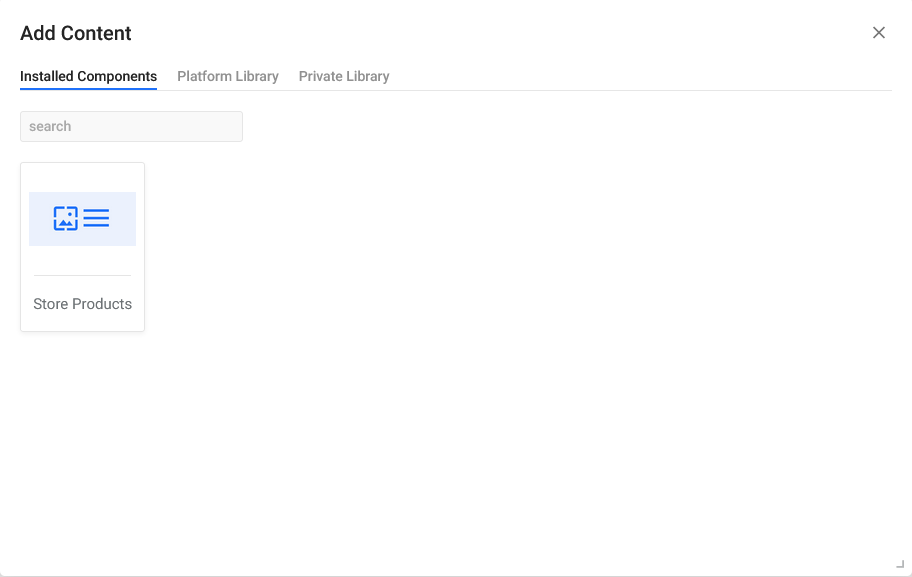
To setup your store, first, add the component to your page. After adding the component, a column has to be added.
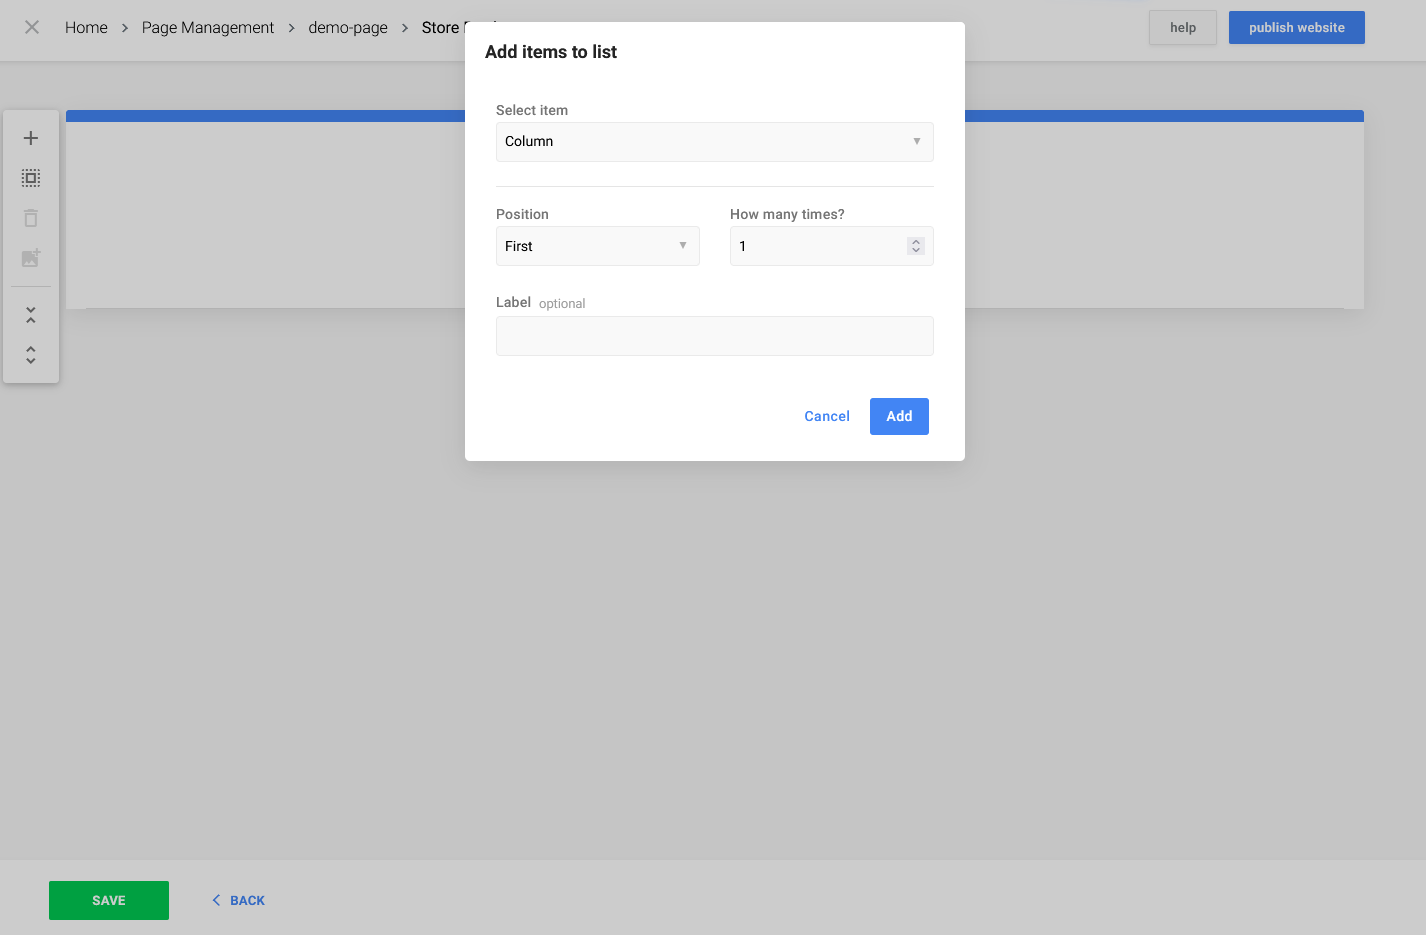
Various store elements can be added, let's take a look at them
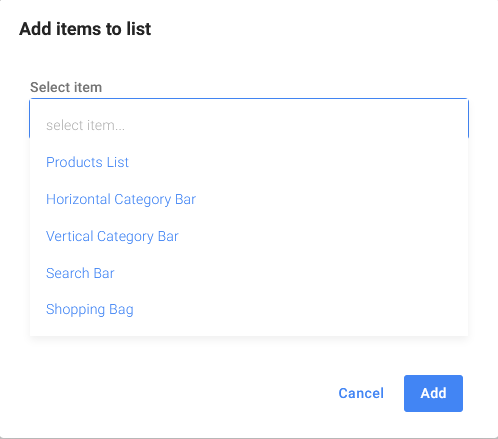
Horizontal Category Bar: will render your Categories in a horizontal bar
Vertical Category Bar: will render your Categories in a vertical bar
Search Bar: will make it possible to search through all products in your shop
Shopping Bag: will add a store icon to check-out
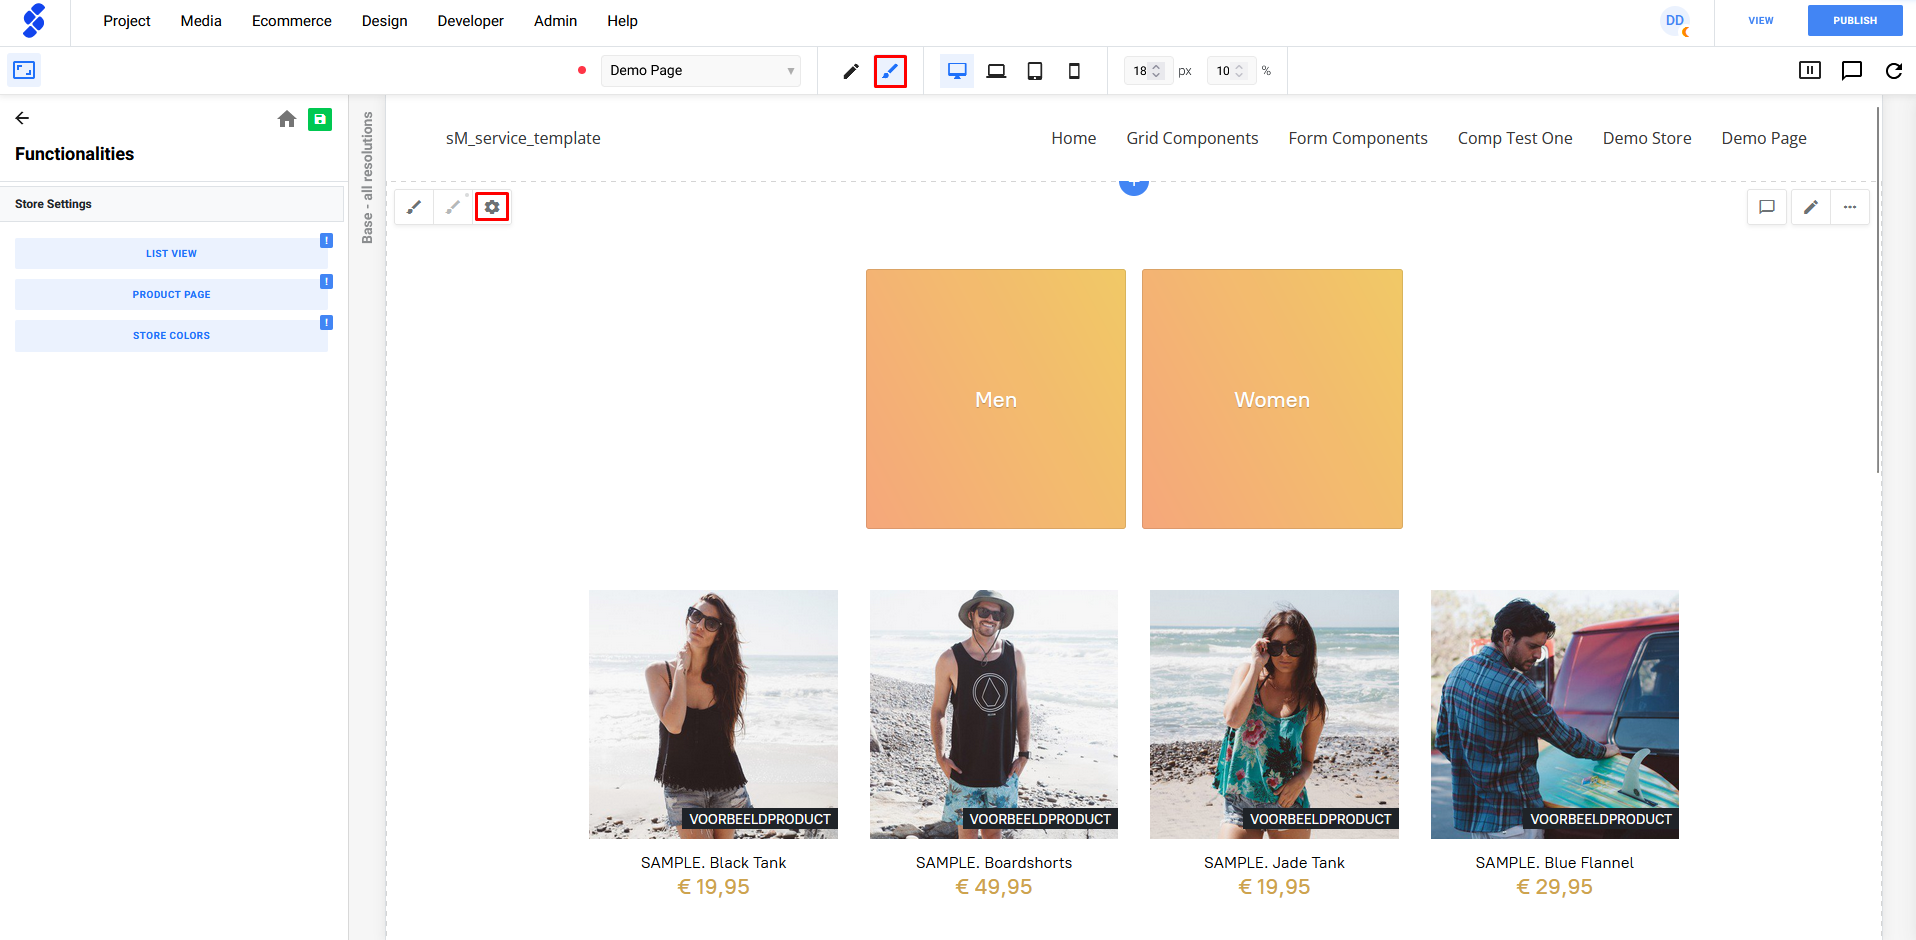
Design your store
Go to the page where your store is located and click on the pencil icon next to your page name in the top of your screen, this will bring you to the design view.
In the design view you're able to change the style of your store.
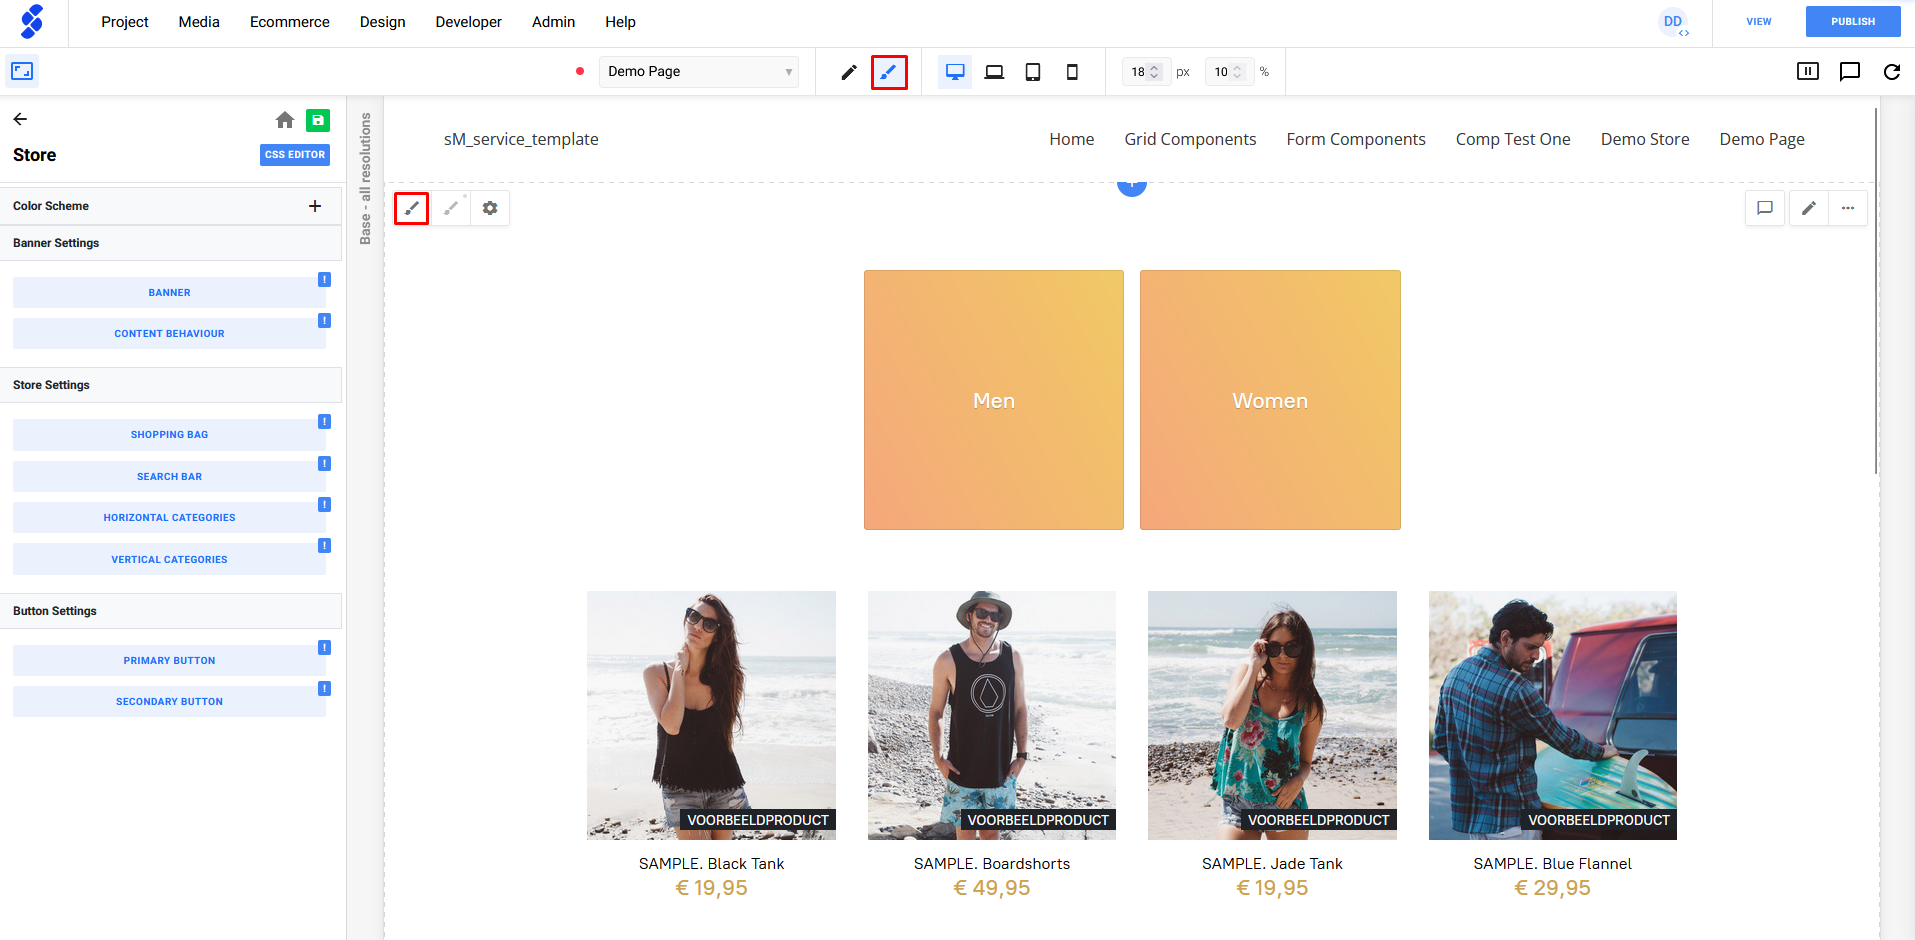
If you want to change the functionality of your store? For example, chaning the store colors? This can be done by opening the Functionality Panels of this component. The Functionality Panels can be found in the Design View
Video (end 2018)
In this video we cover all the steps on how to install the Ecwid integration again however you'll see some steps are somewhat different in our platform today.