-
Adding your domain
-
Advanced
Adding your domain
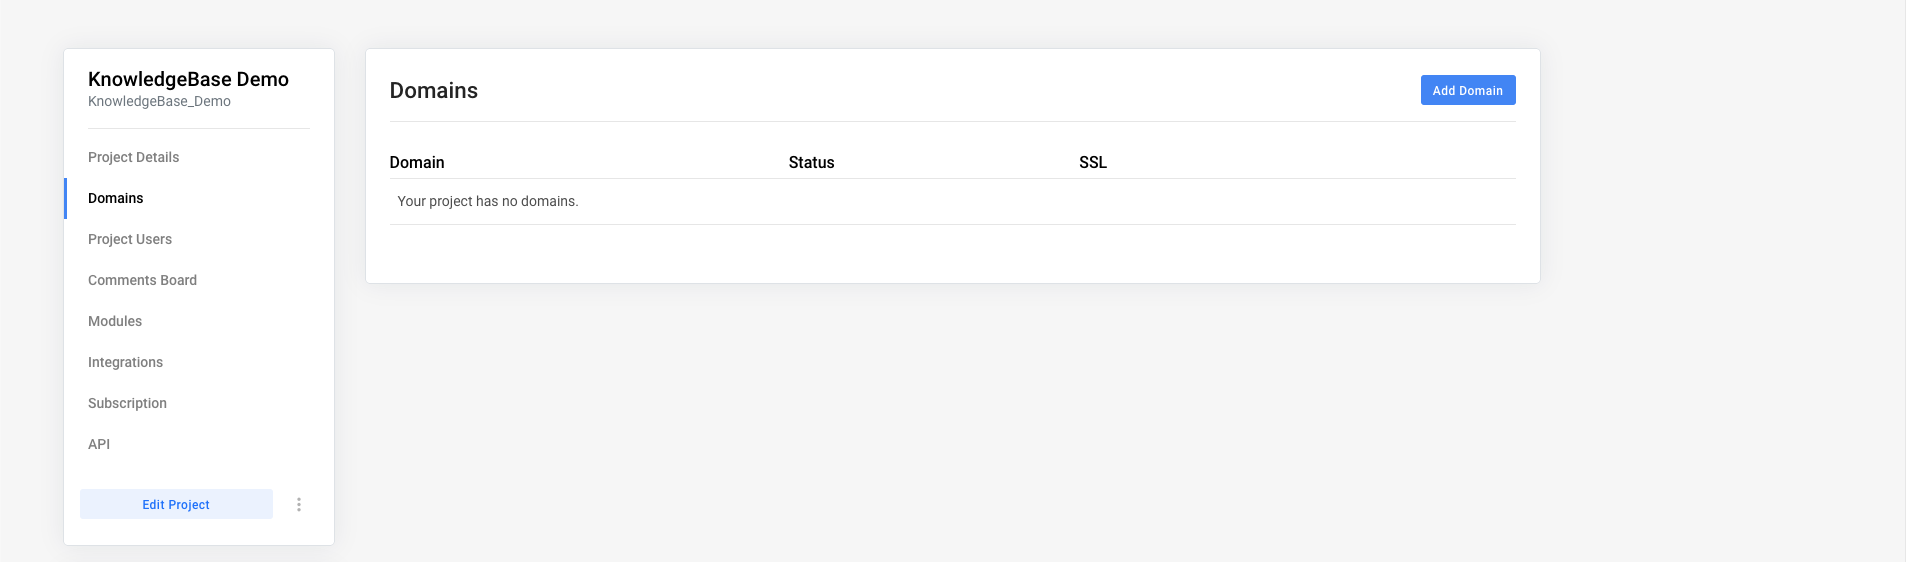
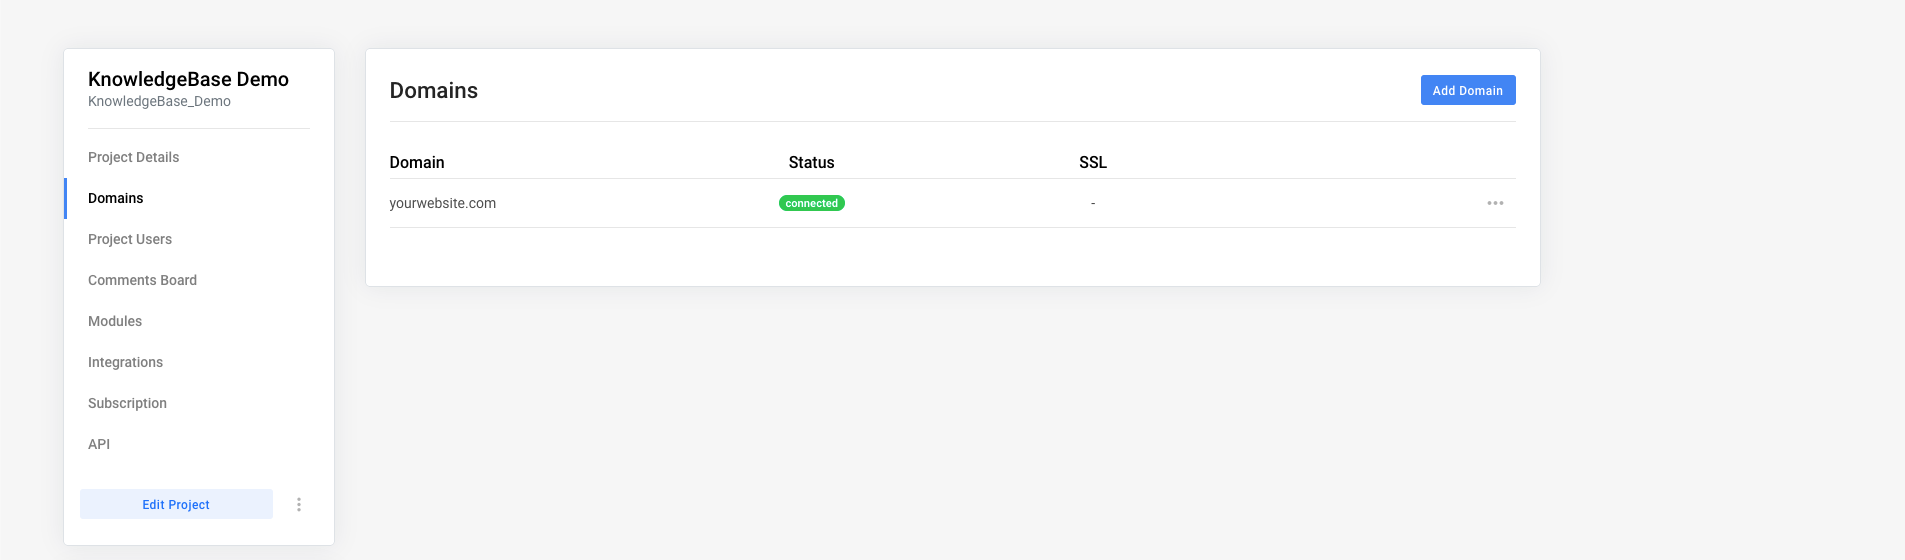
Once your project is live, it's time to add our domain. In our project settings, navigate to Domains.
This overview will show you the domains added to your project.
To add a new one, click: Add Domain
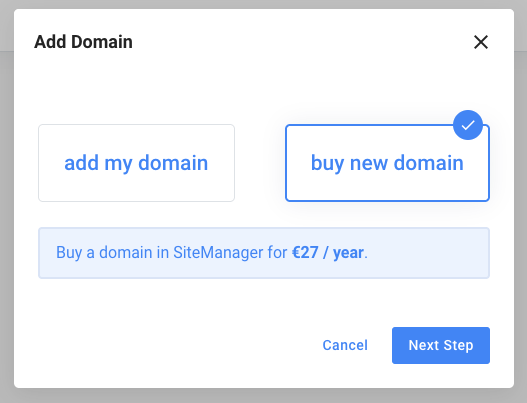
This will give you two options:
-
Add my domain
-
Buy new domain
Add my domain
If you already have an existing domain, you can use this option. To add your domain, you will need to update your DNS. You can learn more about this in the following article.
Buy new domain
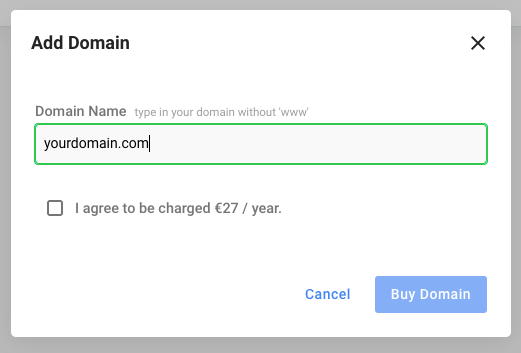
If you don't already have a domain, you can also buy one with SiteManager. Select this option and click Next Step to continue. The next step is where we will type in the domainname with the extension
We do not offer hosted mailbox solutions for our domains. It can take up to 24 hours before your ordered domain is active.
Once your domain has been added, you can request a SSL, you can learn more about SSL in the following article
Advanced
If you use a WAF (Web Application Firewall) you can use the checkbox "Skip checking DNS". Keep in mind that the correct DNS settings mentioned above are still needed and need to be publicly visible.
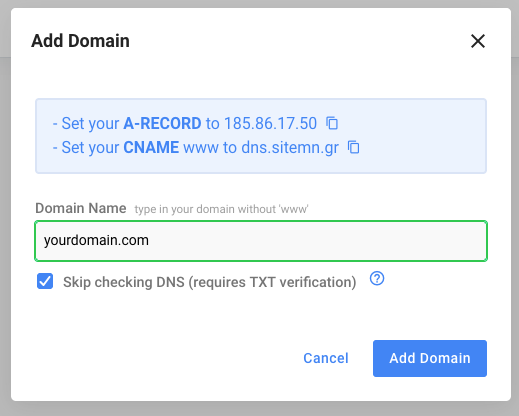
When checking this box, you'll receive a TXT record which you need to add to your domain.
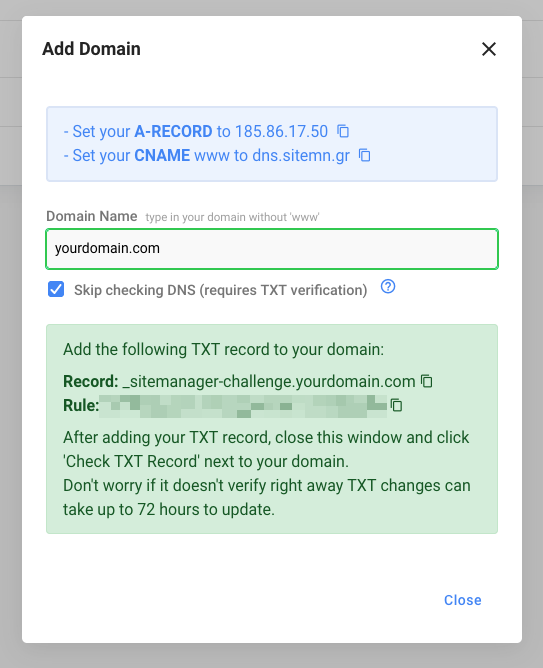
Keep in mind that DNS changes can take up to 72 hours to fully update
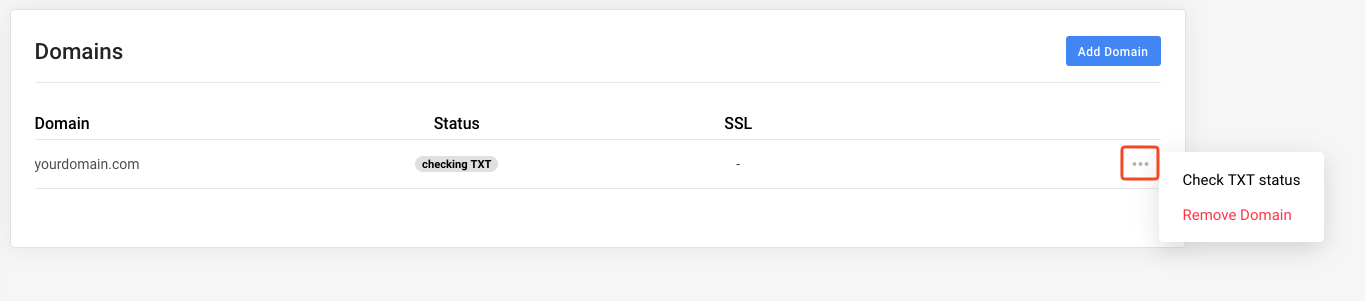
Once you added the TXT record, you can close this window, you will see that the domain has been added with a status: "checking txt".
To manually check the TXT status, click the three dots on the right hand side and click: Check TXT status.