Google Consent Mode version 2 represents a significant advancement in online privacy compliance for websites utilizing Google Advertising Products. This updated framework enables website owners to seamlessly manage user consent preferences while maximizing ad revenue and maintaining regulatory compliance.
By empowering website operators with enhanced control and flexibility, Google Consent Mode version 2 ensures a more transparent and user-centric browsing experience, fostering trust and confidence among both users and advertisers.
Explore the benefits and implementation strategies of Google Consent Mode version 2 to elevate your website's privacy standards and optimize advertising performance.
Setting up Google Consent Mode in Google Tag Manager
This guide assumes that you have at least a basic understanding of Google Tag Manager. If not, you can always reach out to us, and we'll gladly direct you to a reputable SEO partner who can provide the necessary support and guidance.
Enable consent overview
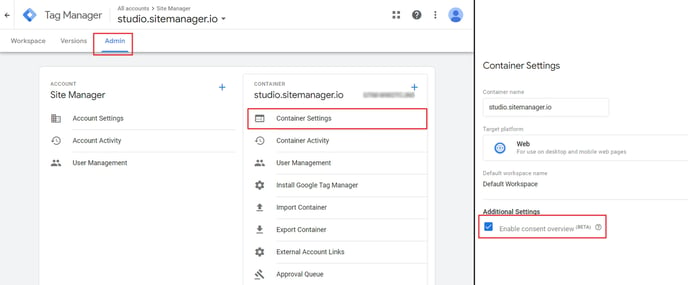
Let's get started by accessing your GTM-container. Simply navigate to the admin tab, where you'll find your container settings. Once there, look for 'Additional Settings' and make sure to check 'Enable consent overview'. This will give you a comprehensive view of your consent settings.
Add the custom trigger
To ensure your tags are fired correctly, let's connect these tags to a custom trigger. Head over to the triggers section of your container and create a new one. Within the options, find 'Other' and opt for the 'Custom Event' type. Now, give your event a name: let's call it 'cookie_consent_update'. It's crucial to use this exact naming since the SiteManager cookie modal relies on this specific event. Lastly, name your trigger (choose anything you like), and save the newly created trigger.
Add the required consents and connect your tags to the custom trigger
Now, it's time to add the required consent(s) to your tags. Head to the tags section of your container and locate the tags that need to be active on your website. Edit each tag and navigate to the 'Advanced Settings' section within the 'Tag Configuration' tab. Here, you'll find the 'Consent Settings' where you can specify additional consent requirements for the tag to fire. Make sure to add all necessary consents to ensure full compliance.
The final step is to connect your existing tags to the custom trigger we created earlier. In the same view as the previous step, navigate to the 'Triggering' tab. From there, simply add the custom 'cookie_consent_update' trigger to these tags.
You can also execute this step directly when adding a new tag.
Setting up the SiteManager cookie module
If you haven't installed the cookie module yet, check out this article for detailed instructions on how to do so.
It is also necessary to install the Google Tag Manager integration. You can find the instructions in this article.
Google Consent Settings
The first settings you encounter, are the general consent settings.
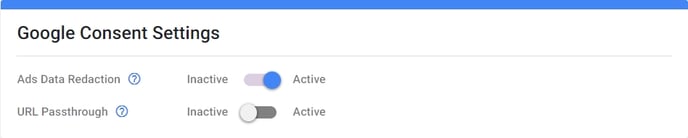
- Ads Data Redaction: When 'Ad Storage' GTM Consent gets denied, third-party cookies previously set on google.com and doubleclick.net will not be used except for spam and fraud purposes. Data sent to Google will still include the full page URL, including any ad click information in the URL parameters.
- URL Passthrough: When a user lands on your website after clicking an ad, information about the ad may be appended to all the links on your page as a query parameter. In order to improve conversion accuracy, this information is usually stored in first-party cookies on your domain.
Cookie privacy groups
Important: By default, Google Tag Manager is added as a Marketing Cookie. This is to prevent cookies being accepted without the necessary cookie setup.
If you want to make sure all Google Tag Manager Consents are sent, remove Google Tag Manager from the Marketing group and add this to the Strictly Necessary group.
Make sure the strictly necessary group is set to default active when changing the group. While this is automatically configured for newly installed cookie modules, you may need to manually adjust it for existing modules.
By default, the built-in cookie groups will have the necessary consent types attached to them. You can change these groups by clicking the consent icon in the top bar.
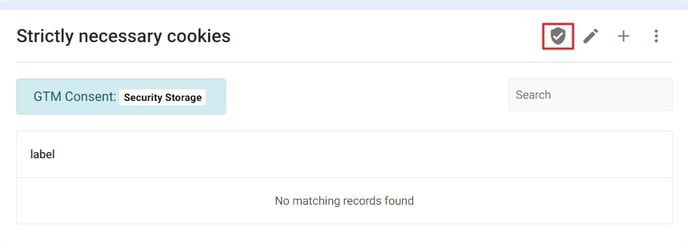
If you've had the cookie module and GTM integration installed previously, you'll need to manually attach consent types. Simply click on the same consent icon in the top bar to do so.
Below, we've outlined our recommended connections between consents and groups for your convenience.
| Cookie Group | GTM Consent |
| Strictly necessary cookies | Security Storage |
| Preference cookies | Functionality Storage Personalization Storage |
| Statistics cookies | Analytics Storage |
| Marketing cookies |
Ad Storage |