In this article
1. Saving your private component
2. Adding your private component
Saving your component to private library
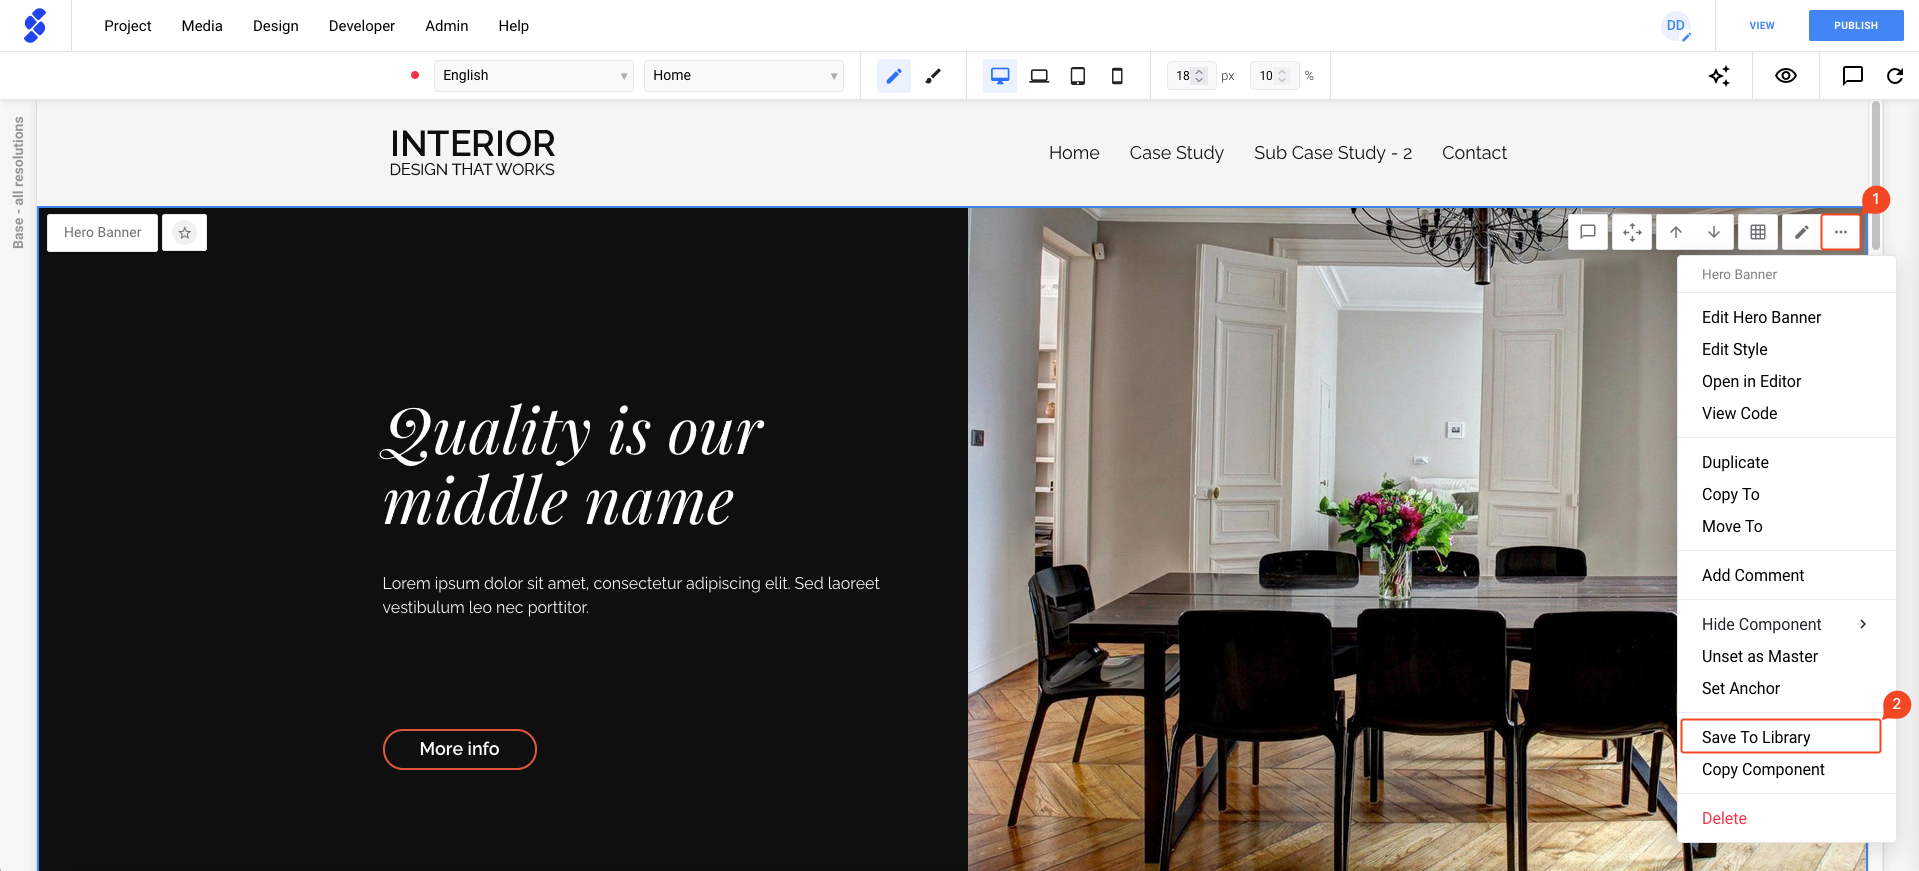
To save a page component, simply open the component options by clicking on the three dots. From there, you can easily save it to your library by selecting "Save to Library".
A popup will appear, giving you the option to choose the library where you want to save this component. You can also customize the component's title and description if desired. The title will be automatically filled in for you.
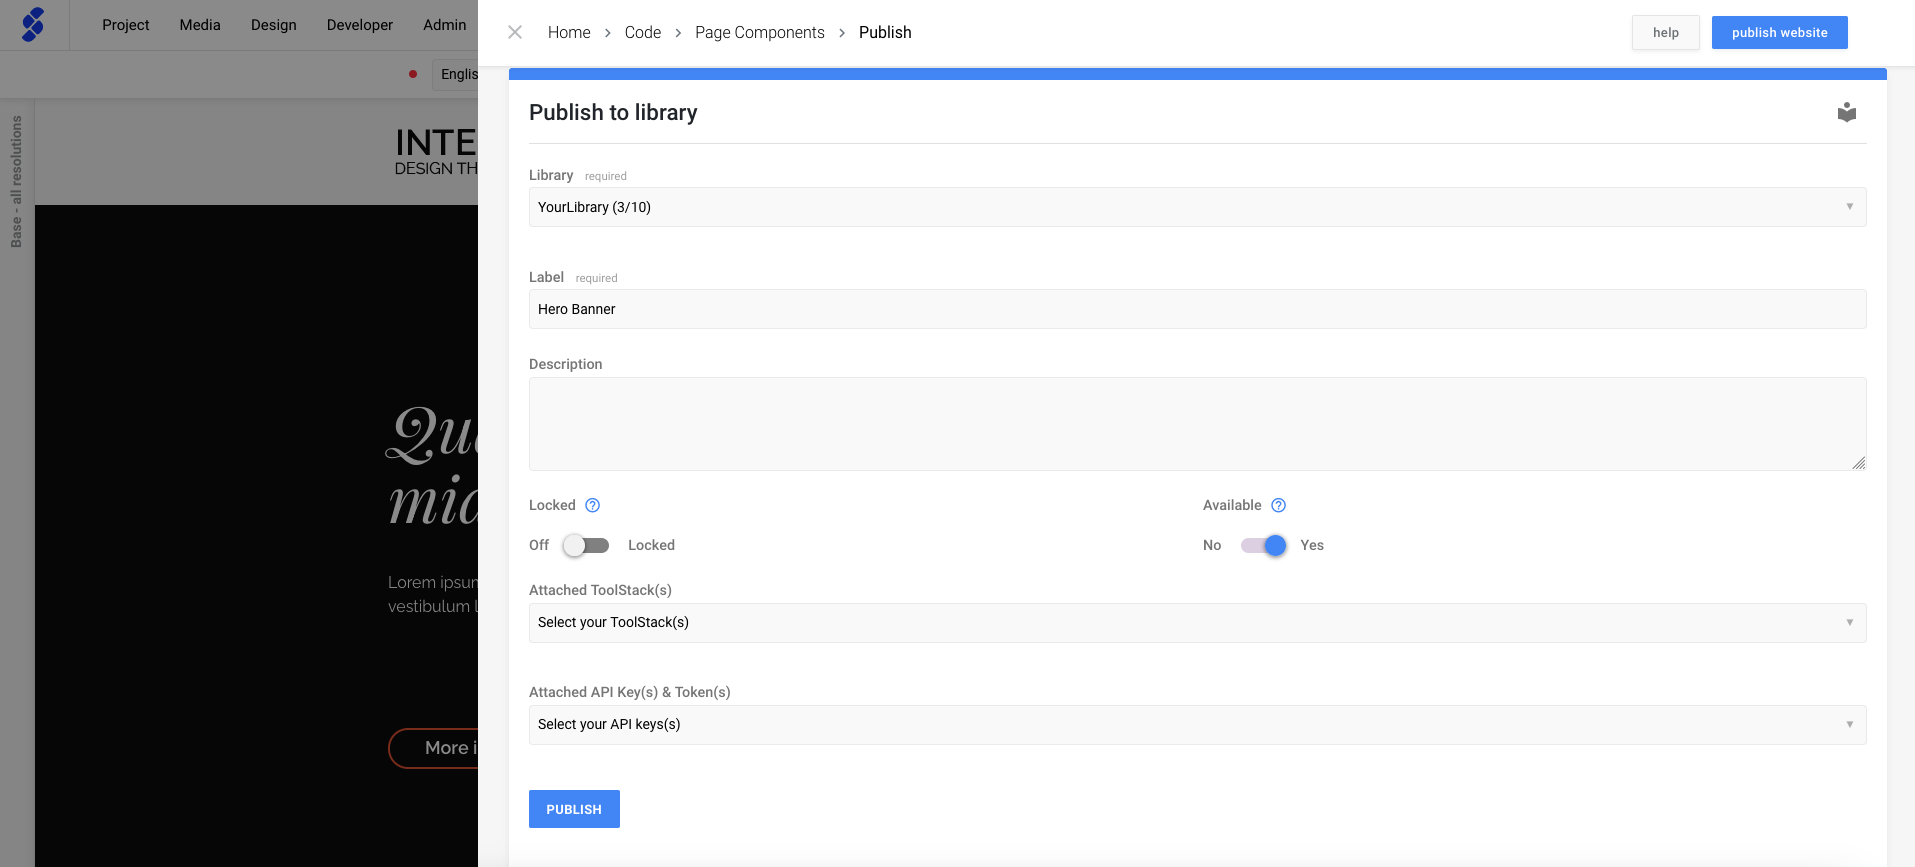
There are two additional toggles, Locked & Available. These will come in handy when you're working with other team members;
- Locked: Prevent your team members to overwrite this component with changes.
- Available: Make your component available for other team members.
The other two options, Attached Toolstack(s) & Attached API key(s) & Token(s) in case you build more complex components that are linked to a tool stack, or when you're working with an API key or token.
When you've finished adjusting these settings, it's time to click the Publish button. This will start saving the component to your private library.

Adding your component
Adding a component from your private library, can be done the same way as other components.
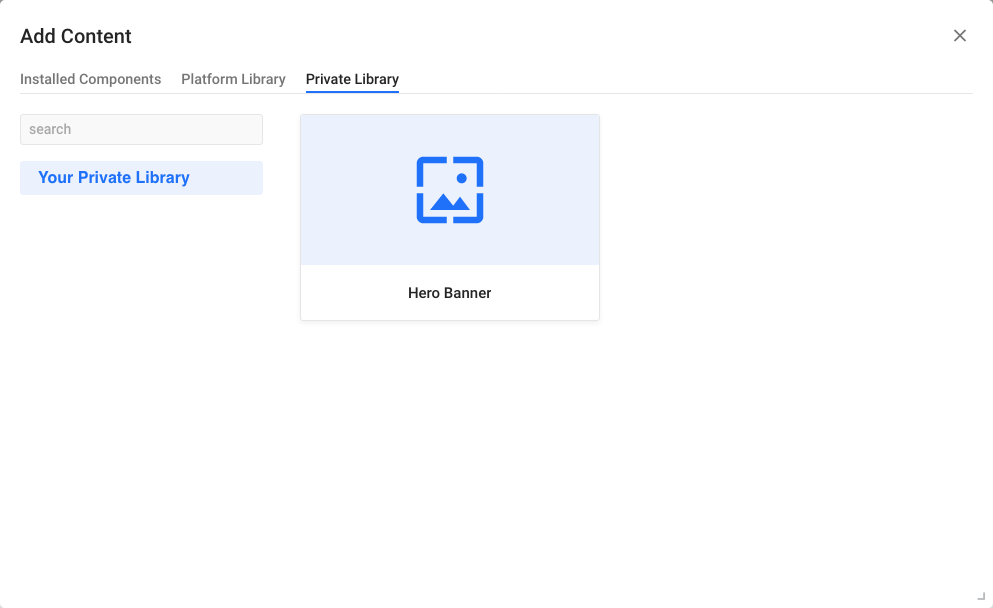
When adding a new component, we can click Choose from Library.
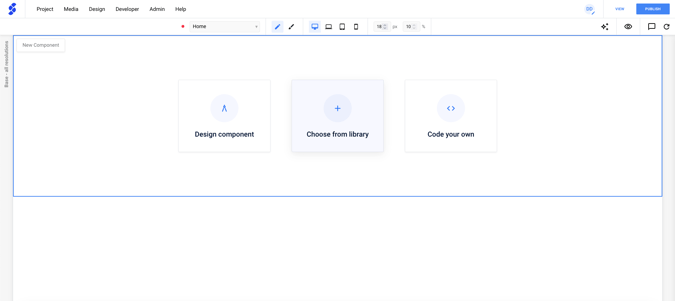
This will open a popup with all our available components. We can then navigate to Private Library. This will give you an overview of all the components that you've saved to your private library!
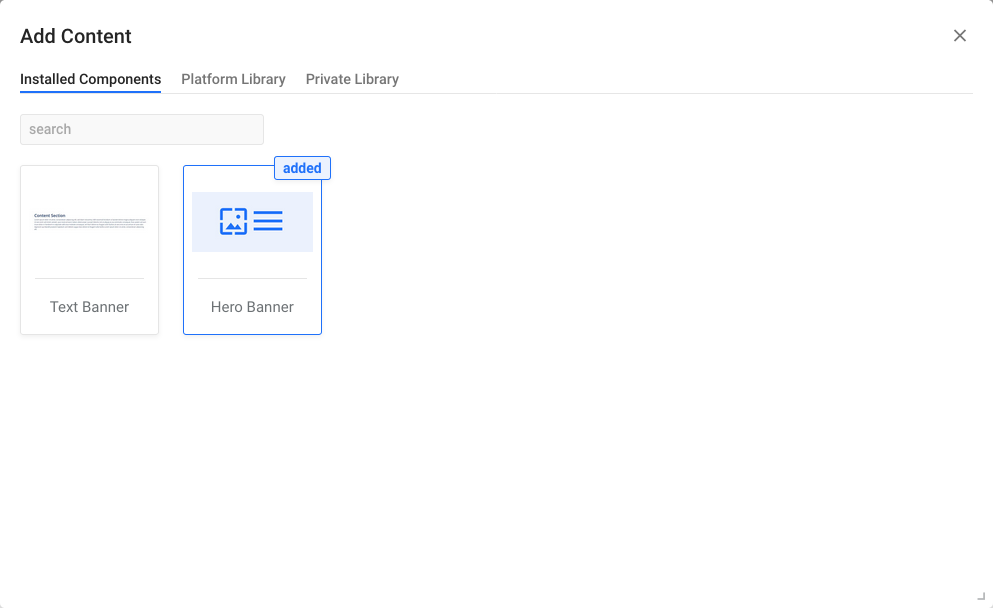
After clicking on the component, you can easily add it to your project. Once added, it will appear in the overview of Installed Components and will be ready for use in your project.