To access the Settings of a (page) component, simply head to the Code Editor and click on the gear icon located on the right-hand side.

This will show various options:
- Change Name
- Settings & Info
- Included Libraries
- Design Panels
- System Variables
- Save To Library
- Delete
Change Name

A dialog box will appear, allowing you to modify the name of your page component. Once you have made your adjustments, click on the Save Changes button to confirm your updates.
Settings & Info
To access the Settings and Information panel for the component, simply click this option.
Component Setting
Here, you will find additional settings regarding the component:
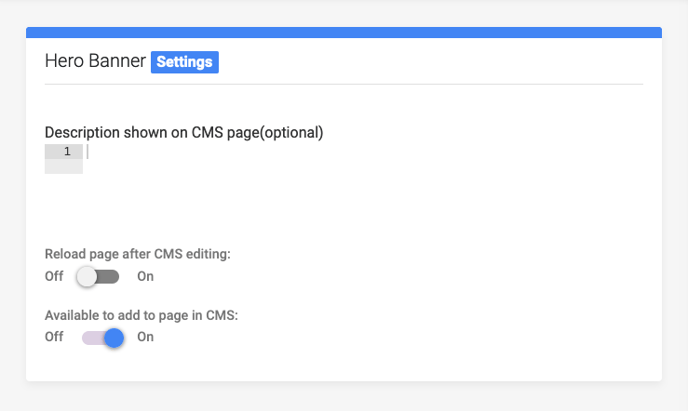
- Description: This text or HTML will be shown on top of the CMS page of the component. This can be used to give additional information to the CMS user about the component.
- Reload page after CMS editing: When you have a component that uses JavaScript libraries it might be necessary to reload the website preview page after editing.
- Available to add to page in CMS: Switch Off if you don't want to show this component in the CMS component list. This can be handy for components that are only used once. Doing so makes the component list more organized.
Click Save at the bottom to apply your changes.
Underneath the Settings section, you'll find the Information section. This panel also provides valuable insight into where the component is currently being used.
Component Information
Some static information about your component.
- The first section shows in which pages the component is being used and how many unique style instances have been used for this component.
- The second section will show the Information color legend
Included Libraries
You can attach JavaScript and CSS libraries to your page component. These will only be loaded on the pages where the component is used. Even if you have multiple instances of the same component on your page the library will only be loaded once.

In the First Section you can find some well-known libraries
You can also add your script in the "Lib Files" Area.
PageSpeed Settings
All your custom lib files will be compressed and combined into single files with the pagespeed engine.
To exclude files from this action simply add the following to the in the library link:
data-smps-nocombine
<script data-smps-nocombine src='swfiles/body/libfile.js' />
All lib files that are not combined are added to the head section of the page. If you want to move them to the bottom of the page you simply add the tag:
data-smps-movebottom
<script data-smps-nocombine data-smps-movebottom src='swfiles/body/libfile.js' />
PageSpeed Functions
Sometimes you want CMS users to add plugins and embeddable code to the site. This might not work with the pagespeed settings. You can use two functions in the code editor to force the script and link data inside these functions to be automatically converted to the correct pagespeed settings.
1. add the no combine tag
[:smps_force_nocombine:(your_code_here)/:smps_force_nocombine:]
2. add the no combine tag and move the script/link to the bottom of the page.
[:smps_force_nocombinemove:(your_code_here)/:smps_force_nocombinemove:]
Design Panels

When clicking this button a right panel will open, showing the design panels attached to this component. These panels are being generated when you add a block in the no-code block.
A Design Panel is a way for non-coding designers to manipulate the CSS and JavaScript of the components.
System Variables

Save To Library

Content Editor
If your component is used on a page you will see a direct link to the CMS page for this component.
Design Editor
If your component is used on a page you will see a direct link to the Design editor for this component.
Delete
You can only delete a component from your project it is no longer used on any page.
If this is the case you will receive the following warning:
