How to add Google Analytics
Google Analytics (GA) is a powerful tool to track user behavior and optimize your website. In this article, we'll show you how to connect your GA account to your SiteManager web project.
Note:
You need a Google account to set up a Google Analytics account.
In this article
Step 1: Retrieve your Google Analytics ID
Step 2: Install the Google Analytics upgrade
Step 3: Connect Google Analytics to SiteManager
Step 1: Retrieve your Google Analytics ID
Google Analytics 4
- Sign in to your Google Analytics account.
- Click the Admin button at the bottom of the left page.
- Open Data Streams in the second column.
- Select the stream you wish to add to your SiteManager project.
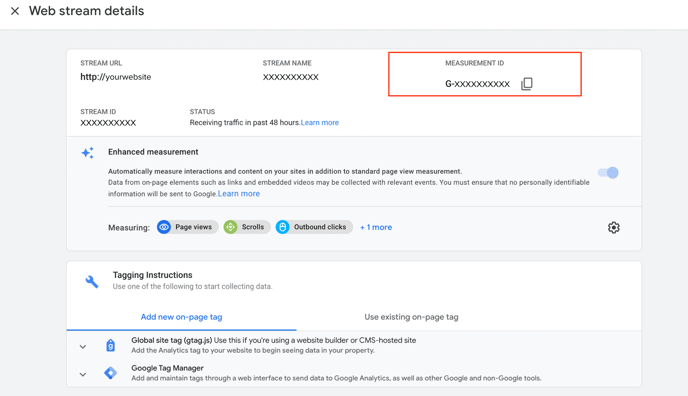
- Copy your Measurement ID from the top-right corner (ex: G-XXXXXXXXXX).
Universal Google Analytics
- Sign in to your Google Analytics account.
- Click the Admin button at the bottom of the left page.
- Open Tracking Info in the second column, and select Tracking Code.
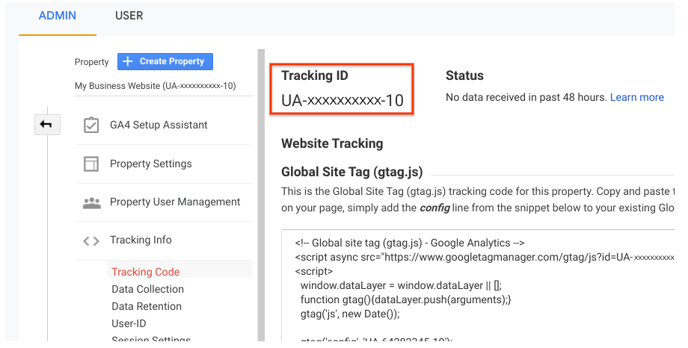
- Copy your Tracking ID from the top-right corner (ex: UA-XXXXXXXXX-1).
Note:
Google Analytics 4 (GA4) is the latest iteration of the Google Analytics platform. GA4 replaces Universal Analytics (UA) as the default for digital analytics measurement in GA. Google announced that GA4 will be the only option beginning on July 1, 2023.
Step 2: Install the Google Analytics upgrade
-
Log in to the web project to which you want to add Google Analytics.
-
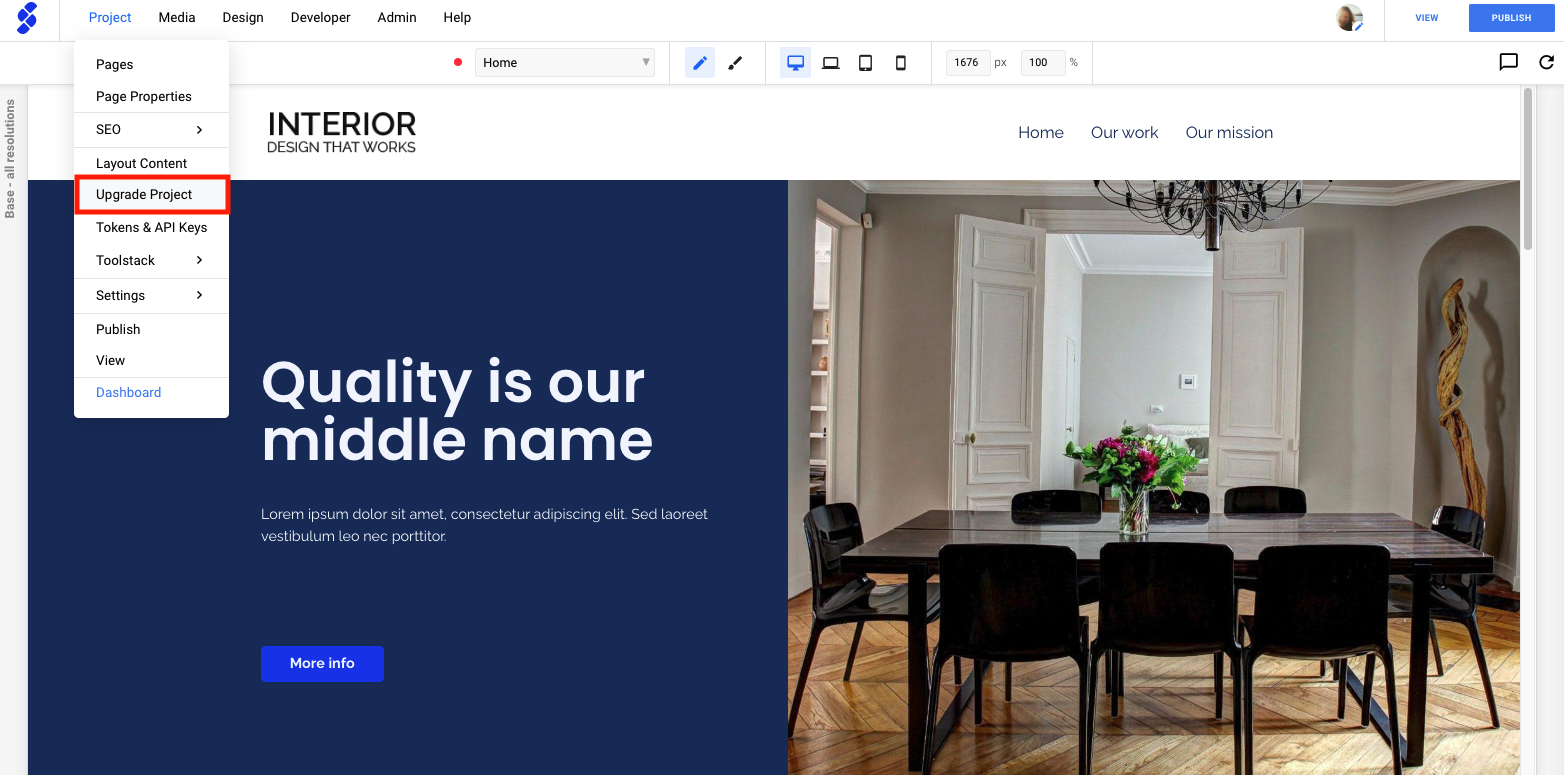
Navigate to Project > Upgrade Project.
-
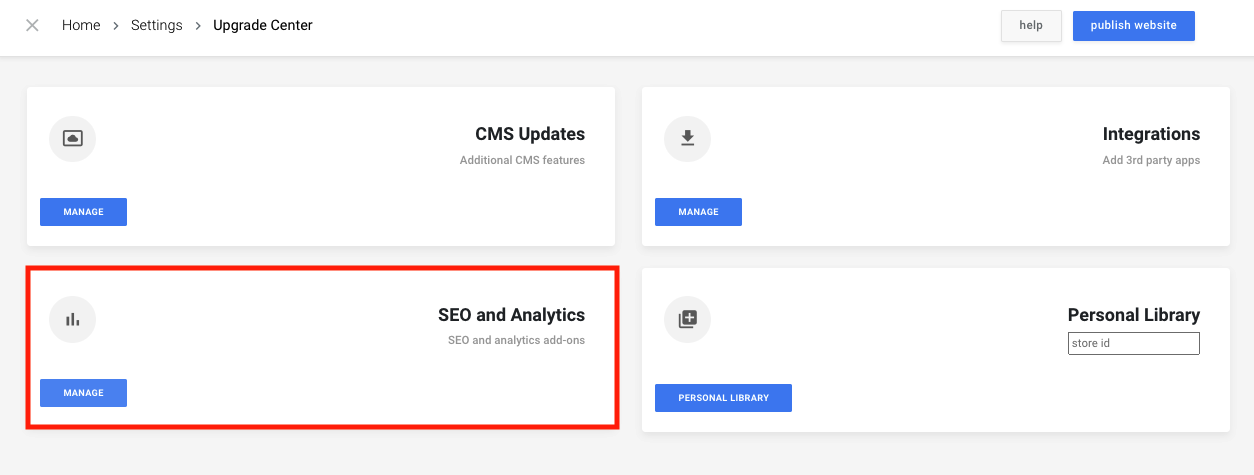
Select SEO and Analytics.
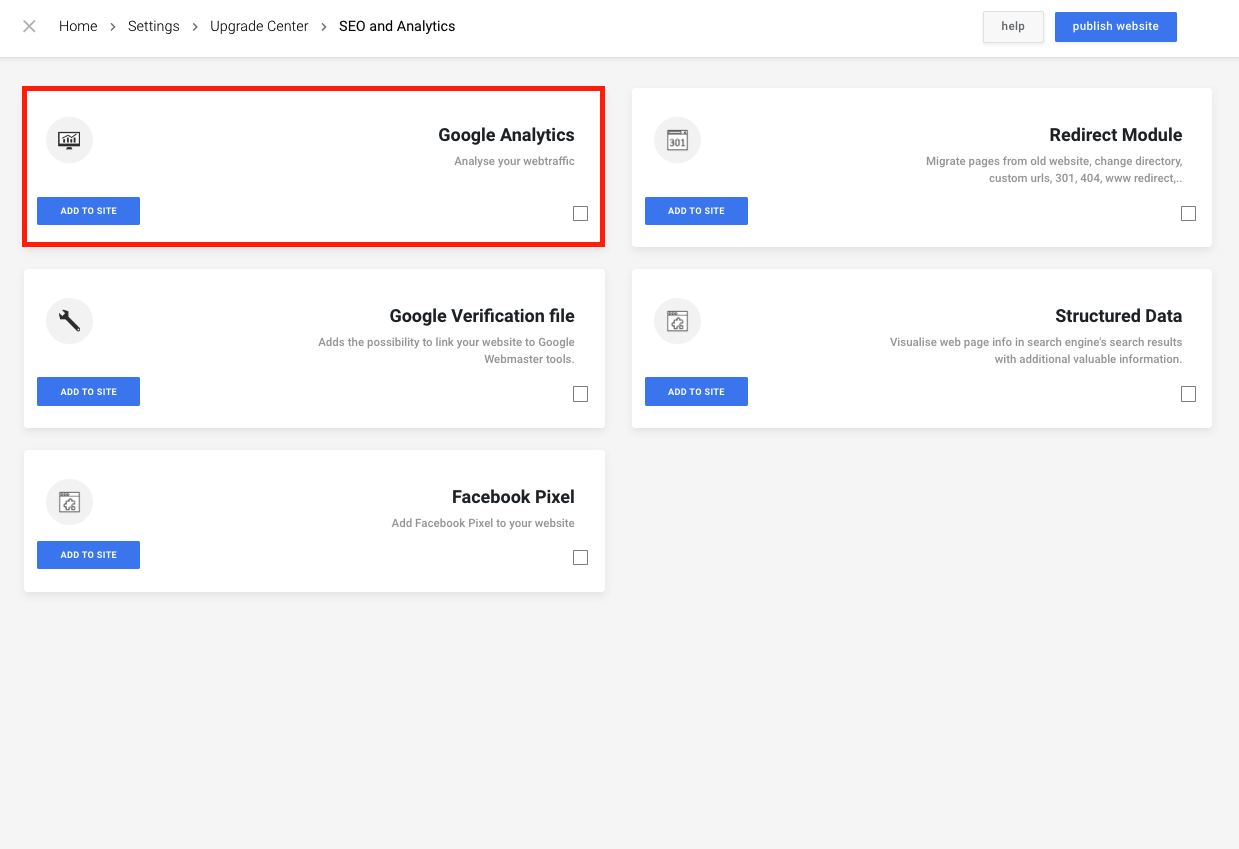
- Find the Google Analytics block, and click Add to site.
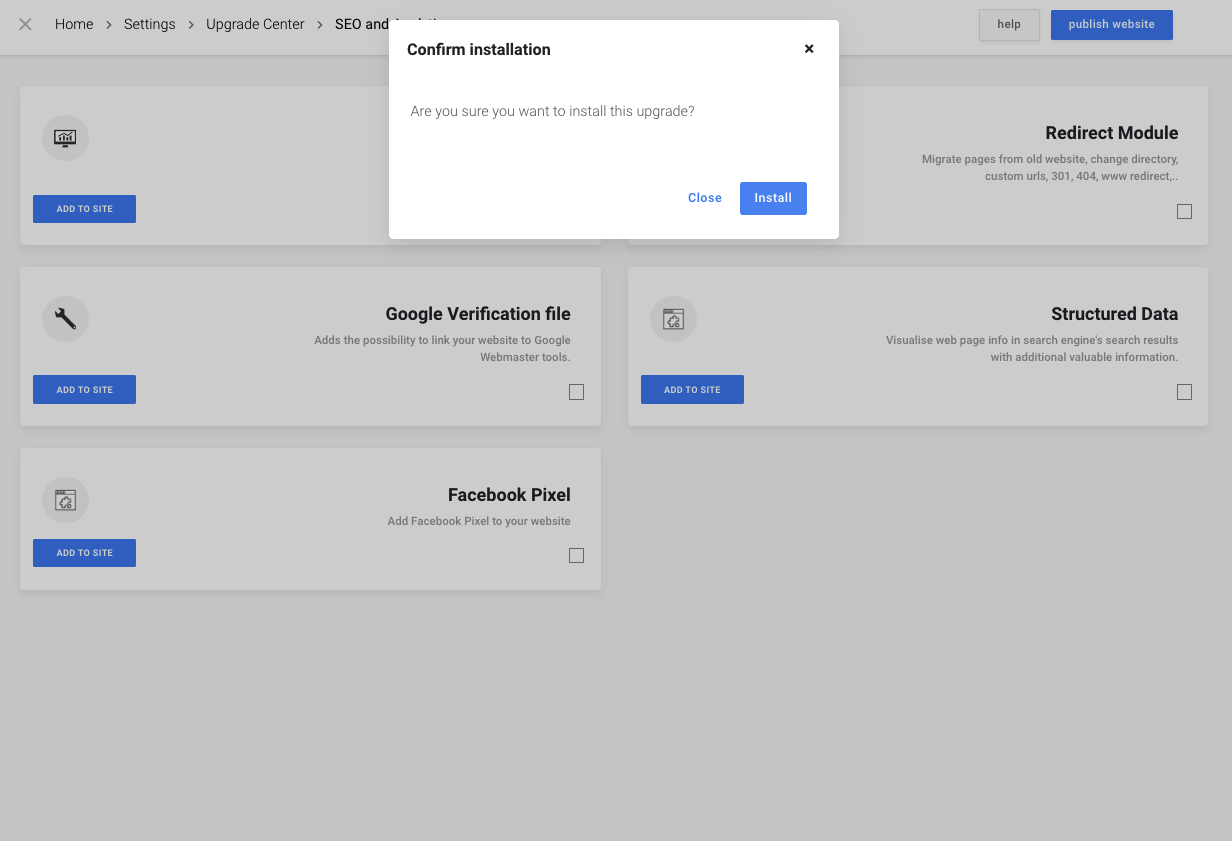
- Confirm by clicking Install.
Step 3: Connect Google Analytics to SiteManager
- Toggle between Google Analytics 4 or Google Analytics Universal, depending on which GA account you have.
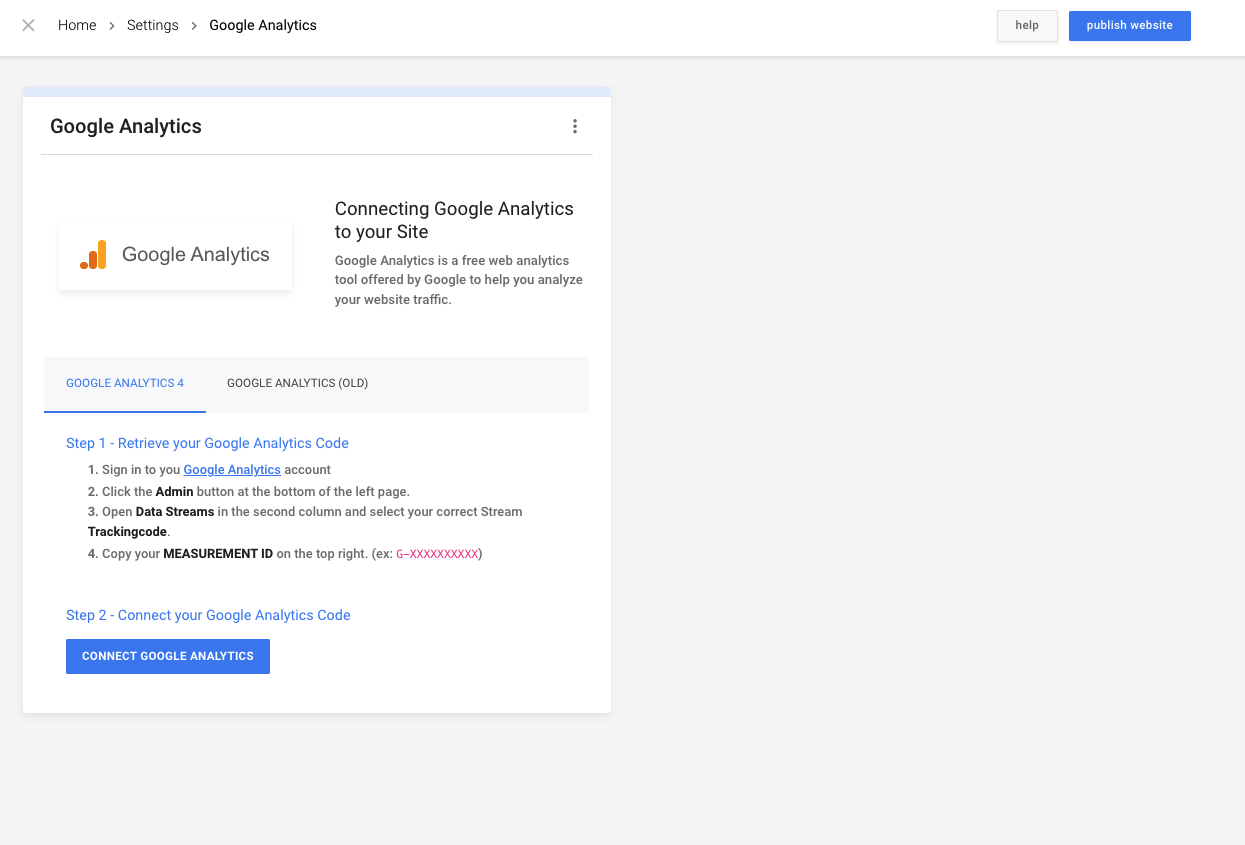
- Click Connect Google Analytics.
- Paste the Measurement ID (G-XXXXXXXXXX) orTracking ID (UA-XXXXXXXXX-1) you retrieved in Step 1.
- Click Connect and you're all set!
Remember to publish all pages after adding the Google Analytics key to your project.