How to connect the SiteManager Form to Zapier.
This article will explain how to connect the SiteManager form to Zapier. Every time the form will be submitted, the connected fields will be pushed to a zap, so you can distribute this data to another service of choice.
Connecting to Zapier
You need to be on a paid Zapier plan to be able to use webhooks, as this is a premium module. See the pricing page for more info.
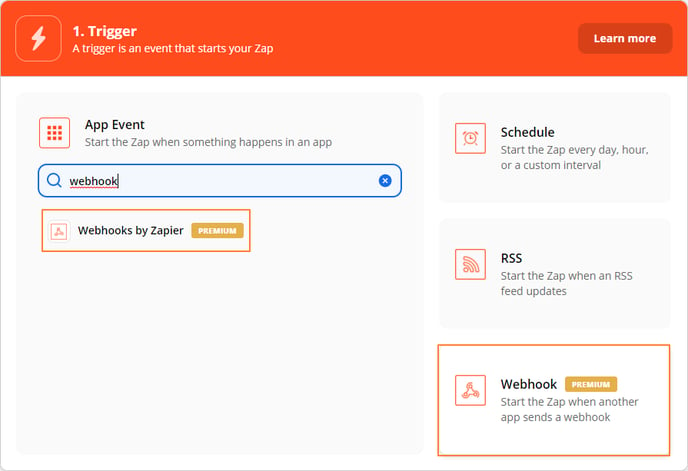
Log in to Zapier and create a new zap. There is no dedicated SiteManager app, but we will set up the integration by a webhook. Choose Webhooks by Zapier for your trigger.

Next you will need to select a trigger event. Choose Catch Hook and continue the wizard. In the following step, you'll see a Custom Webhook URL. Copy this URL as we will need it inside the SiteManager form. Leave all other settings as is.
Connecting Zapier to SiteManager
Head back over to the SiteManager platform and edit your form content. By clicking the 'Edit Form Actions' button, you can add the Zapier action. Add the Zapier action, and you will see an input field where you can paste the recently copied webhook URL.
Build form
You can insert multiple form inputs to collect different kinds of data. Be sure to include a submit button (as that is required for every form). No other fields are required, but without any it will be hard to collect data.
Input data
Each field that you want to send to Zapier, needs to be marked with an attribute. You can do so by editing the input data on a field and by adding the Zapier data. Give your field a name, as it will show up in Zapier. Make sure to give all your fields a unique name, as the data will be overwritten otherwise.
Finishing the zap
Head back over to your zap in Zapier and continue to the next step. Here you can test the trigger you made. Your form should be completely set up by now, so you should be able to submit your form. After you've submitted the form, you can click the test trigger button, which will show you the result of the form. You should be able to see your data in Zapier now.
If you don't see any data or the test fails, make sure to check your webhook URL in the form actions and check that you have added the Zapier input data to at least 1 input field.
Connecting to another service
In the next step, you can choose the destination service for the data. You will be able to use the fields you have connected by the input data as values in the destination service.