In this article we will go through the process of adding a Adobe Font so we can use it in our projects!
- Add font to your Web Project
- Retrieving your Project ID
- Adding the Adobe Font to our Project
To be able to integrate Adobe Fonts, you'll need an Adobe Account.
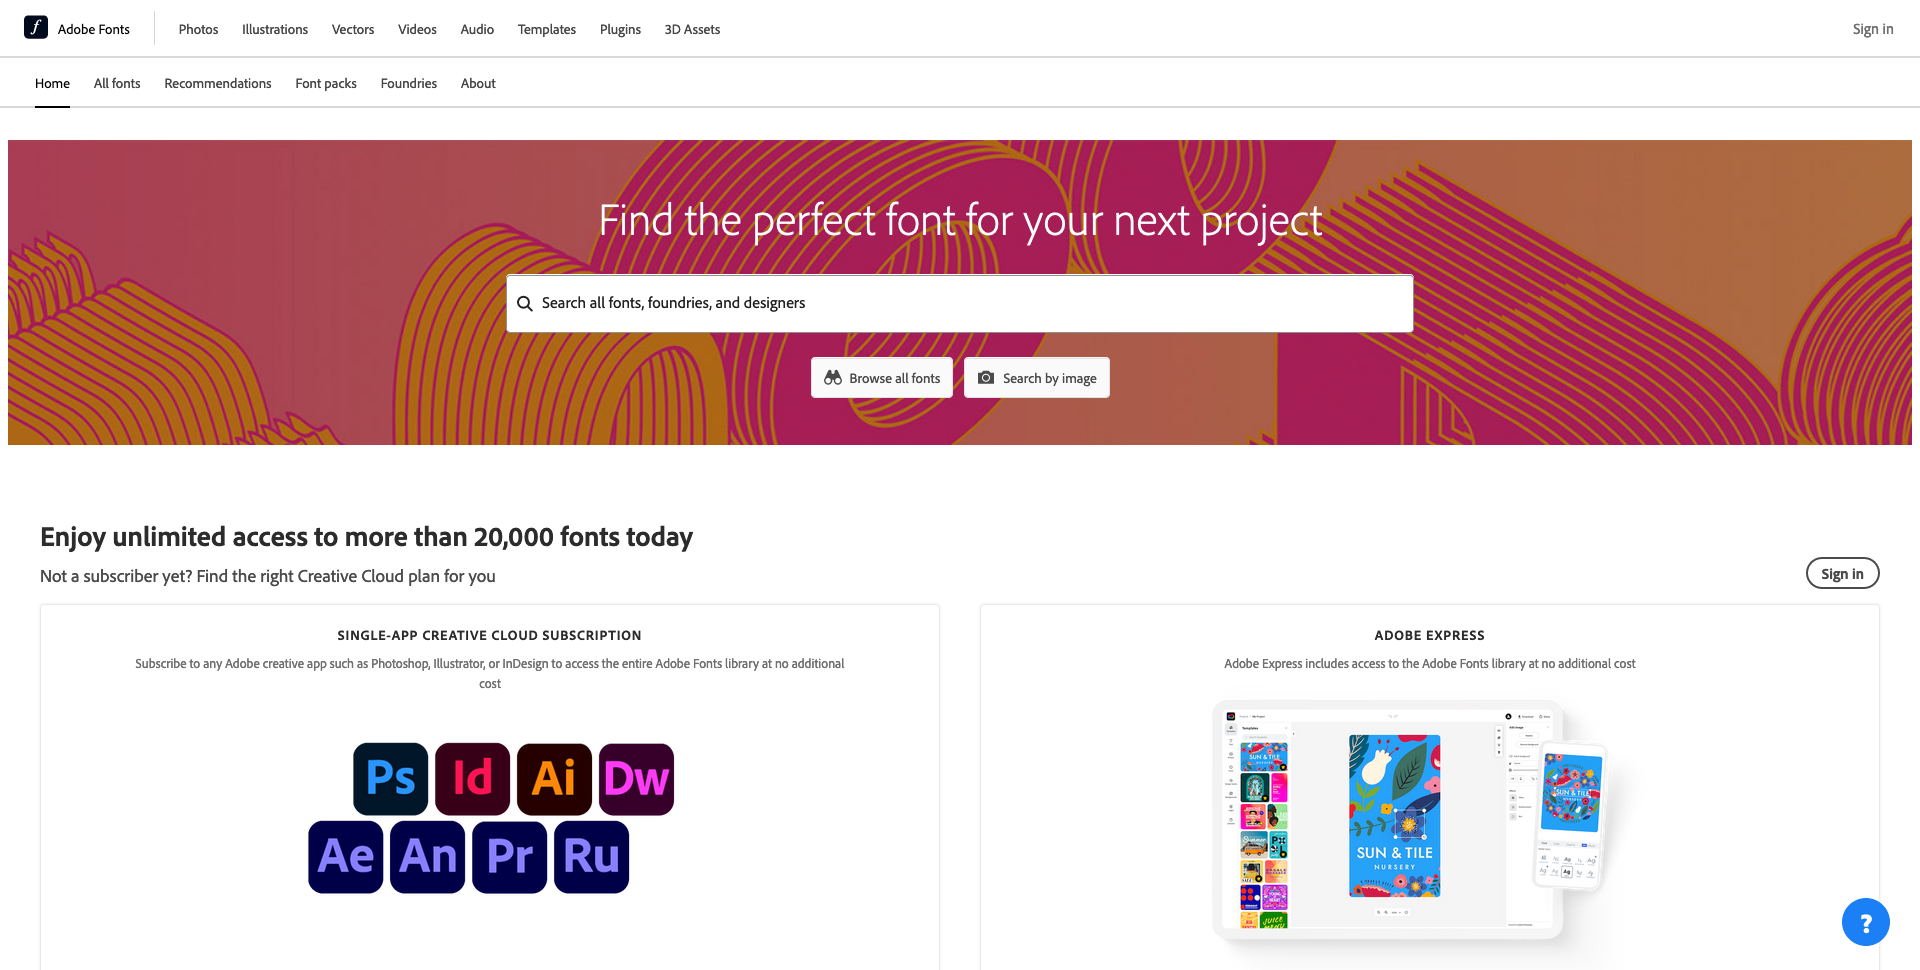
As soon as you have one, you can sign in on your account and look for a font to use on a website. You can explore different fonts by using the search bar at the top of the screen or by clicking on "browse all fonts" for a comprehensive overview.
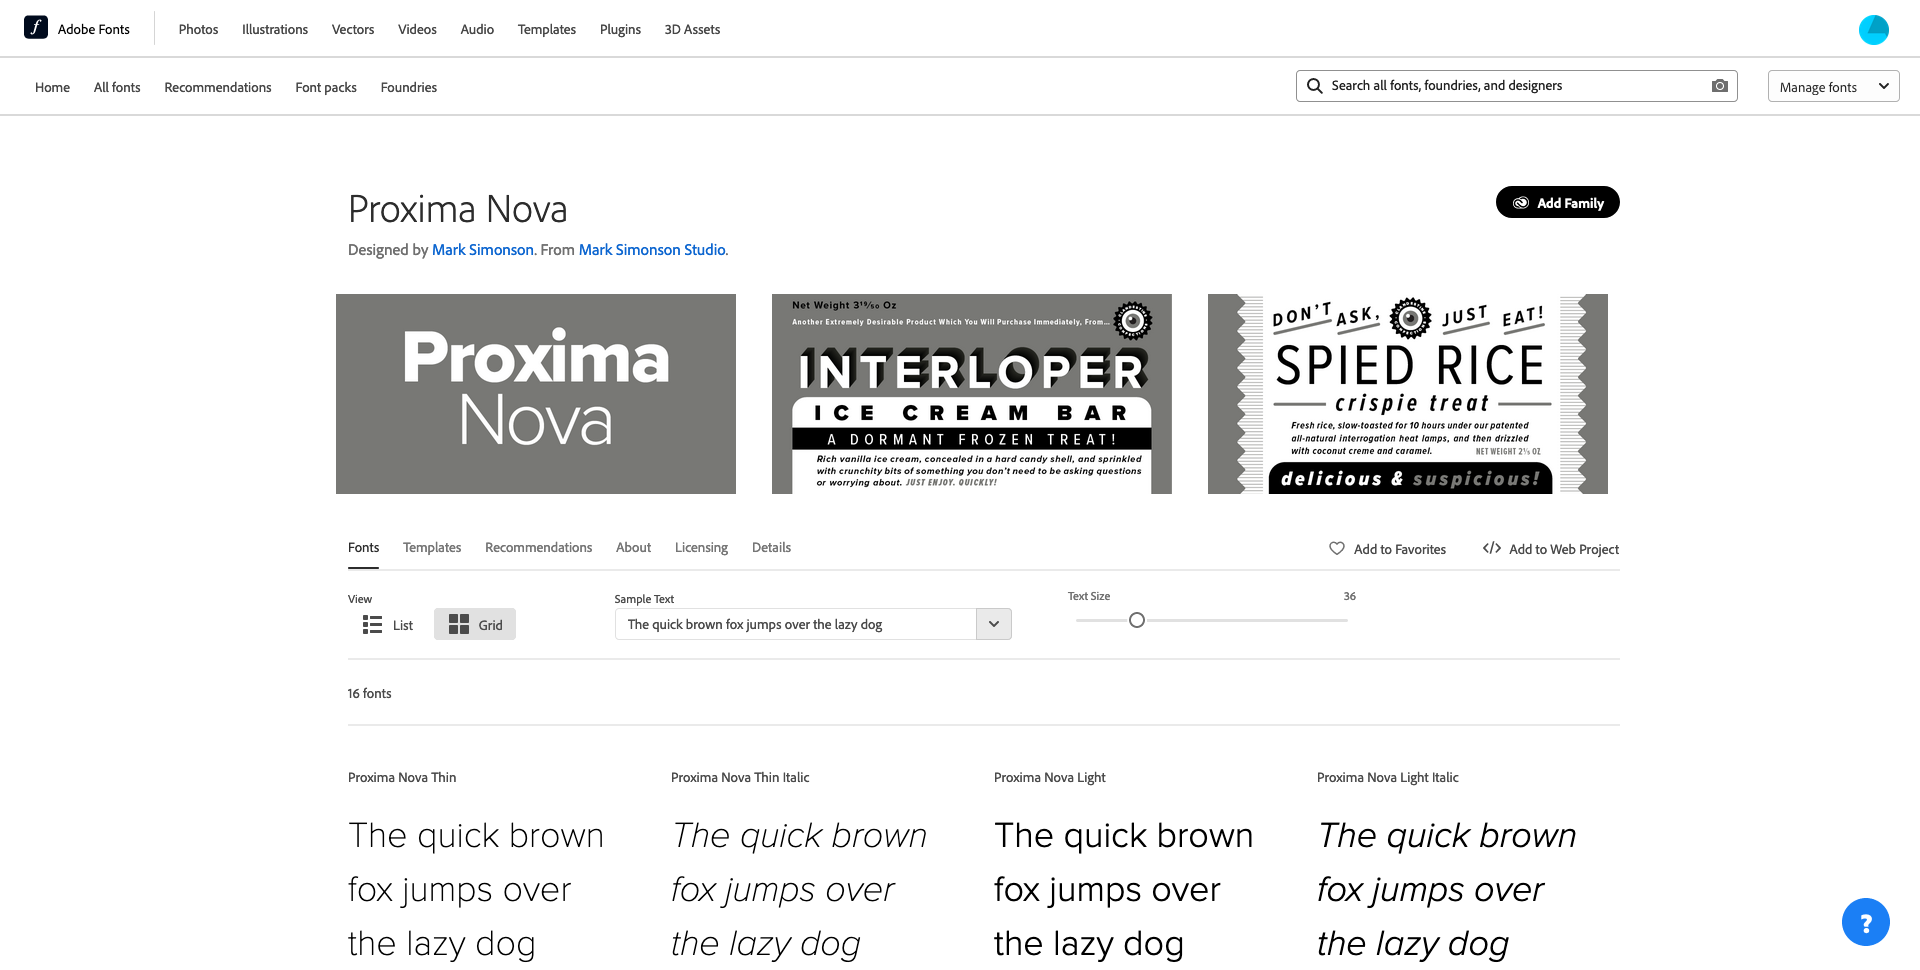
Go to the page of the font you want to use in your Sitemanager Project.
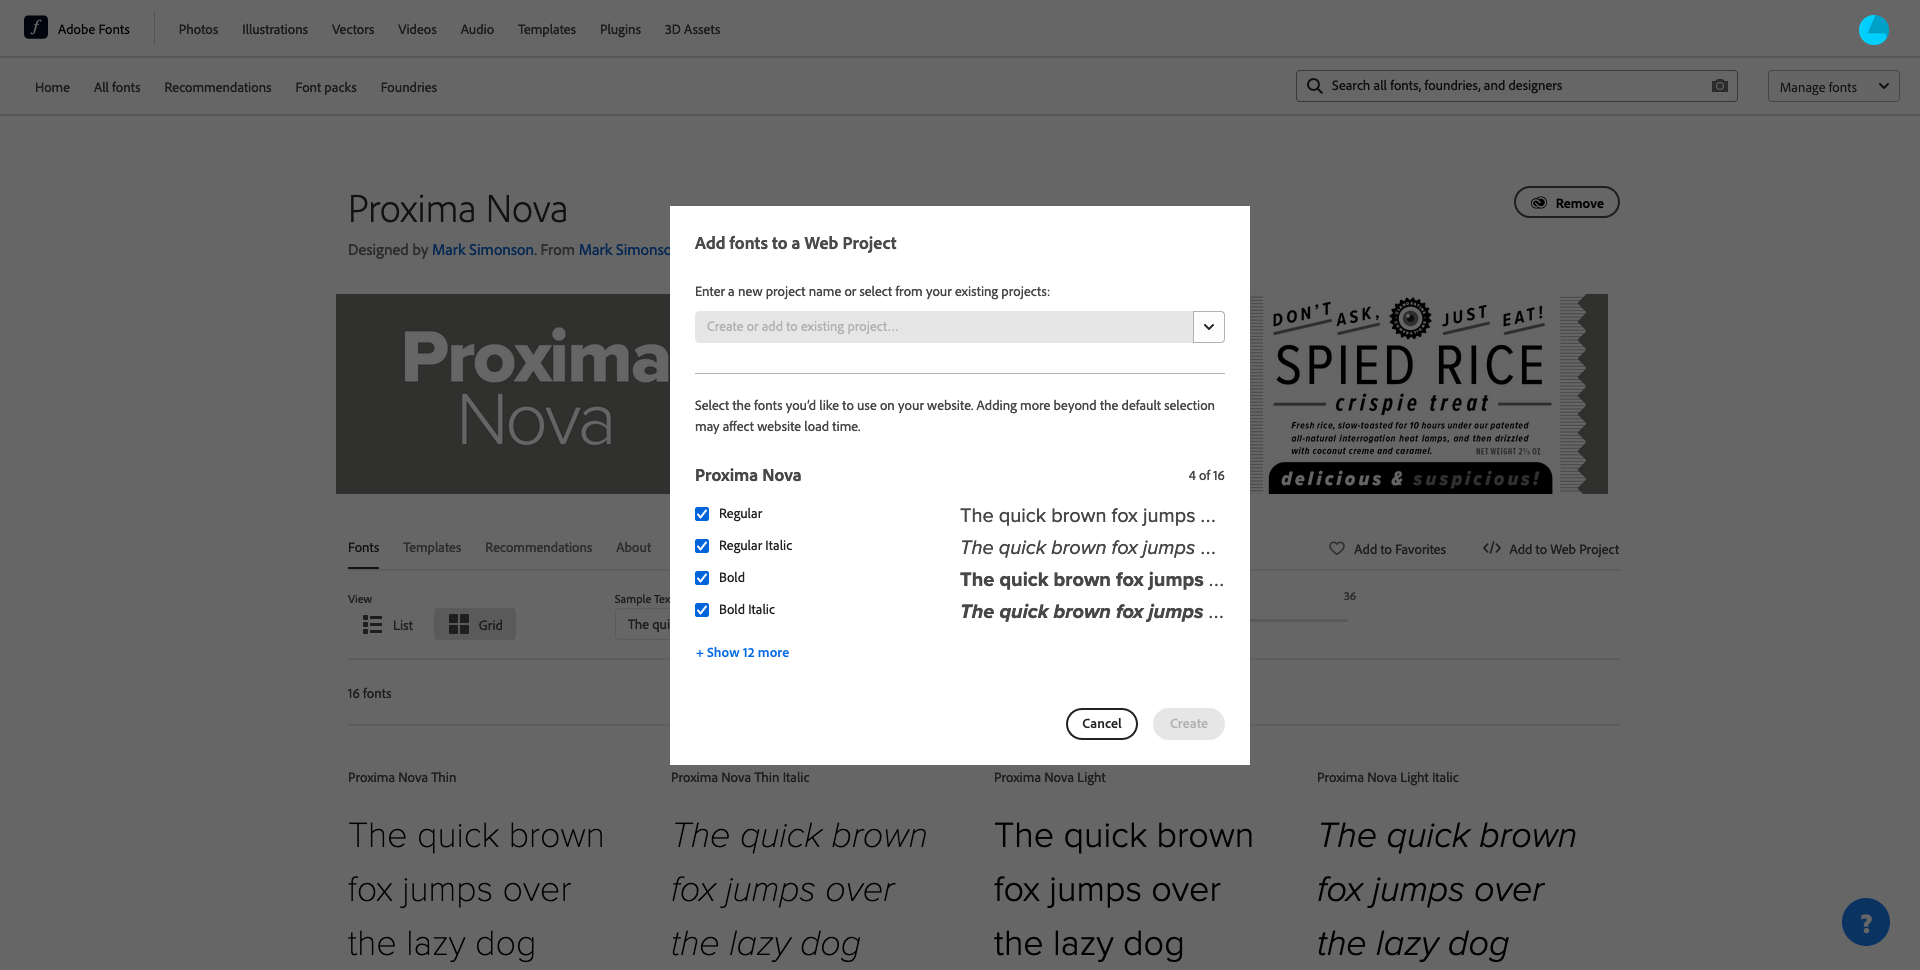
In this example we'll use the font Proxima Nova.
Add font to your Web Project
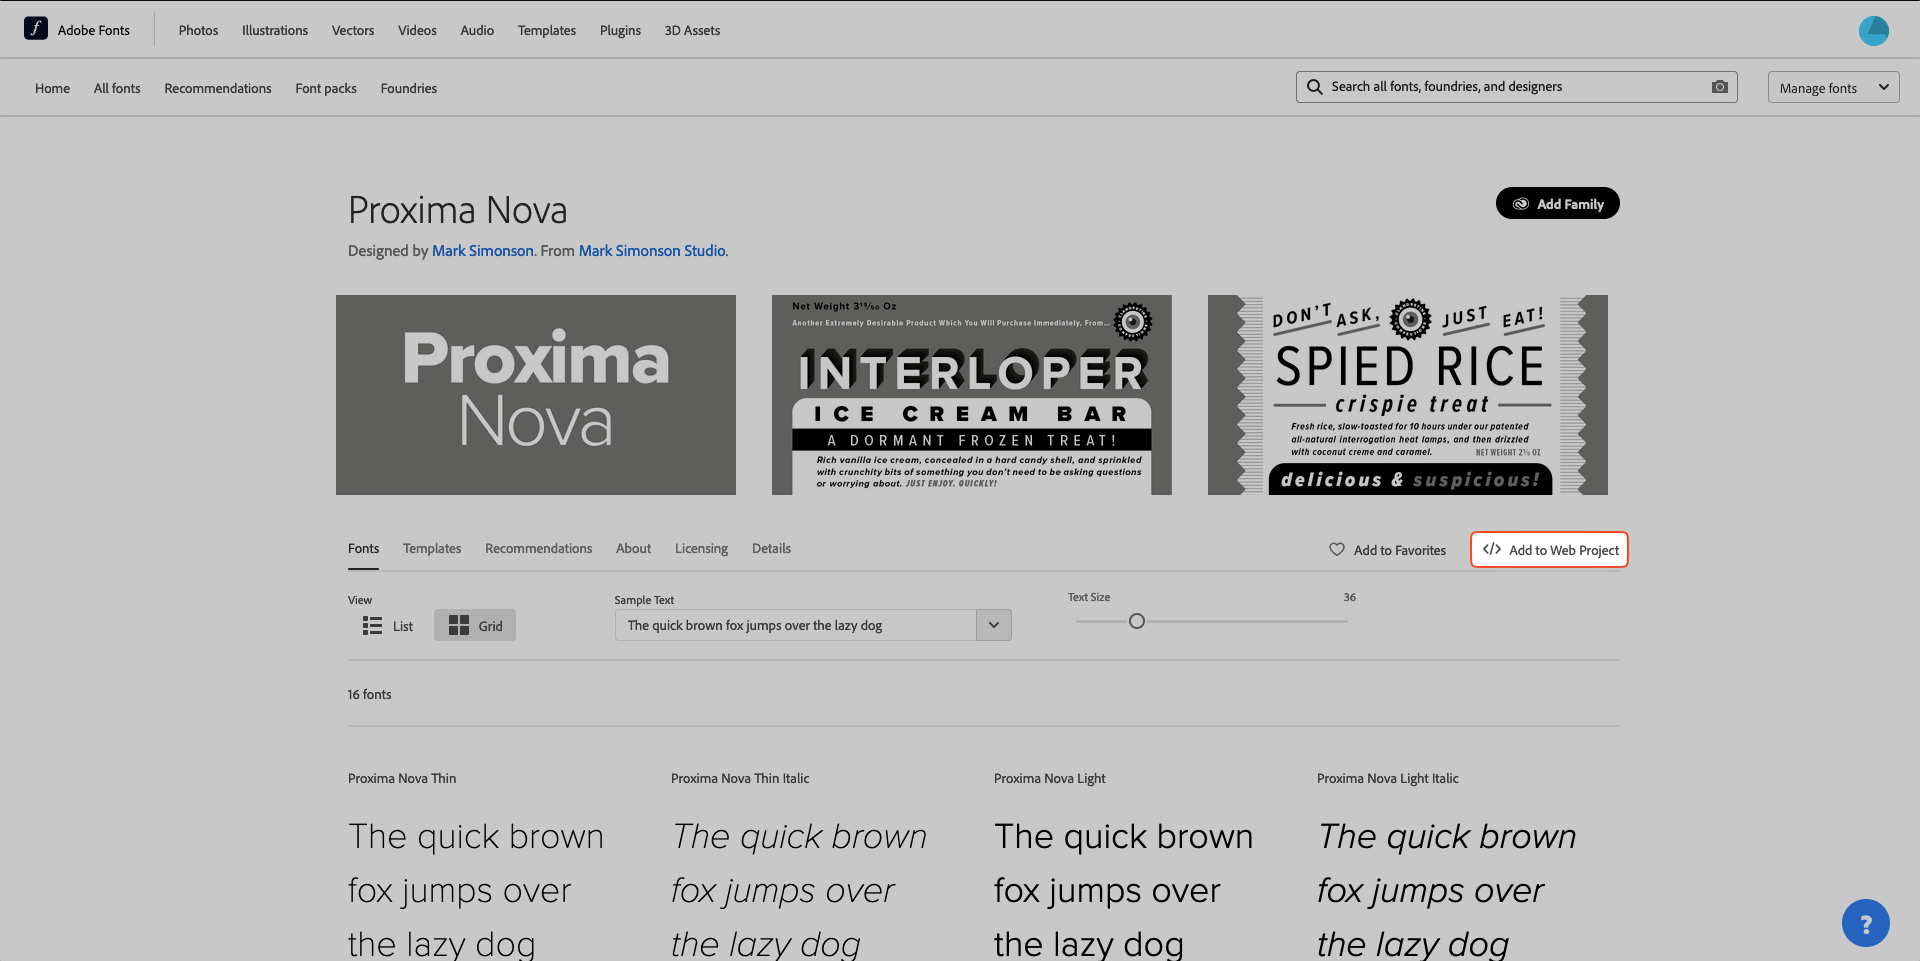
We can use the Add to Web Project to add this font to a new or existing project! In the menu below we can select which font styles we want to include in the project.
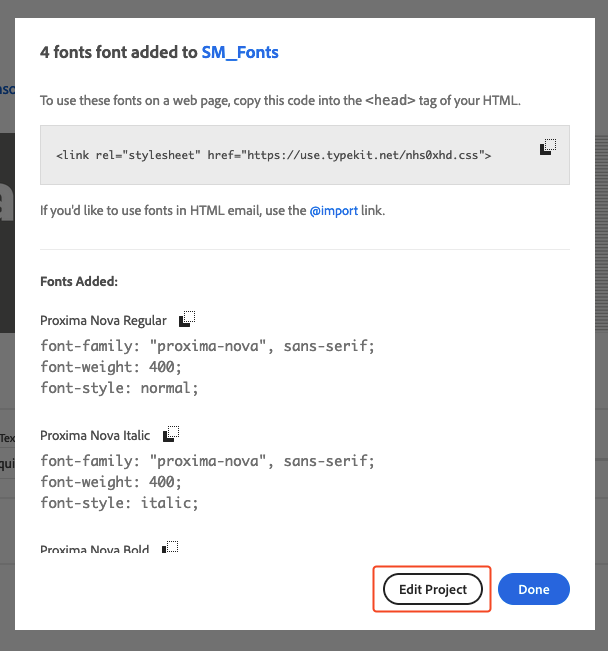
After adding your font(s) to your Project go to Edit Project to retrieve the Project ID.
Retrieving your Project ID
To use your font inside a SiteManager Project, we need 2 things:
-
Project ID
-
Font-Family Name
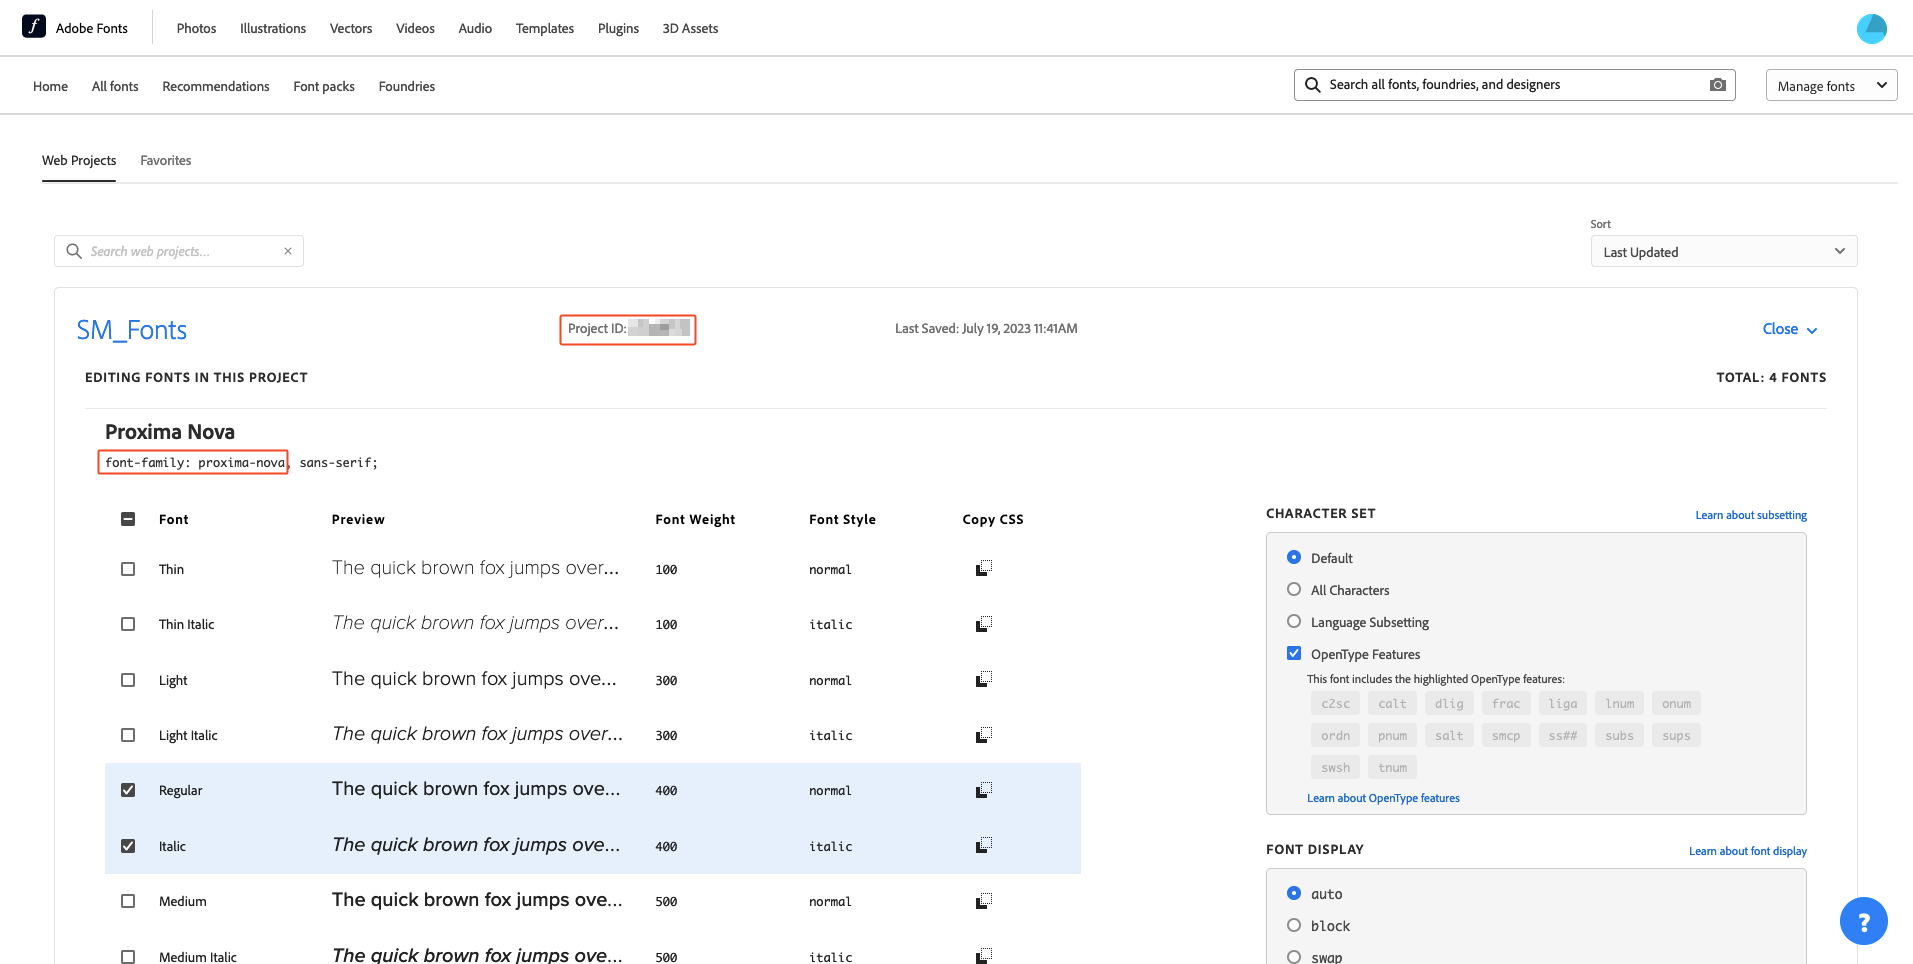
In this "Web Project Overview" you're able to change your font styles even further!
Here we also find our Project ID & the font name proxima-nova.
Adding the Adobe Font to our Project
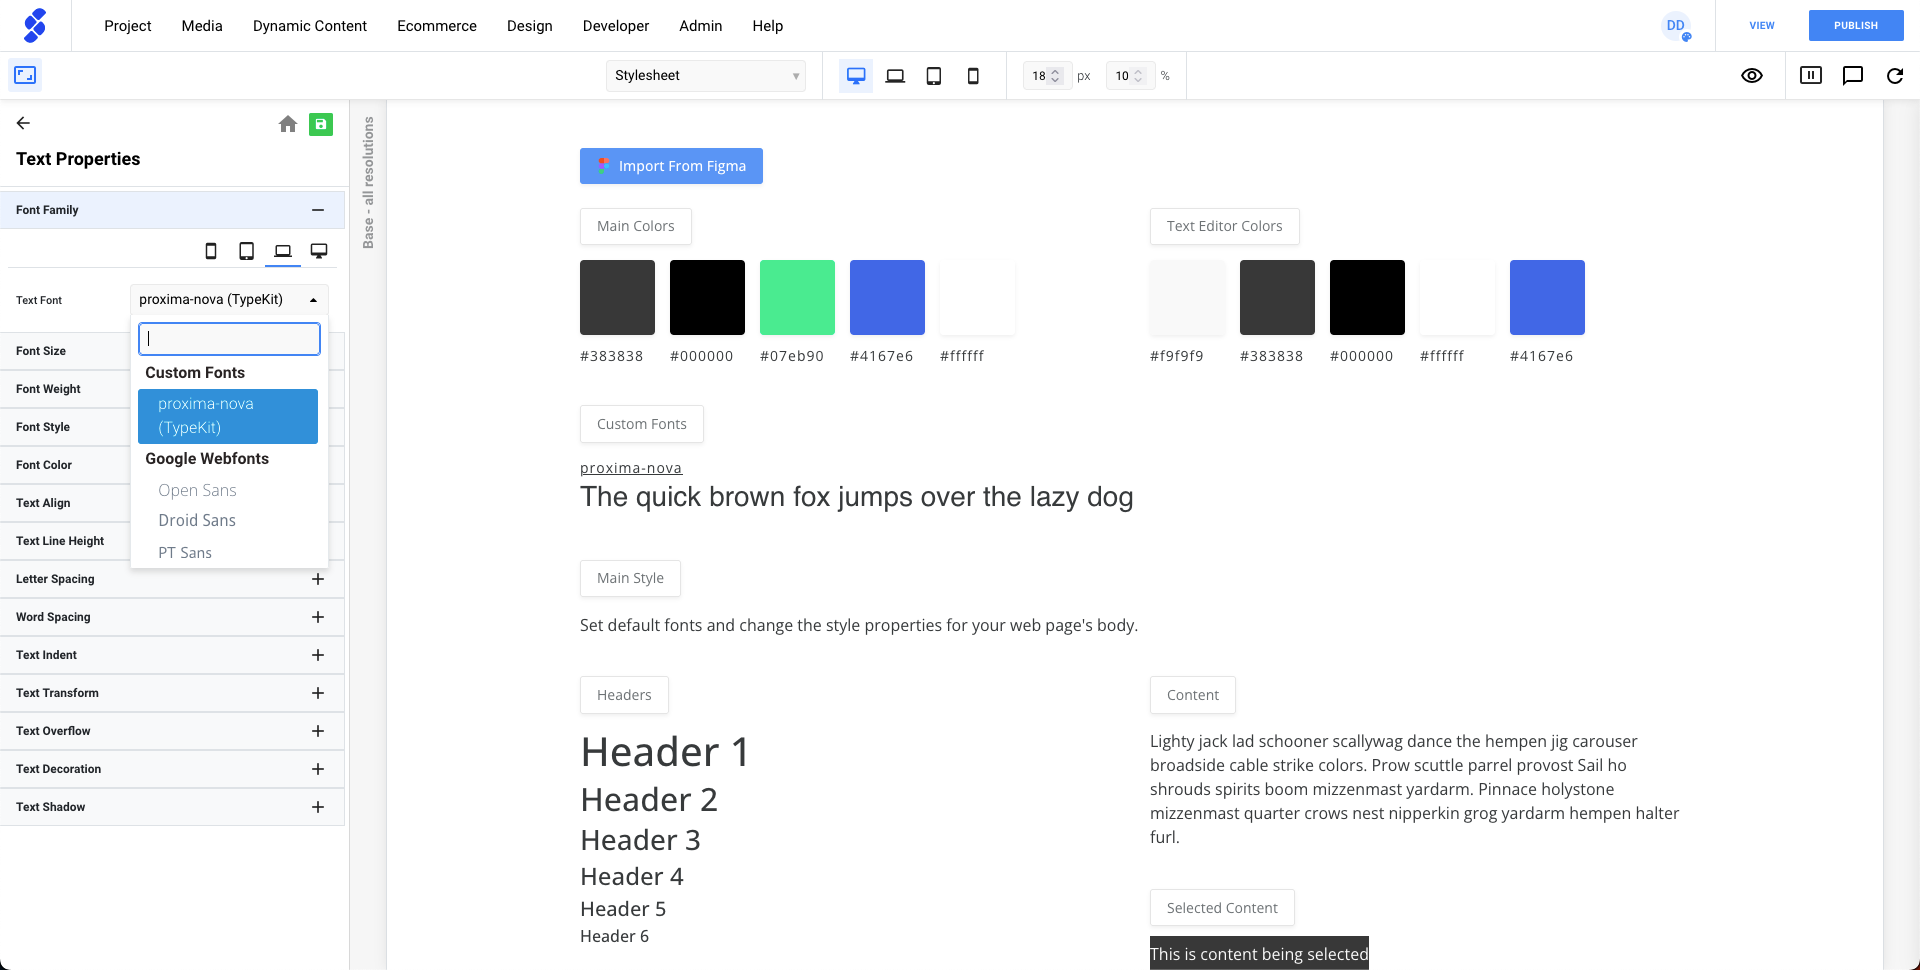
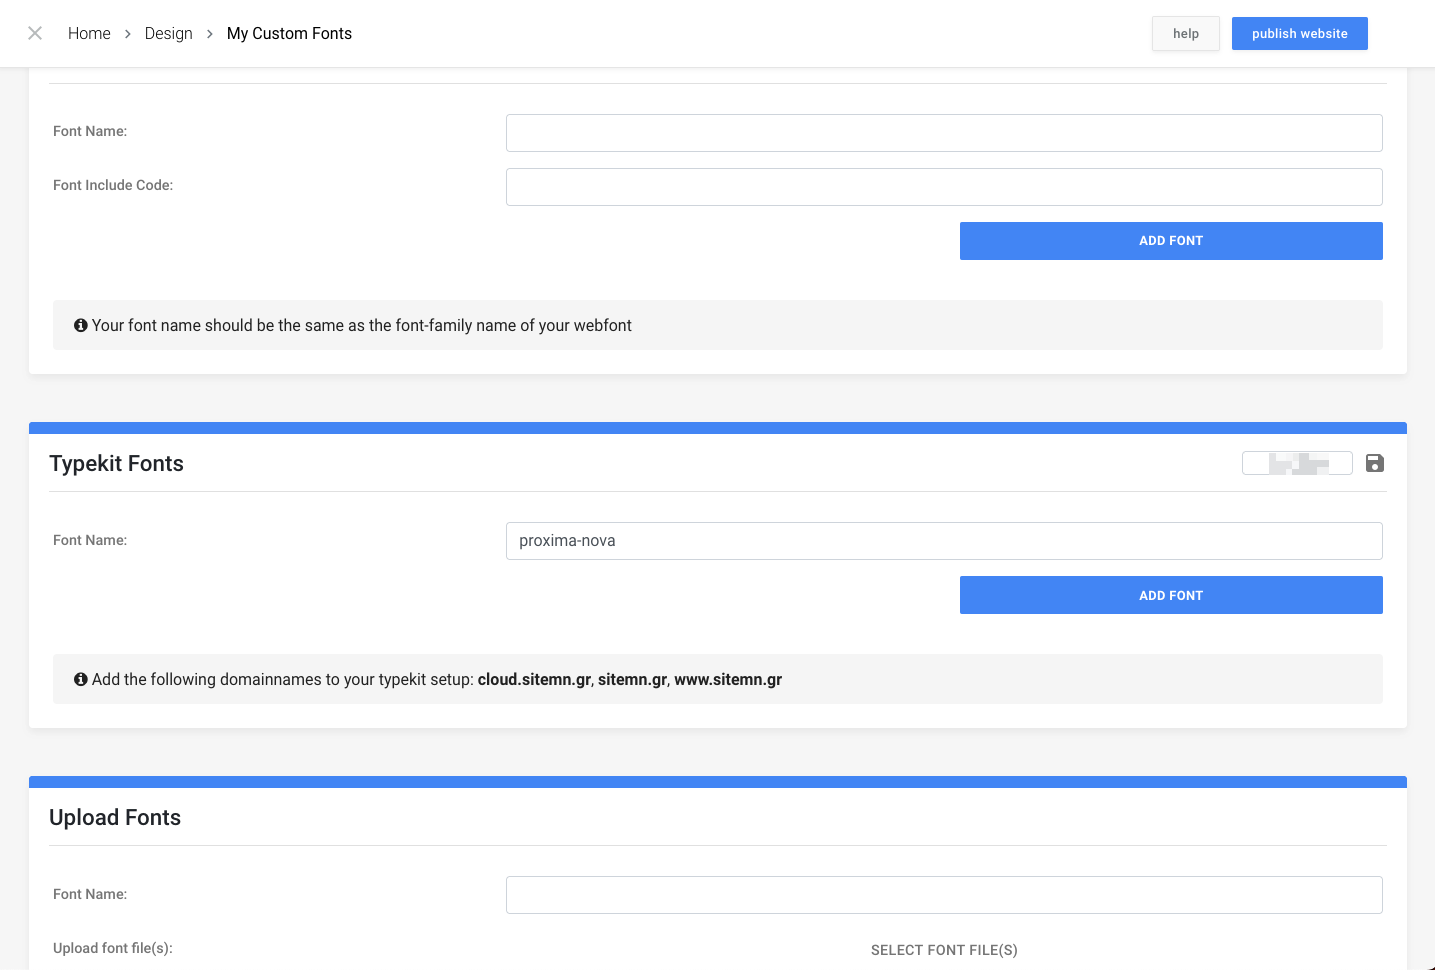
Now we everything we need to add this font to our project, so head back to your SiteManager Project > Design > Add Fonts.

This will open the fonts panel where we can add our Adobe Font. Firstly, add your Project ID and click the save icon. Afterwards we can fill in the font name in the corresponding field and press Add Font.
When our font has been added we can use it throughout the whole project.