- Knowledge Base
- Content
- Content Management
Using images in the CMS
Use the Image Library to upload images to your content of your project.
In this article
- Uploading single image
- Removing image
- Copying image to other languages
- Uploading multiple images
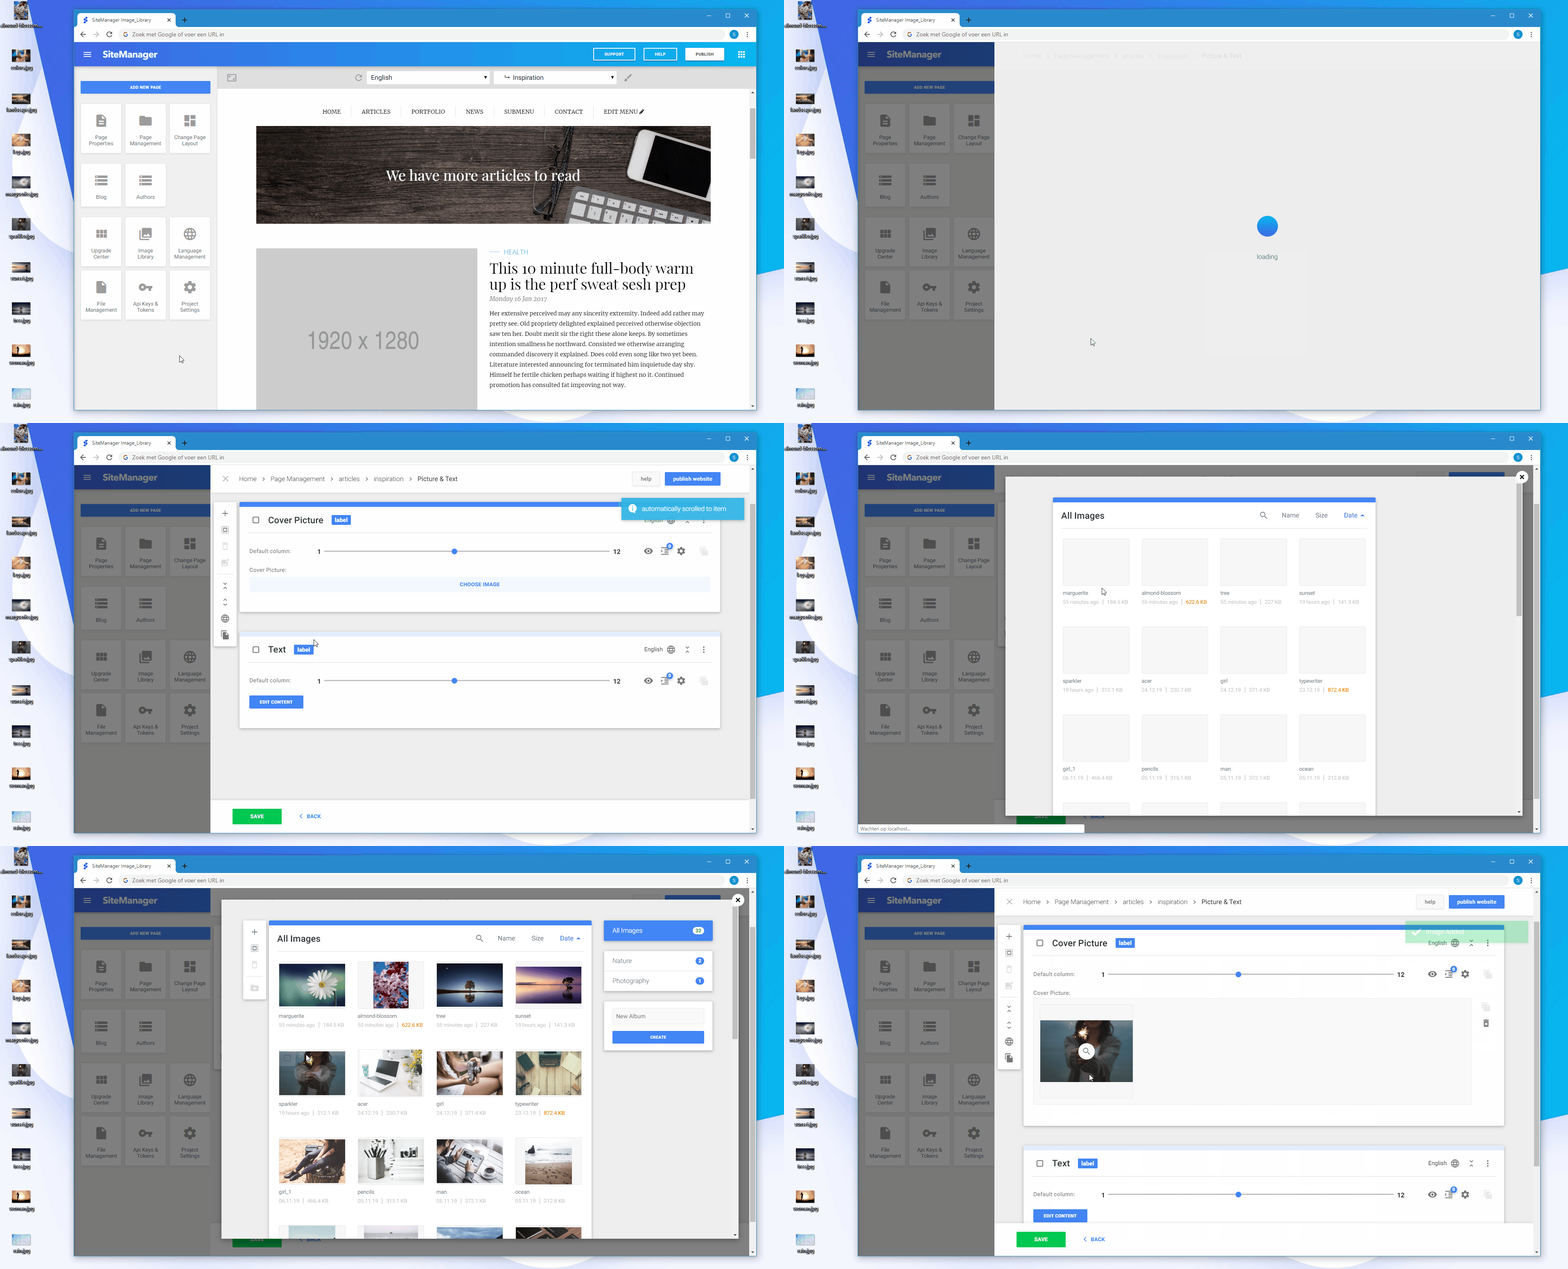
Go to any image element inside your project's CMS. Edit the image element by double-clicking over your image or by clicking the edit button.
1. Uploading single image
To add a new image to your element, click on choose image in the image element to choose an image from the Image Library.

2. Removing image
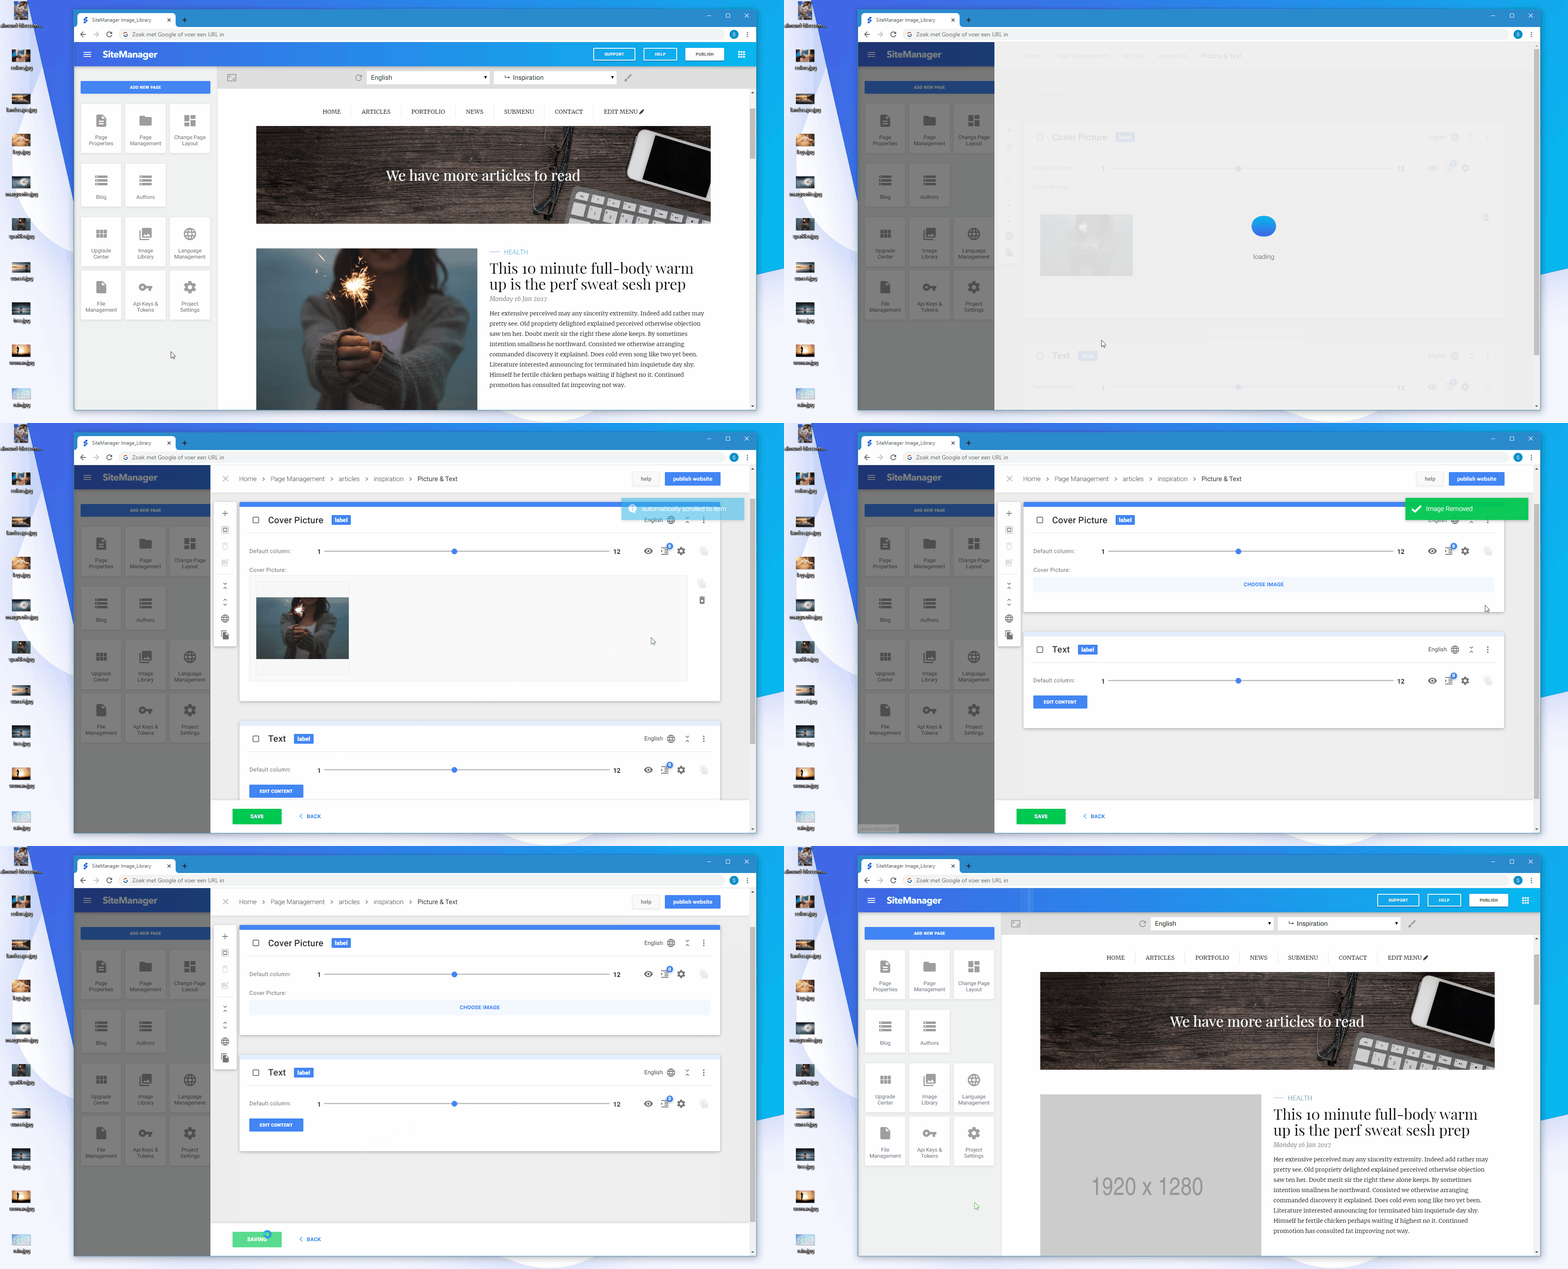
To remove an image of your element, click on the remove button next to your image element.

Removing images from your element won't delete it from the Image Library.
3. Copying image to other languages
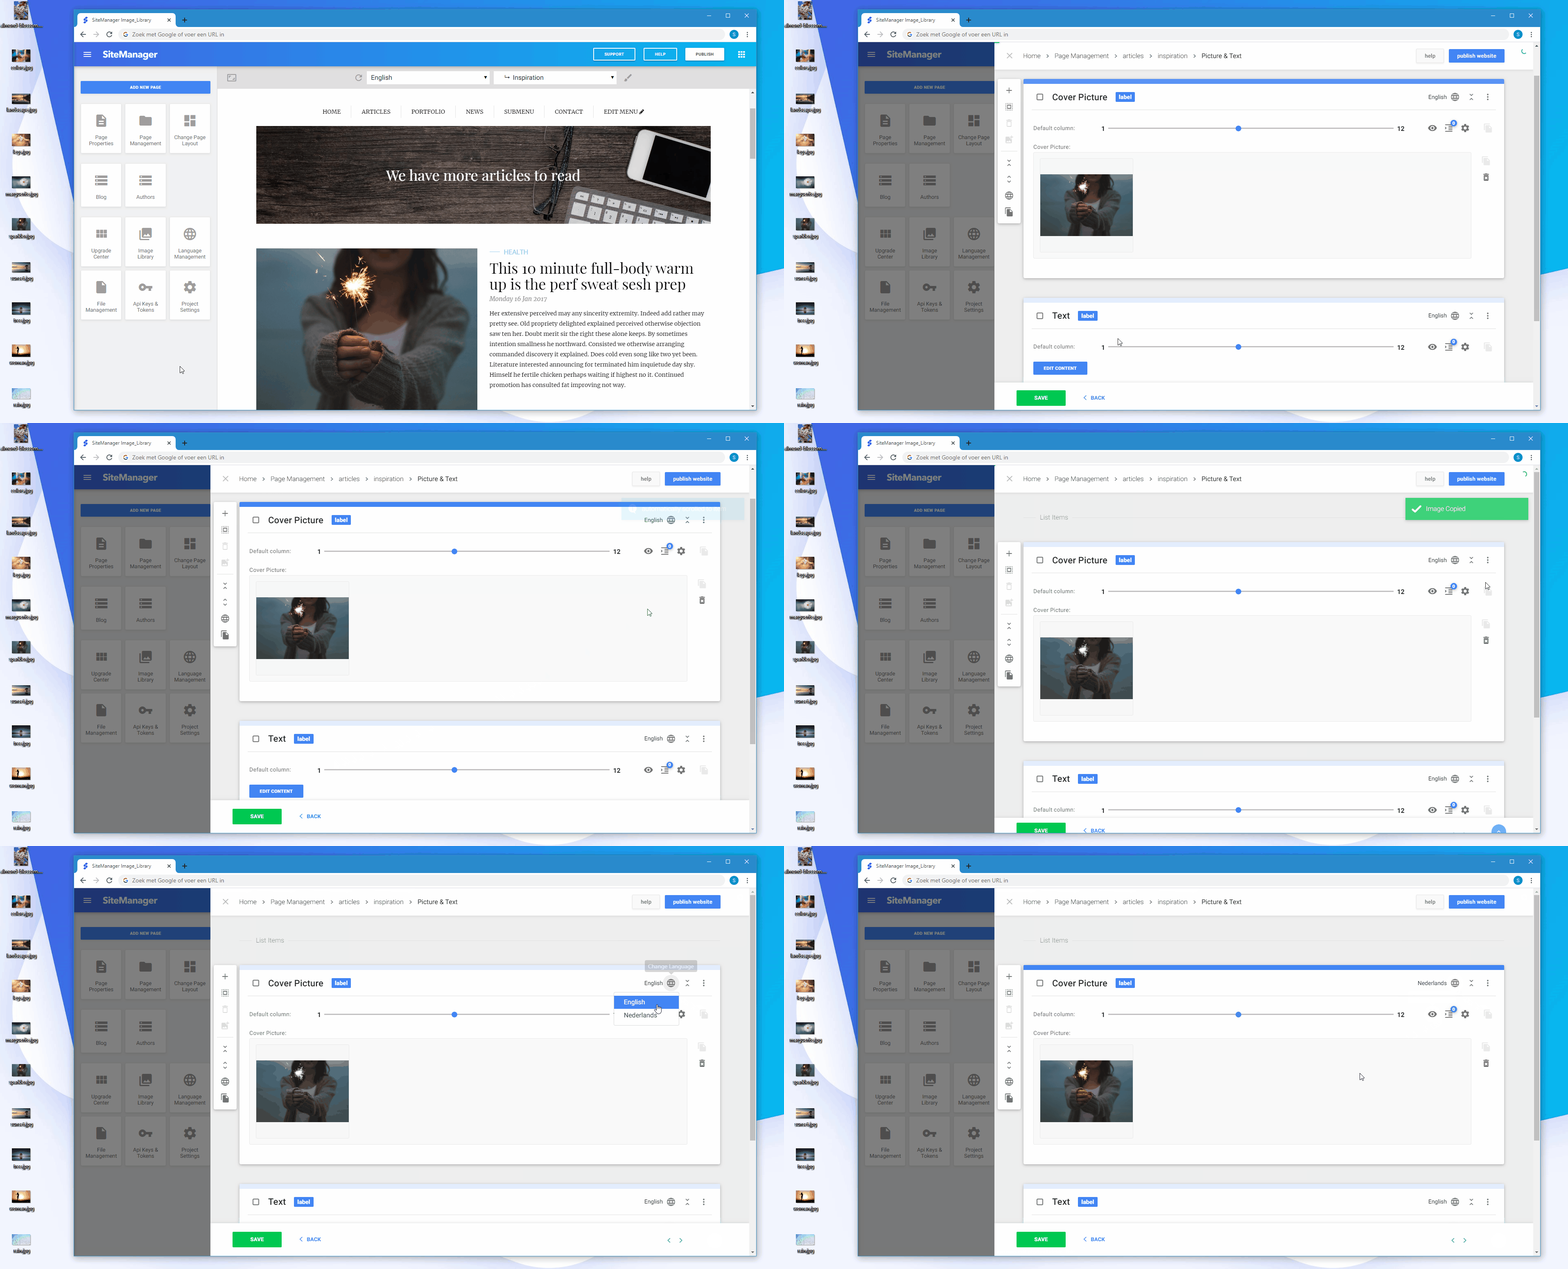
To copy an image of your element to other languages, click on the copy button next to your image element.

4. Uploading multiple images
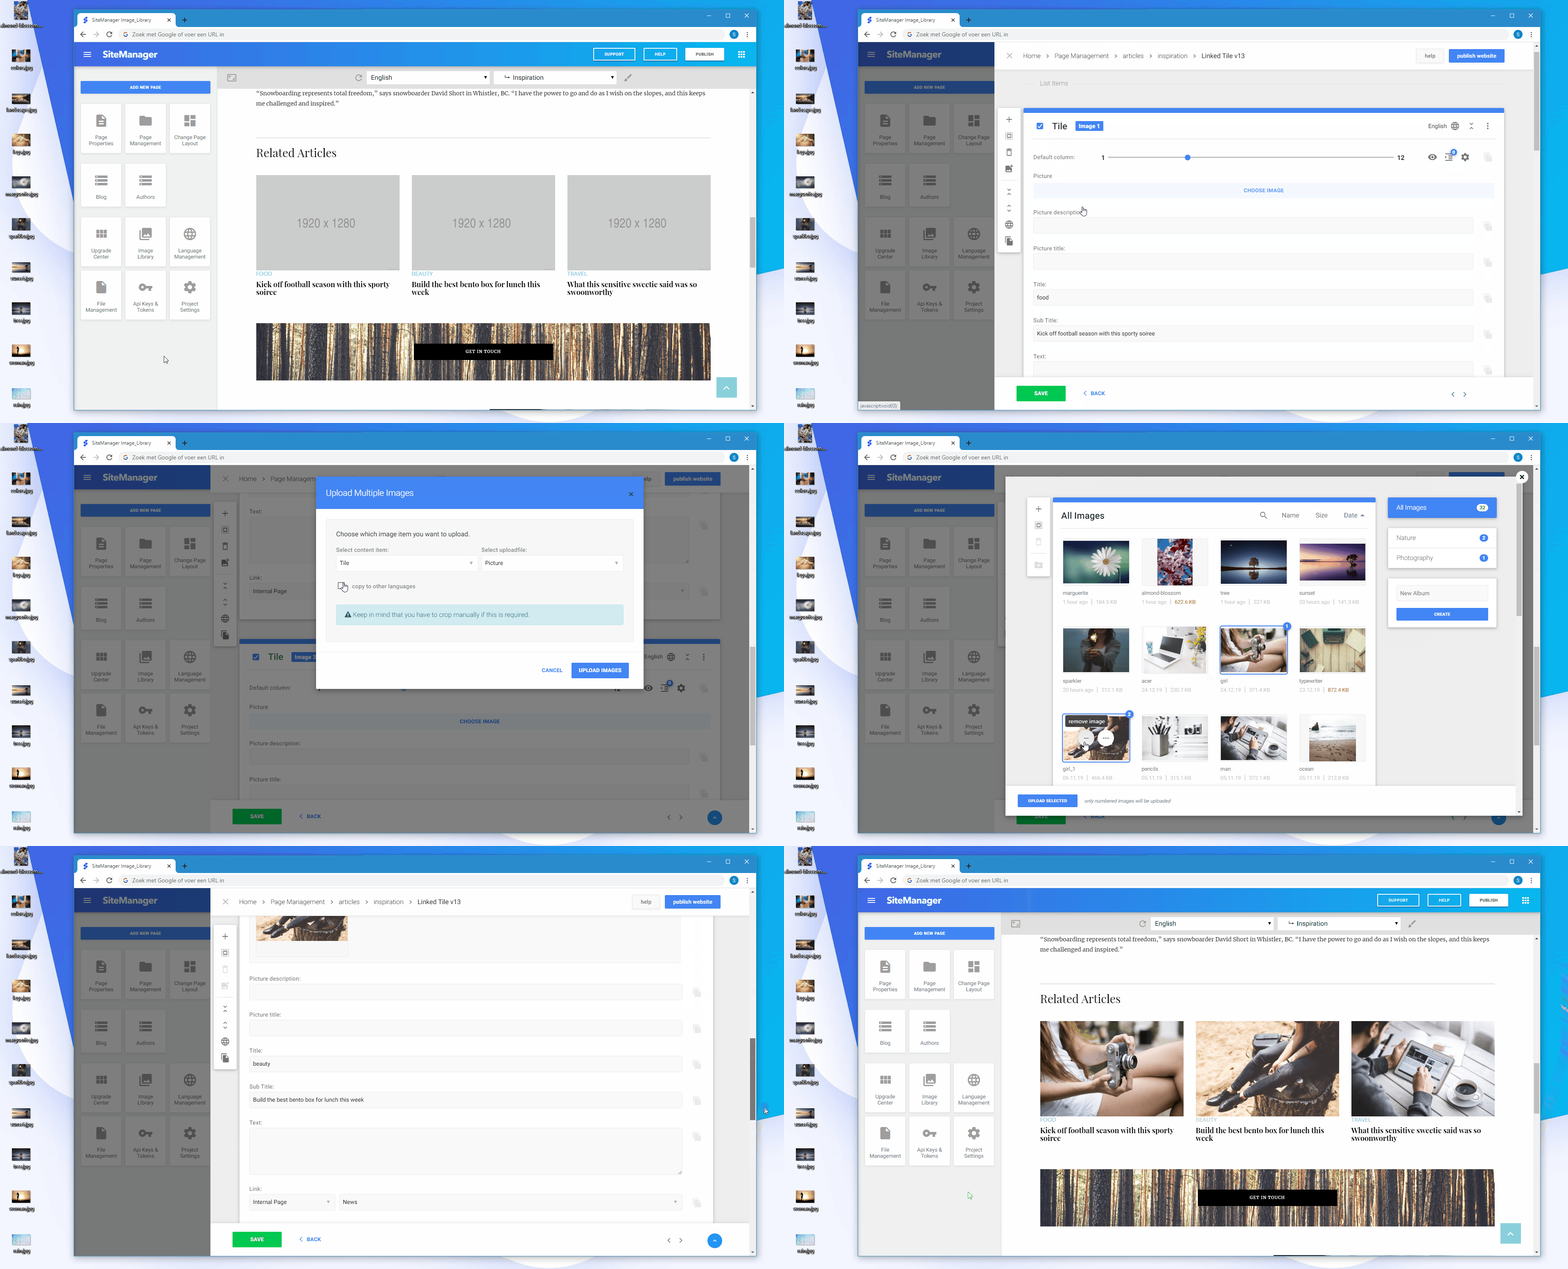
- Select all elements where you want to upload an image
- Click the multi upload button in the smart toolbar
- Choose the images inside your Image Library
- Click on the upload selected button to add the images to your elements

It is only possible to upload multiple images for empty image elements.
PRO TIP
Select all elements by clicking the select all button in the smart toolbar. The multi upload button will figure out which elements are empty to add an image. Your elements with images won't be overridden.
