After you have activated the Dynamic Content Module, and you have created a collection, you can start building and populating a dynamic list to display your collection content.
In this article
Step 3: Populate the dynamic list structure
Step 4: Populate dynamic component elements
Step 5: Populate dynamic links
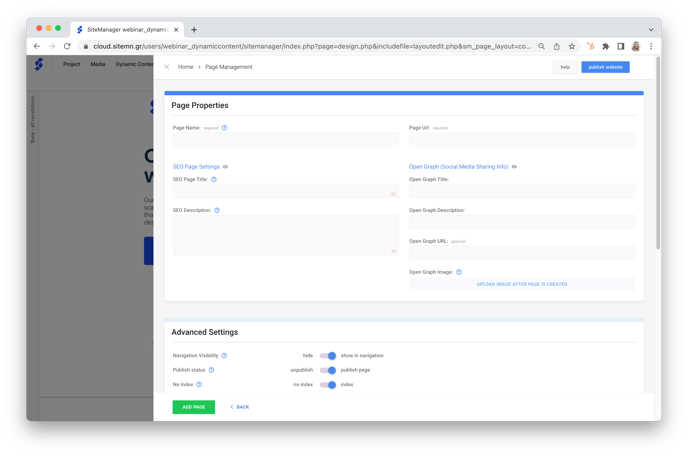
Step 1: Create a new page
- Click the drop-down menu of the page management console.
- Select New Page.
- In the Page Properties view,
- Complete the required fields Page Name and Page URL.
- Complete or leave the default setting for SEO Settings, Open Graph Settings, and Advanced Settings.
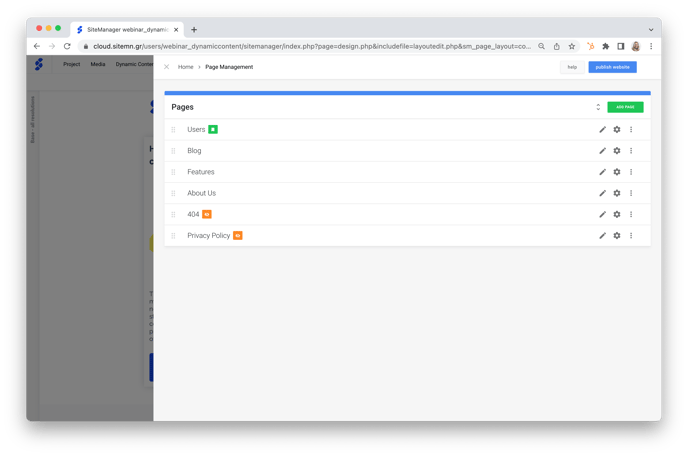
- In the Page Management overview:
- Ensure your new page is visible
- Ensure your new page is placed logically in the navigation structure.
Step 2: Build a dynamic list
- Build a component using the Dynamic List Structure.
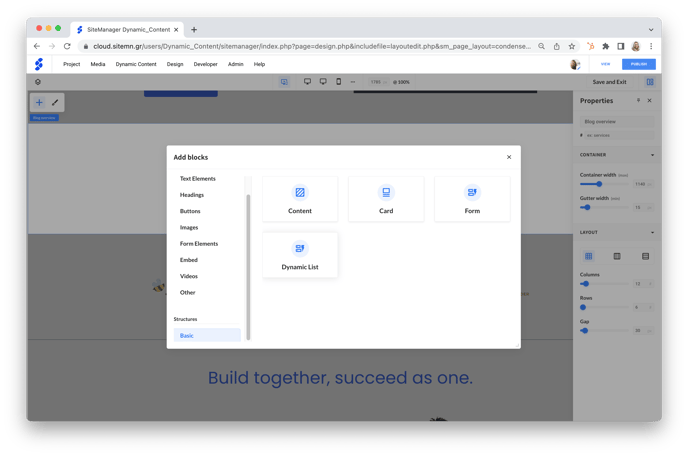
Although the design and structure of your collection overview is entirely subjective and personal, you can watch a guideline example below (starting at 15m50s).
Step 3: Populate the dynamic list structure
- Select Dynamic List in the layers panel on the left.
- Click the pencil icon to edit its content
- Connect to the Main Category you created earlier.
Caution: If you don't connect to the default Main Category you created earlier, your collection items won't be visible.
-
- Set filters, determine in which order the collection items will be displayed, the number of collection items will be displayed per page, etc.
- Save to exit.

Step 4: Populate dynamic component elements
- Select a component element.
- With the right mouse button, select Manage Input Fields > Component Element (for example, Title).
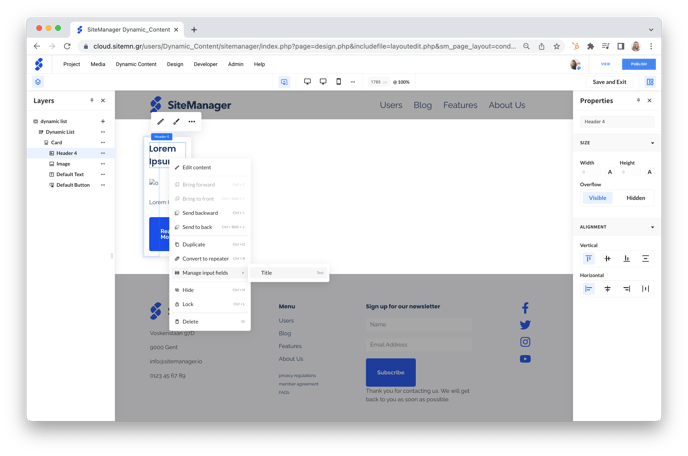
- In the content view of the Text Input Setup:
- Content Source: select Collection
- Collection: select which collection you would like to connect to
- Data: select which data field you would like to connect (for example, Blog Title)
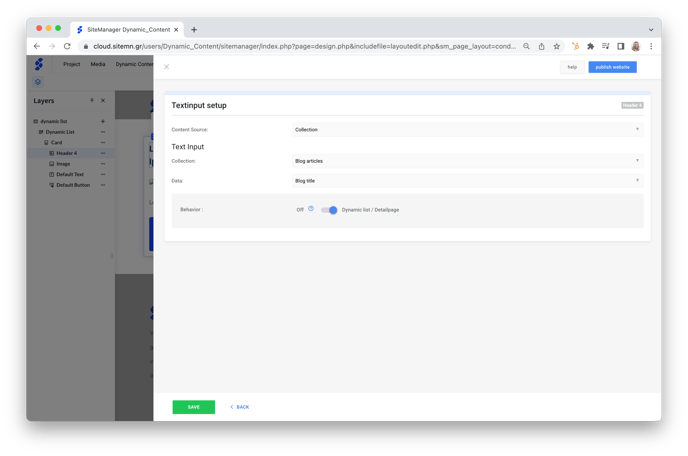
- Open the Content CMS of your dynamic component by clicking the pencil icon and save.
Caution: This step is less intuitive, so you may forget it. However, skipping this essential step will result in your content not being displayed.
- Repeat this method for each component element.
Step 5: Populate dynamic links
- Select a component element.
- With the right mouse button, select Manage Input Fields > Link.
- In the content view of the Text Input Setup:
- Content Source: select Collection
- Collection: select which collection you would like to connect to
- Data: select Link to detail page
Tip: Combine dynamic and static content: populate a dynamically linked button with static content (for example, Read More) and avoid having to duplicate its content for each collection item:
- Click the pencil icon to edit its content.
- Change the Text on button to whatever you like to be displayed on your button.
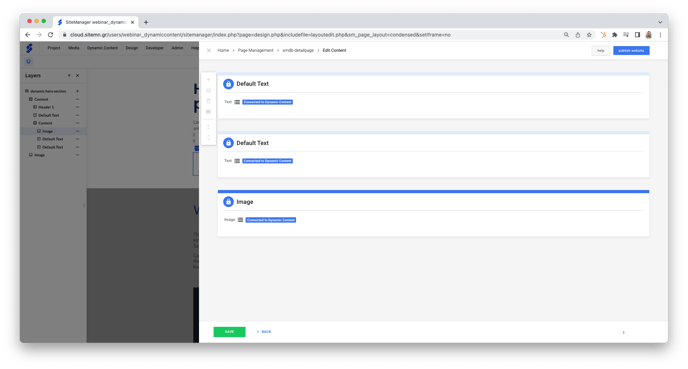
Step 6: Build a dynamic page
- Navigate to the dynamic page through the Dynamic Content menu,
OR
Click any dynamic link, such a Read More button.

- Design the dynamic page to your liking.
- Dynamically populate each component element, similar to how you did in step 4.
Although the design and structure of your dynamic page is entirely subjective and personal, you can watch a good example below (starting at 21m32s),