Our Smart Content module has recently been renamed to Logic. All documentation will be updated with the new name in the future.
With the Smart Content Module it's really easy to add time-sensitive content to your project. You can add content that starts from a certain date or time, ends at a certain date or time, or is visible between a certain date or time.
This logic can be applied to content, layouts, navigation menu and databases.
In our example we have a website where we have a brand new resort that's almost finished. Starting from a certain date and time visitors will be able to book on the site. Untill that time we will show a message when booking becomes available.
If you haven't read the get started with smart content articles: you find them here:
https://support.sitemanager.io/what-is-smart-content
https://support.sitemanager.io/installing-smart-content-premium-module
https://support.sitemanager.io/manage-smart-content
https://support.sitemanager.io/smart-content-configuration
https://support.sitemanager.io/implement-smart-content
https://support.sitemanager.io/smart-rules-in-the-sitemanager-cms
Step 1. Timed Content Configuration
Make sure timed content is installed to your project: https://support.sitemanager.io/installing-smart-content-premium-module
We go to the code environment > smart content to configure time logic.
Note: timed content can also be used with the smart content input variable or code variables (https://support.sitemanager.io/implement-smart-content)
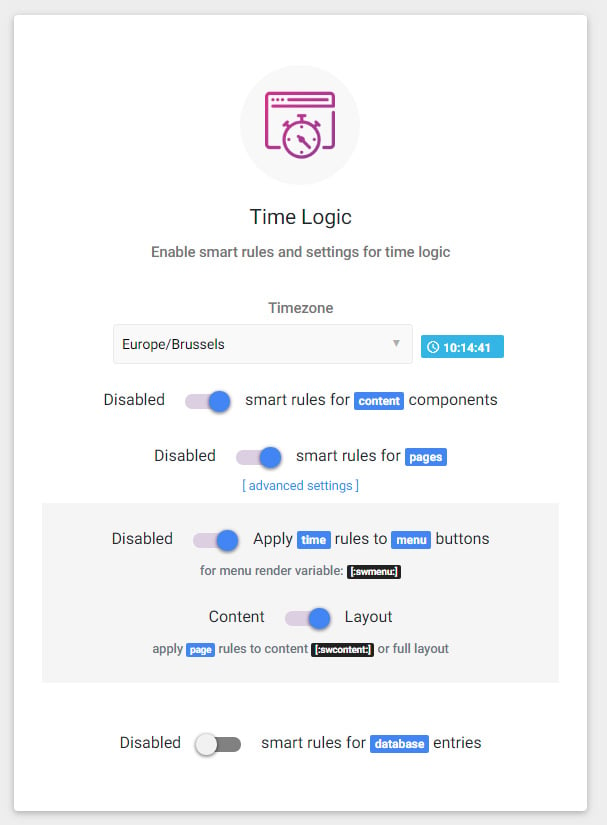
Set your timezone (all time logic will be calculated in this timezone)
In our example we are going to use time for our content components and pages.
In the advanced settings for pages we also enable the time rules for menu buttons.
This will make sure our page is not visible in the menu until the date and time from the page rule is met. (more on this later).
Step 2. Page and navigation time logic
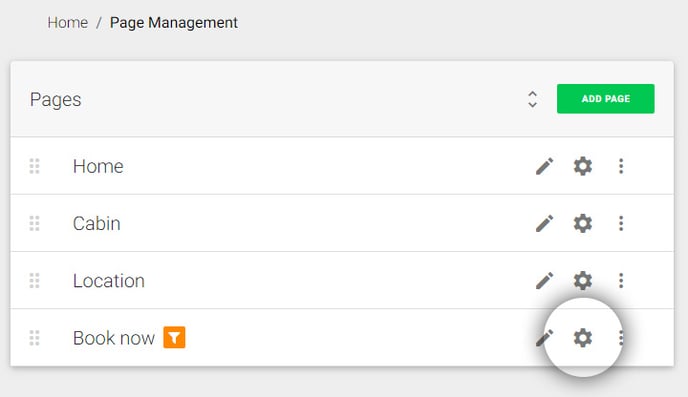
We already build our booking page but we only want this page to be accessible from a certain date and time.
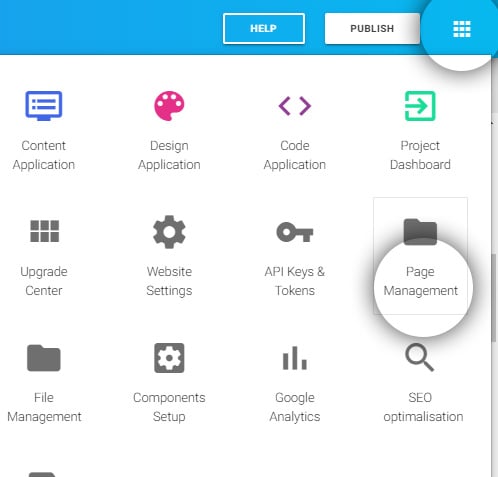
We use the main left or right menu to go to Page Management:
and click the settings icon next to the book now page.
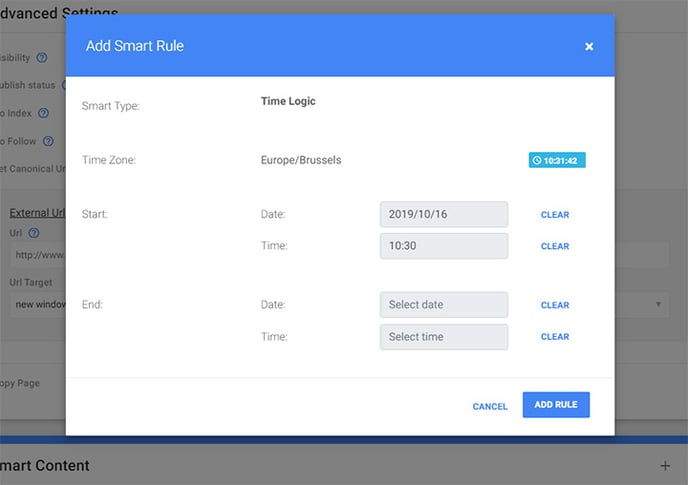
We click the plus icon to add a smart rule (https://support.sitemanager.io/smart-rules-in-the-sitemanager-cms)
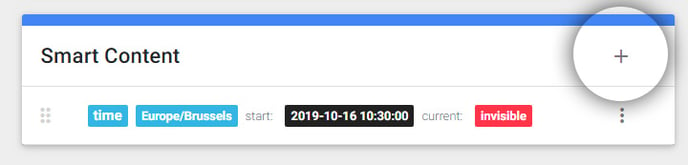
Select time logic and set the start date for the page.
We have configured in step 1 that this rule also applies to the navigation menu of the site. This means the Book Now button will not be visible until the start date and time is met. Even if you would visit the page url directly the page would be blank.
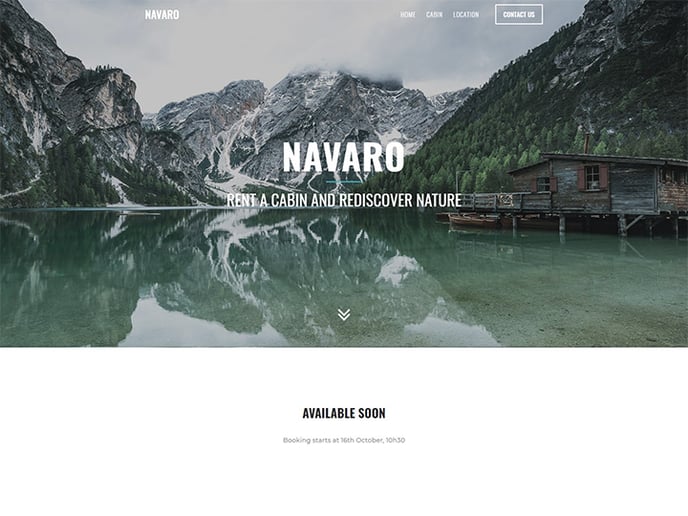
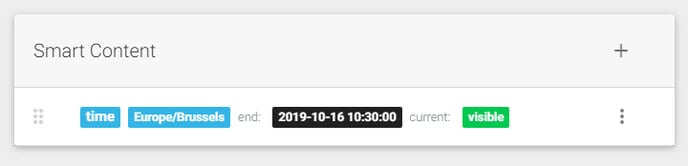
Step 3. Set the content that expires
In the visual CMS we have created a content section that tells the visitor when booking will be available.
Click the options button to set the time logic using smart logic.
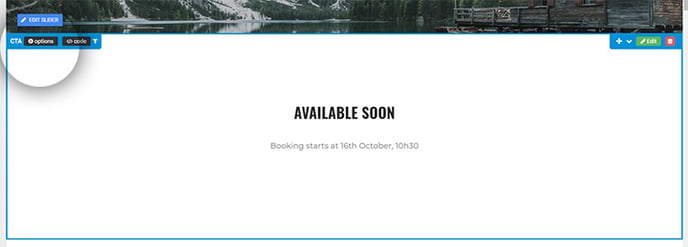
We have set a time rules which will end when the booking page becomes available.
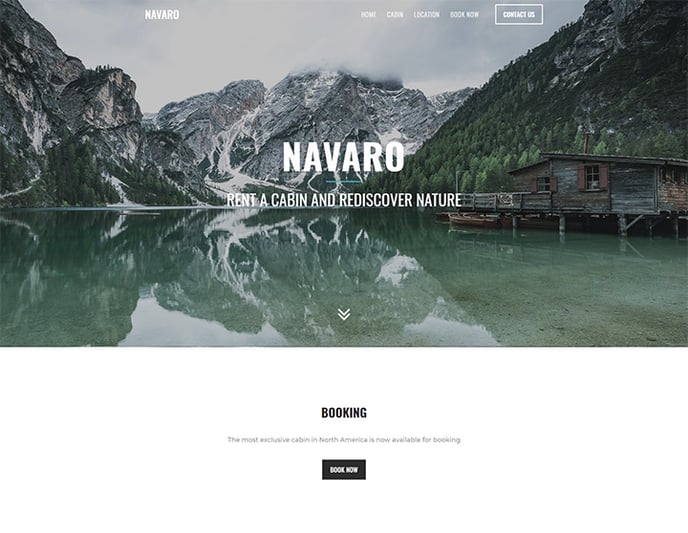
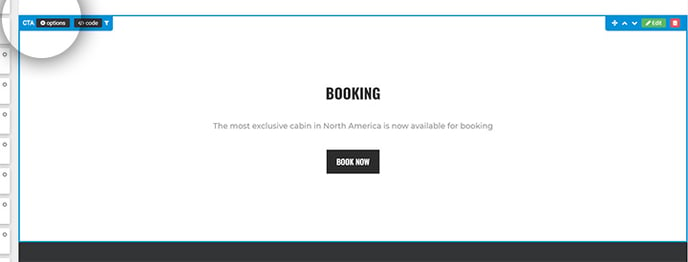
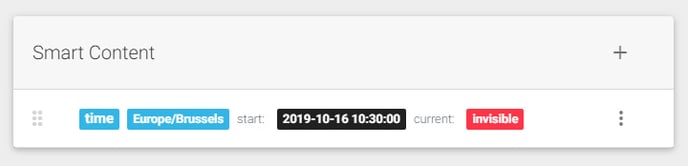
Step 4. Set the content that becomes available
We have created a booking section on the homepage that can only be visible from a certain date and time.
We click the options button again to add our smart rule.
Example of the smart rule that shows when the content will be visible on the website. You can always see if the content is currently visible or not.
Step 5. Publish website
The nice thing about timed content is that you can work on content in advance and publish your website. The content will automatically become visible or invisible when the time logic is met.
Screenshot before booking became available:
Screenshot after booking became available: