In this article
Step 1: Install the Language Manager Module
Step 3: Language cookies & start settings
Step 5: Switch between languages
Step 7: Configure the language switcher
Important:
When you add, edit or delete a language, all published pages will be deleted from your website. If your project is live, and you make any language changes, your site will be inaccessible. To fix this, simply republish all the pages of your website.
Step 1: Install the Language Manager Module
To install the Language Manager Module, read this article.
Tip: We advise that you install the Language Manager Module before you start adding any content to your web project.
It is possible to add languages later, but all layout and page content will need to be revisited and updated.
Step 2: Add languages
To add a new language, we first have to navigate to Language Management. This can be accessed in two ways.
Projects > Settings > Languages
In the Project menu we can find Languages when we navigate to Settings.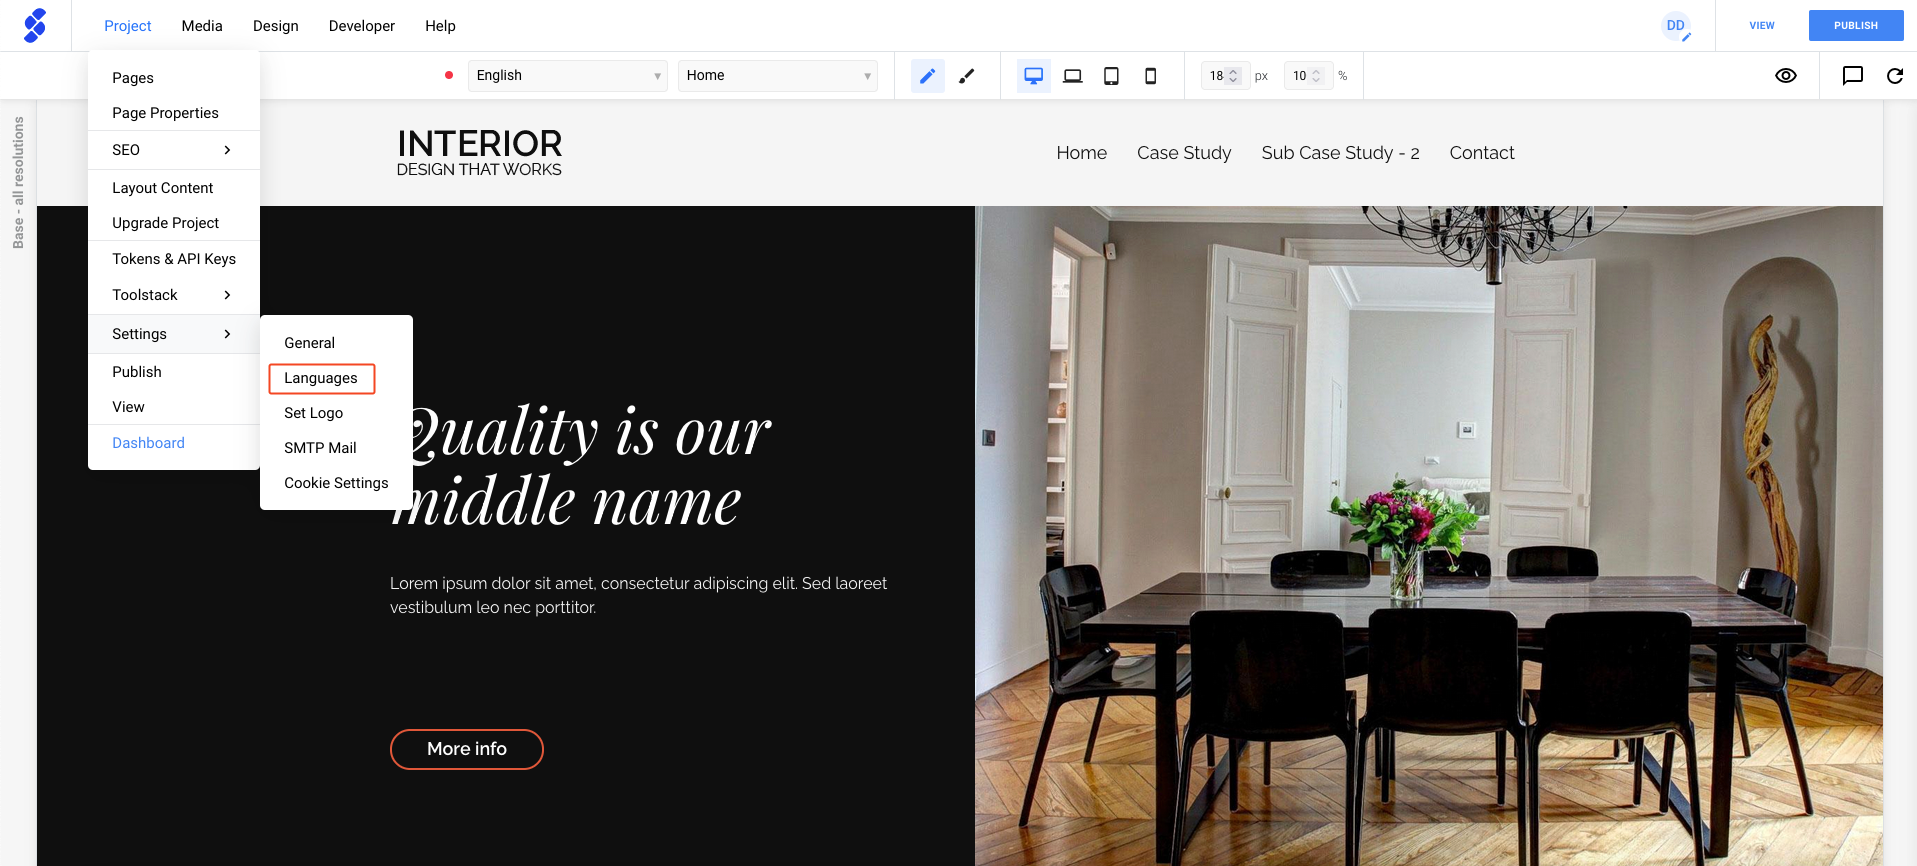
When the Language Manager Module has been installed you'll notice that a language dropdown is now available! In this dropdown we can find the languages you've created, as well as a way to open Language Management.


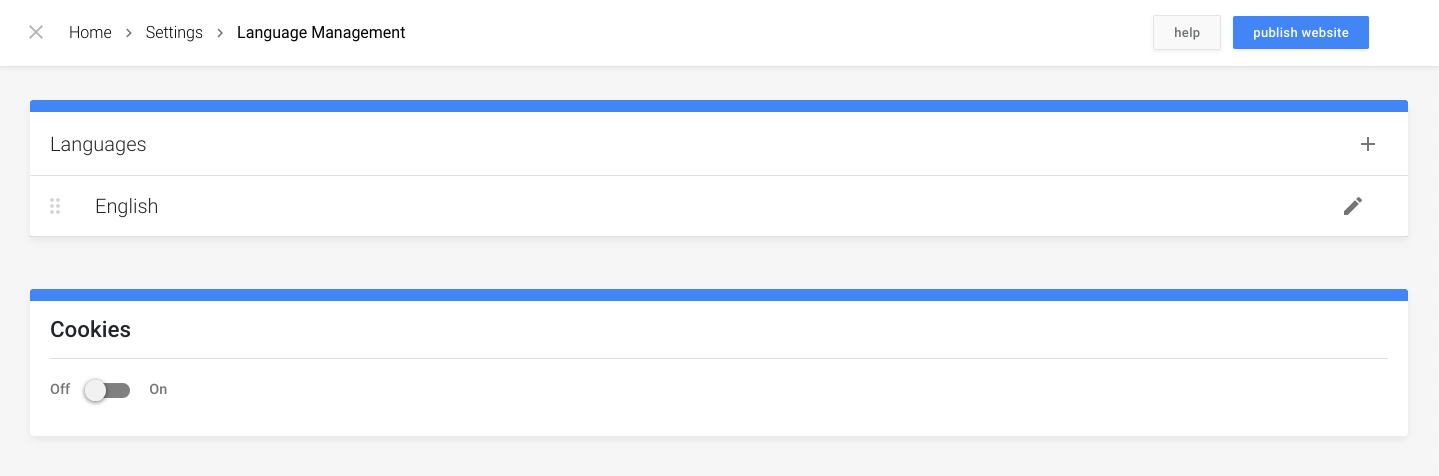
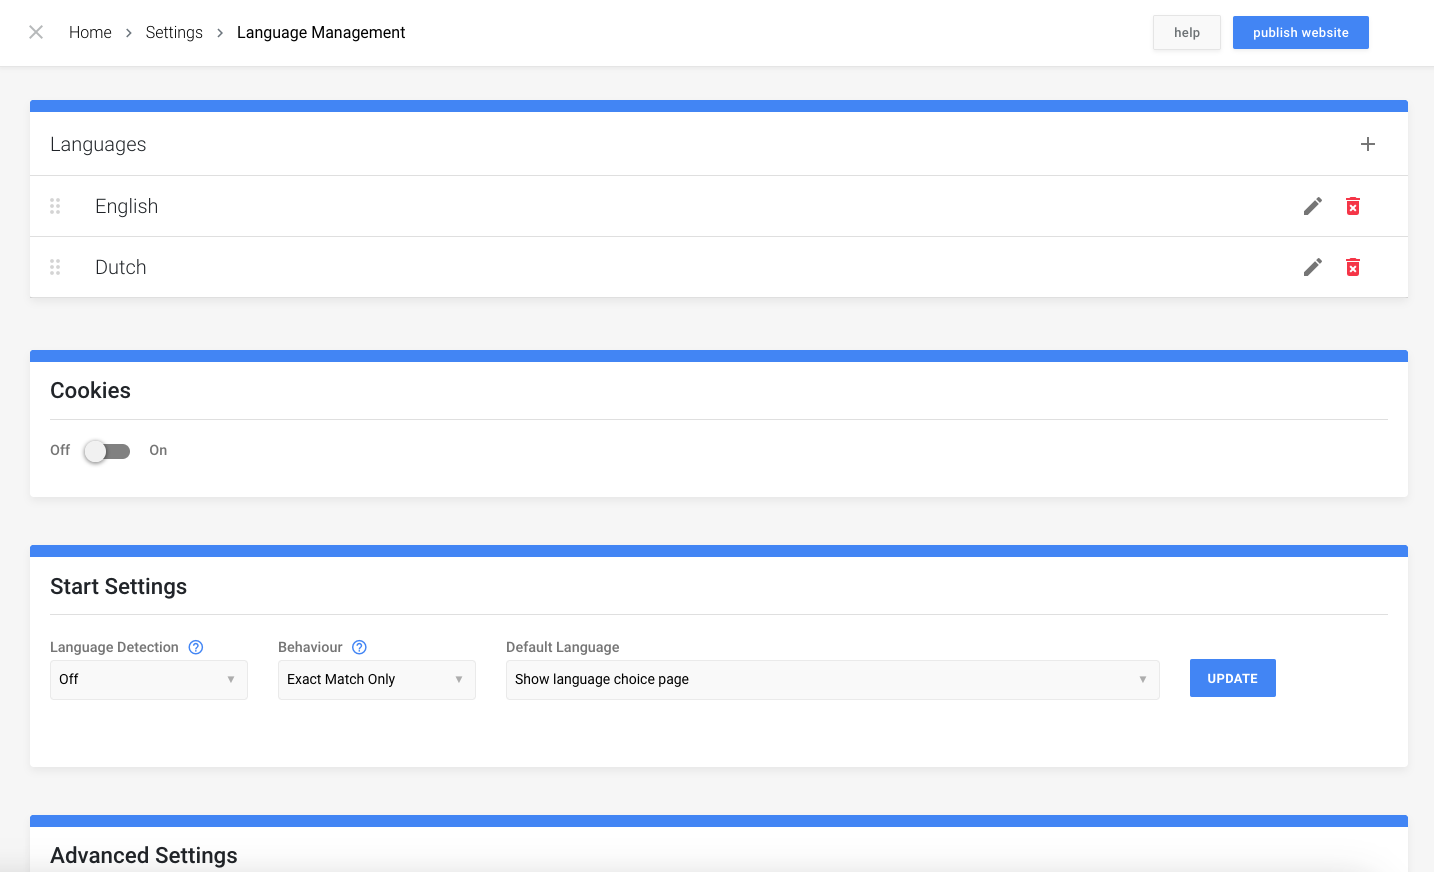
When you have opened Language Management, you'll see an overview of your langauges. Using the "+" icon, we add a new language (you can also add RTL languages).
After clicking "+", a new popup will open.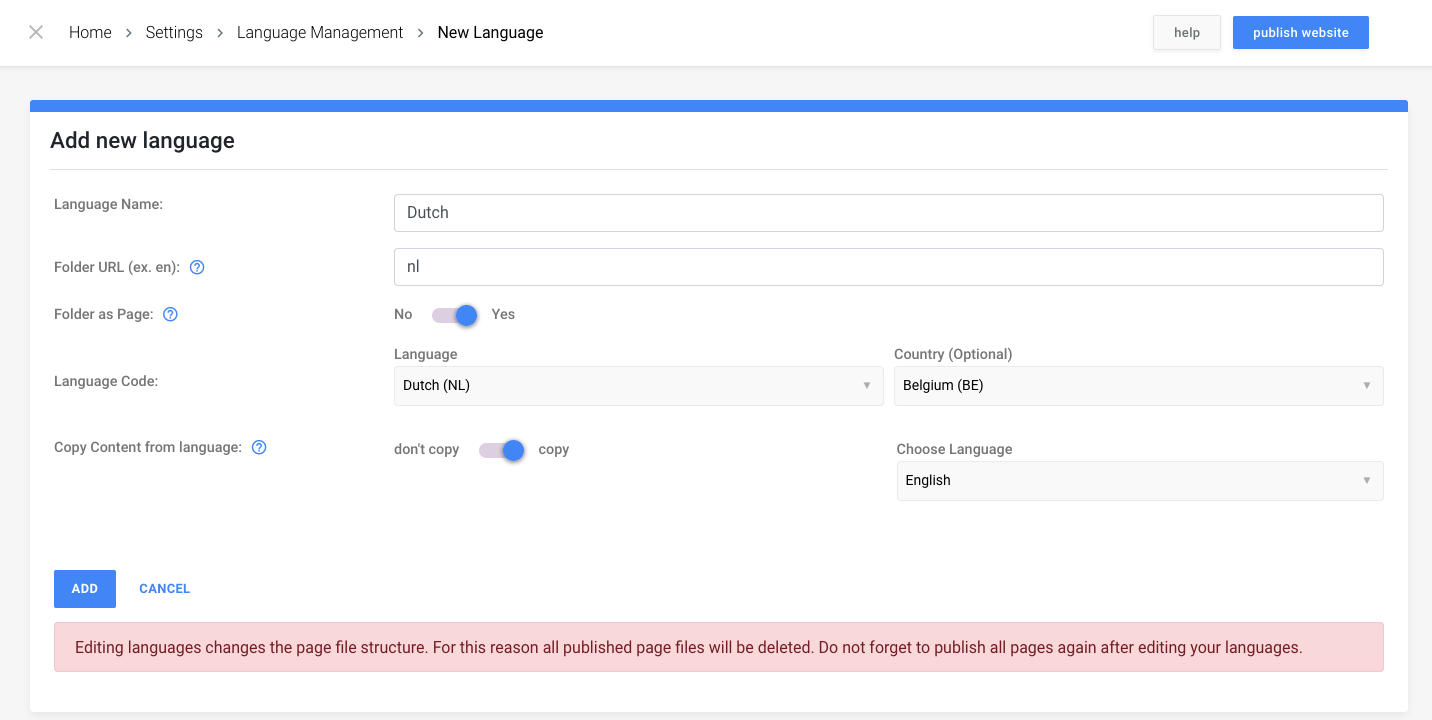
- Language Name: Label the language of your choice.
- Folder URL: Change the URL
- Folder as Page: When enabled, visiting the Folder URL will show the homepage
- Language Code: Select the language from the dropdown menu.
- Country Code (optional): Select the country code from the dropdown menu.
- Copy Content from language: Autofill content from another language.
You can use Copy Content from language if you are adding a language when you already have content.
Tip: You can find a list of all language codes here.
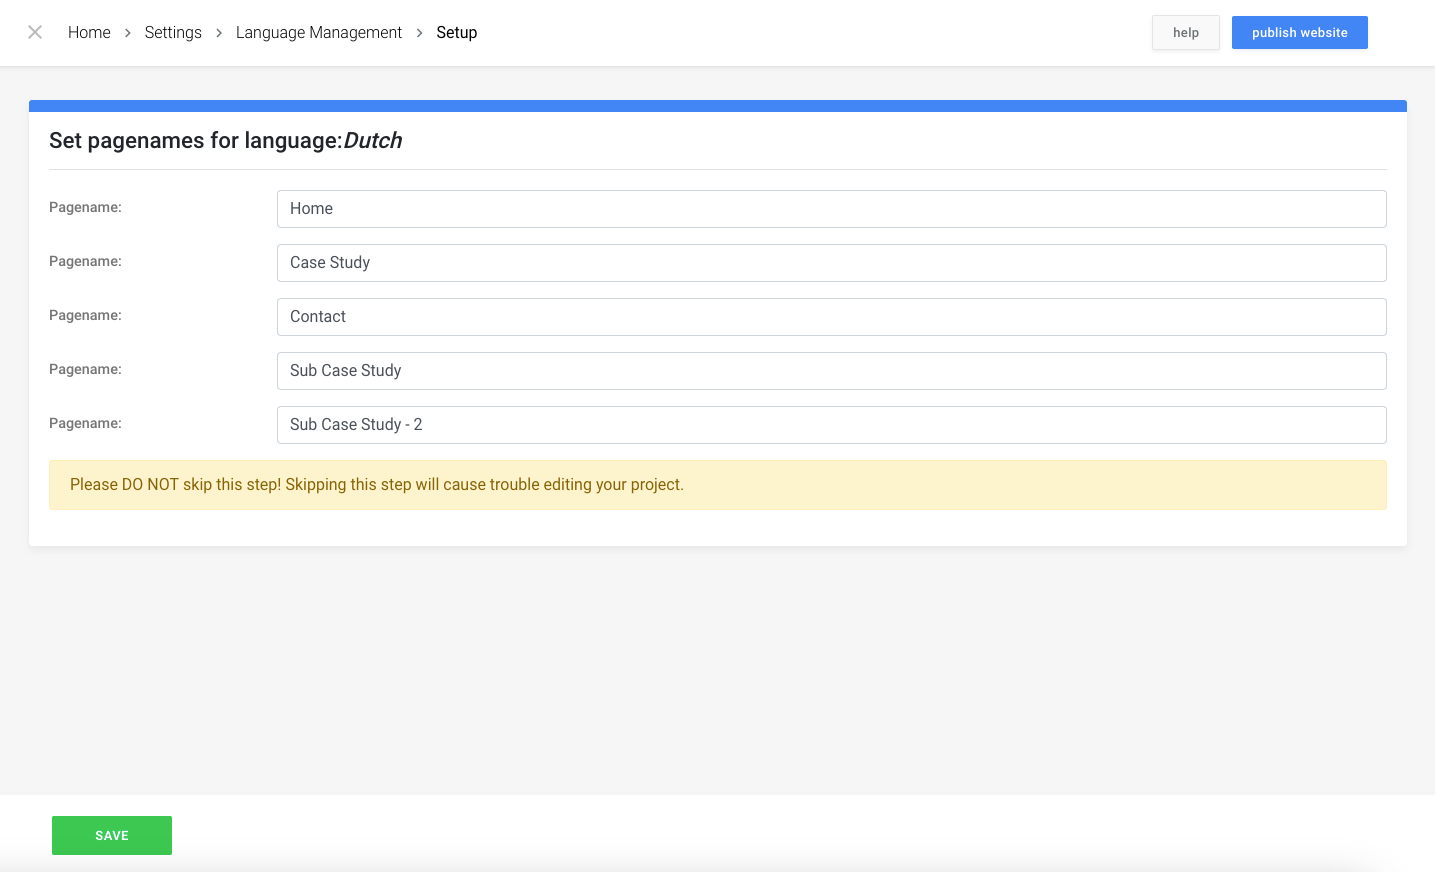
After clicking the Add button, you can set the page names for your newly made languages. It's important to check these pages before continuing!
Step 3: Language cookies & start settings
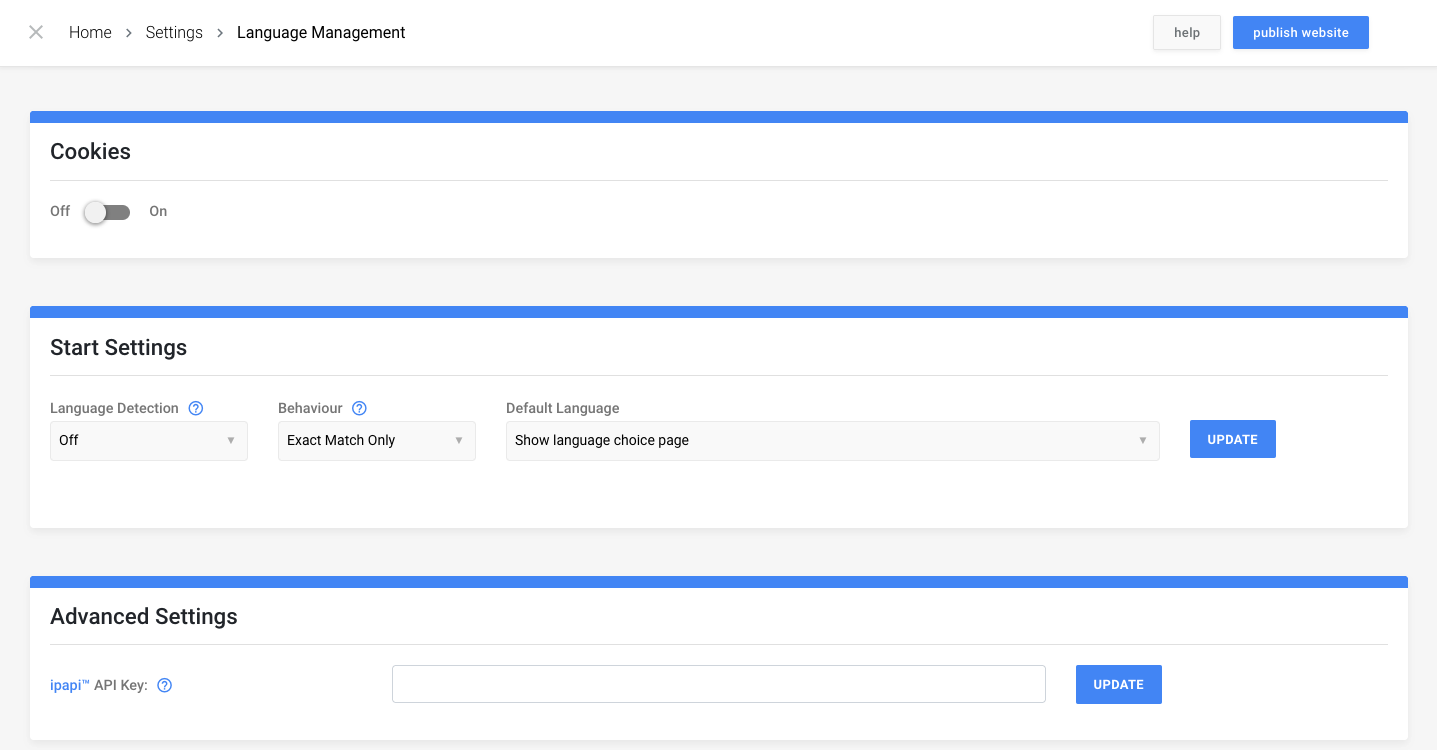
- If you enable Cookies, you can activate functional cookies that will store the visitor's language preference. This means that when the visitor returns to your site, their preferred language will be automatically loaded.
- You have the option to set a default language or display a Language Selection page. Additionally, you can utilize language detection to automatically determine the visitor's preferred language based on their browser or IP address (see Advanced Settings).
Step 4: Edit languages
In the overview of your languages, we can use the pencil icon to edit a language.
This will open a similar panel of the one we saw earlier. However, this one has some additional features.
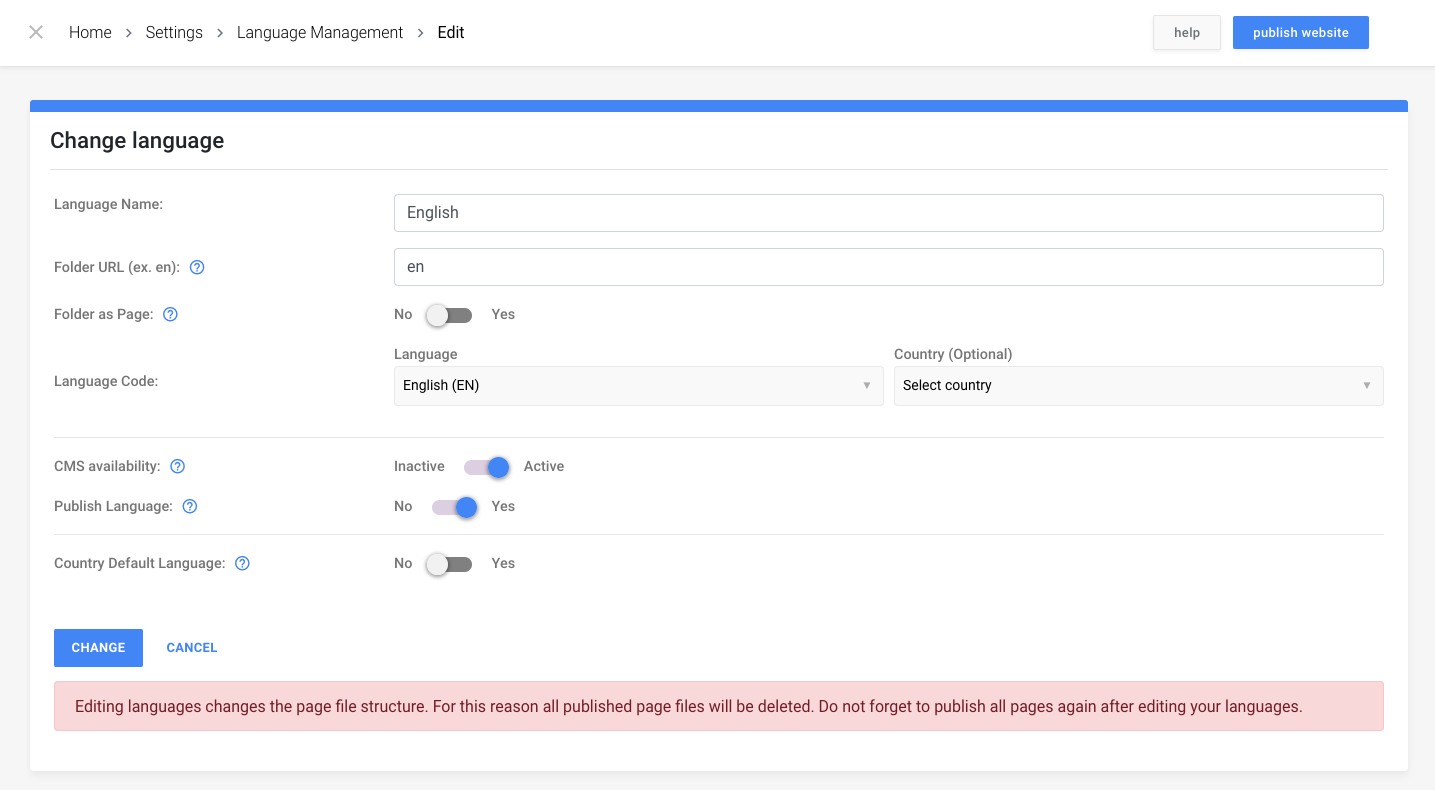
- CMS availability: Toggle to Inactive, so CMS users can no longer edit any content in this language, and to unpublish the language from your website.
- Publish Language: Toggle to No to prevent this language from being published, while still making it available to CMS users to edit (if CMS Availability is Active).
- Country Default Language: Toggle to Yes to set this language as the default language match when using browser detection.
Tip: Deactivating or unpublishing options are great if you want a multilingual folder structure, or if you want to launch one website language at a time.
Step 5: Switch between languages
Using the language dropdown, we can switch between the languages we would like to edit in.

Step 6: Editing components
When languages have been added. Components will show additional features.
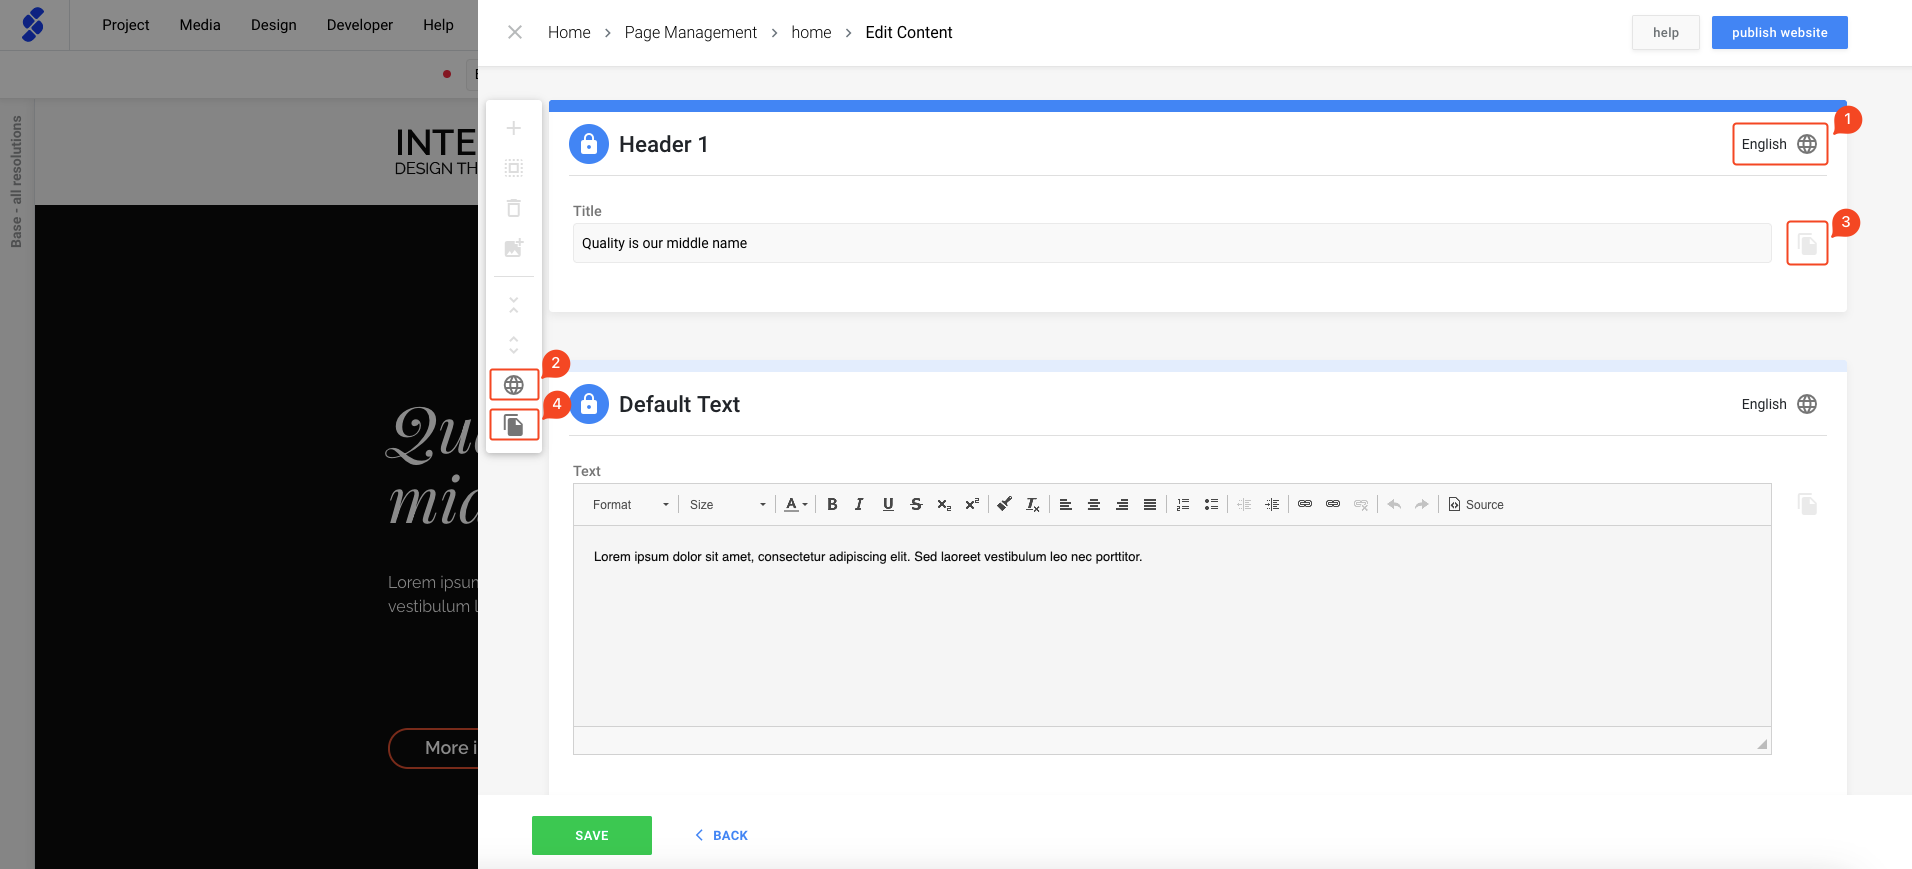
1) This allows you to switch to a different language so that you can edit the content in that language.
2) You can use the globe icon located in the sidebar to easily switch the language of every block within this component to a different language.
3) If content is the same across languages, this icon can be used to copy the content to another language
4) This icon, which is located in the sidebar, can be used to copy the content of every block to another language.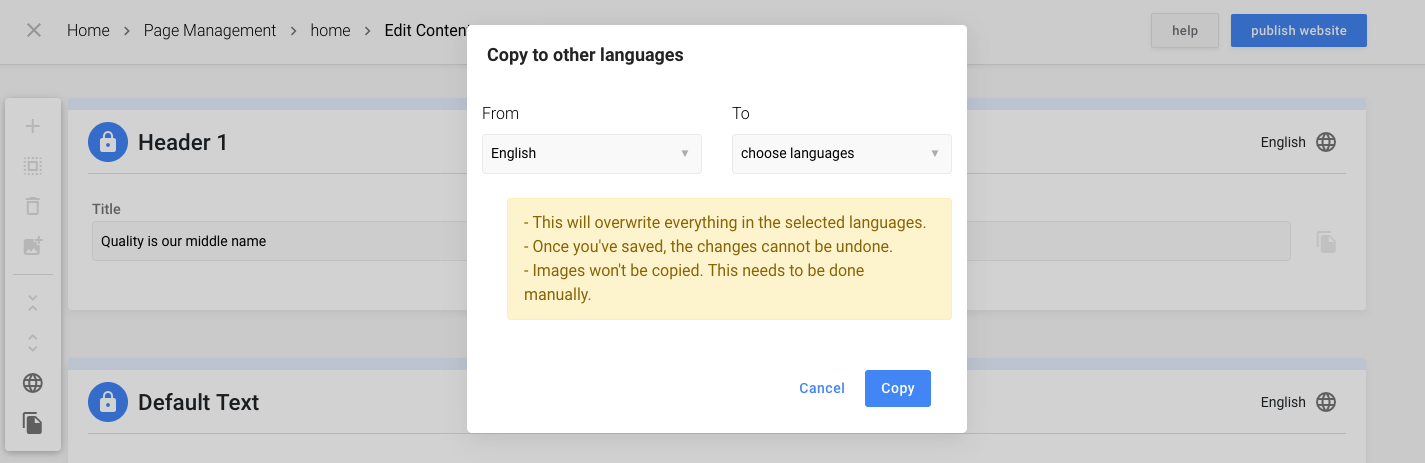
When copying content to another language, keep in mind that images will not be copied! This has to be copied manually!
Step 7: Configure the language switcher
To configure the language switcher, read this article