Note:
Before you can implement Smart Content on your website, you or your project owner need to activate the Smart Content module in your General Project Settings.
After creating your Smart Content Groups, you need to set up the Smart Content Configurations.
Our Smart Content module has recently been renamed to Logic. All documentation will be updated with the new name in the future.
In this article
Step 1. Code App - Smart Content
Step 2. Set the General Options
Step 1. Code App - Smart Content
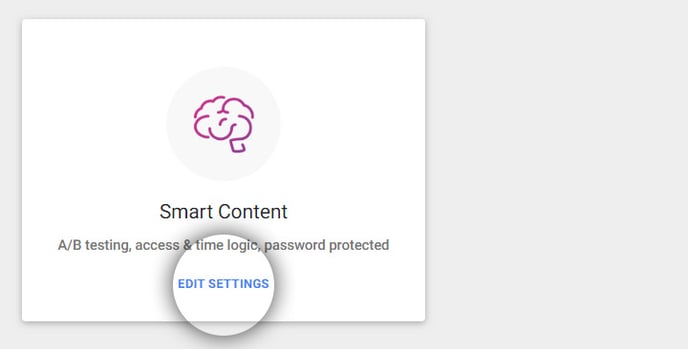
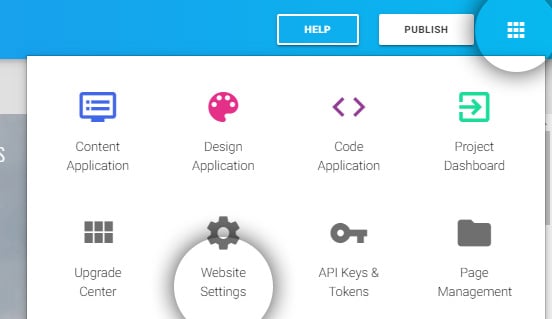
- Login to your project and go to the SiteManager Code application.
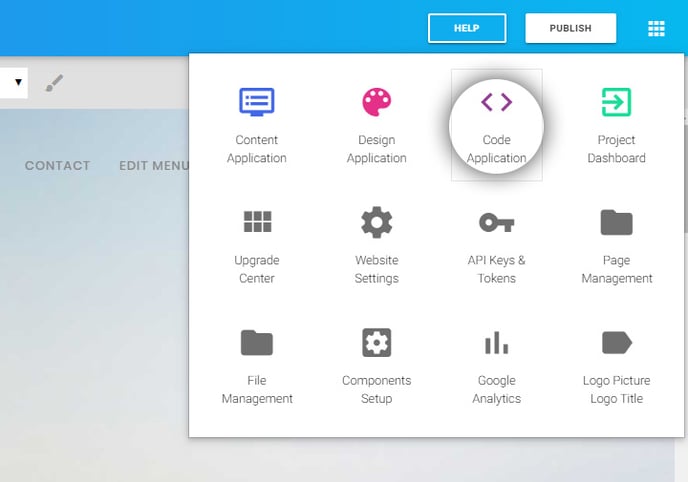
- Click Smart Content.
Step 2. Set the General Options
The General Options are applicable for all types of groups.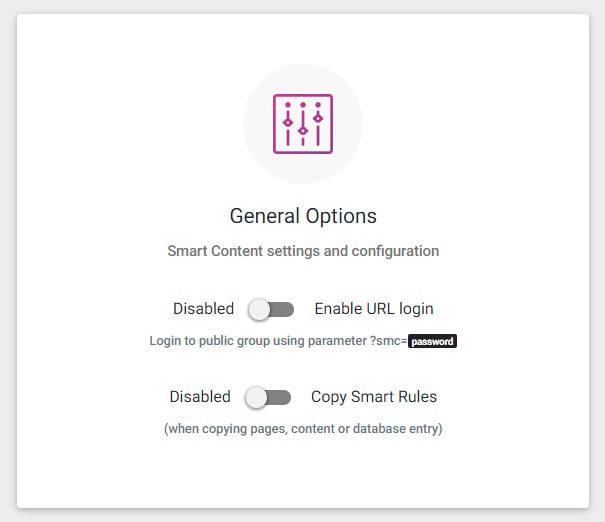
-
URL Login: Toggle right if you want to be able to log in to public groups using a parameter in the URL.
- Copy Smarts Rules: Toggle right if you want to duplicate the applied Smart Rules to an element when copying said element.
Note:
You can enable Smart Rules for the CMS in configuration (4,5,6) and/or use the smart input group in the code application.
Step 3. Set the Login Forms
Check these settings whenever you build login forms for your password-protected pages.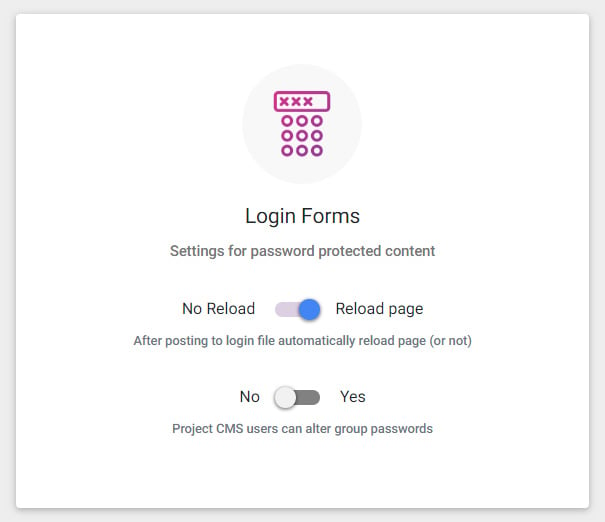
- Reload page: Toggle right whenever you're posting a password directly to the login or logout file. In any other case, it's better not to use the reload option.
- CMS Password Management: Toggle right if you want to grant CMS users the option to change the group passwords.
- Use the Project Dashboard User Permission to revoke a single person's access to change passwords. This can come in handy if you are working with multiple CMS users.
Step 4. Access Logic (behavior)
Allow CMS users to add Smart Access Rules for content, pages & databases. 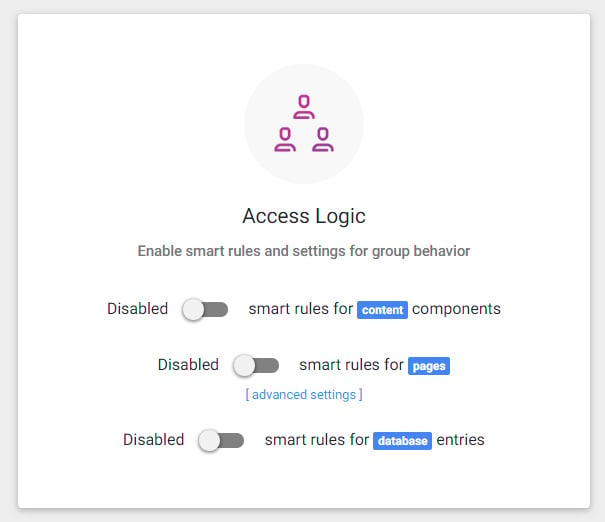
- Smart Rules for content components: Toggle right to show Smart Access (behavior) Rules in the options button of every page component of the website.
- Smart Rules for pages:
- Toggle right to show Smart Access (behavior) Rules when editing the page properties.
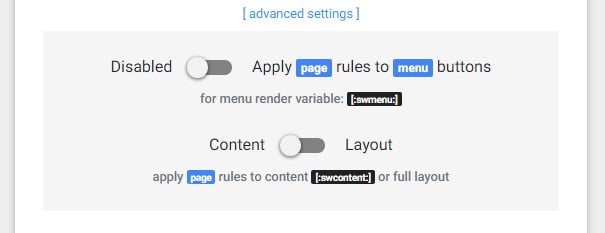
-
Click advanced settings and Toggle right to:
-
apply the rule to the website menu buttons
-
apply the rule to the entire page (including layout)
-
- Smart Rules for database entries: Toggle right to show Smart Access (behavior) Rules when editing a database entry.
Step 5. Set A/B testing
Allow CMS users to add Smart AB Rules. CMS users will be able to add the following logic: automatically set visitor in groups depending on percentage views for content, pages & databases.

- Smart Rules for content components: Toggle right to show Smart AB testing Rules in the options button of every page component of the website.
- Smart Rules for pages: Toggle right to show Smart AB testing Rules when editing the page properties.
- Smart Rules for database entries: Toggle right to show Smart AB testing Rules when editing a database entry.
Step 6. Set the Time Logic
Allow CMS users to add Smart Time Rules. CMS users will be able to add the following logic: start/end time/date for content, pages & databases.

- Select Timezone on which all time logic is based on.
- Smart Rules for content components: Toggle right to show Smart Time Rules in the options button of every page component of the website.
- Smart Rules for pages:
- Toggle right to show Smart Time Rules when editing the page properties.
-
Click advanced settings and Toggle right to:
-
apply the rule to the website menu buttons
-
apply the rule to the entire page (including layout)
-
- Smart Rules for database entries: Toggle right to show Smart Time Rules when editing a database entry.
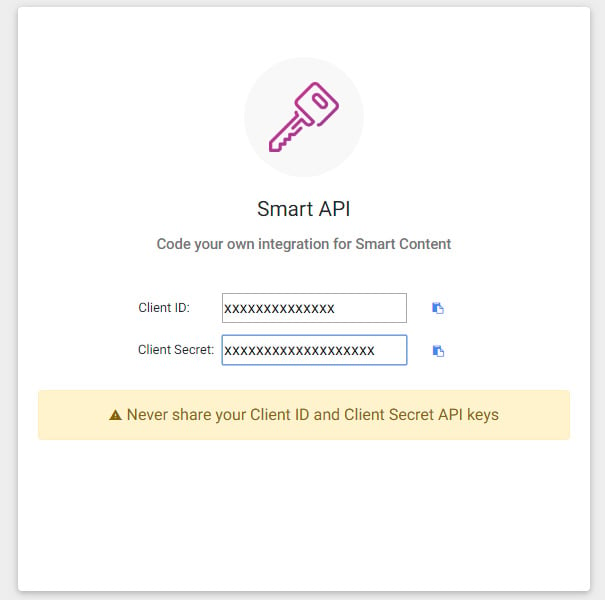
Step 7. Smart API
Integrate an advanced login system or load extra visitor data into the website, adopting the Smart API.
- Retrieve your Client ID and Client Secret to set the Smart API.